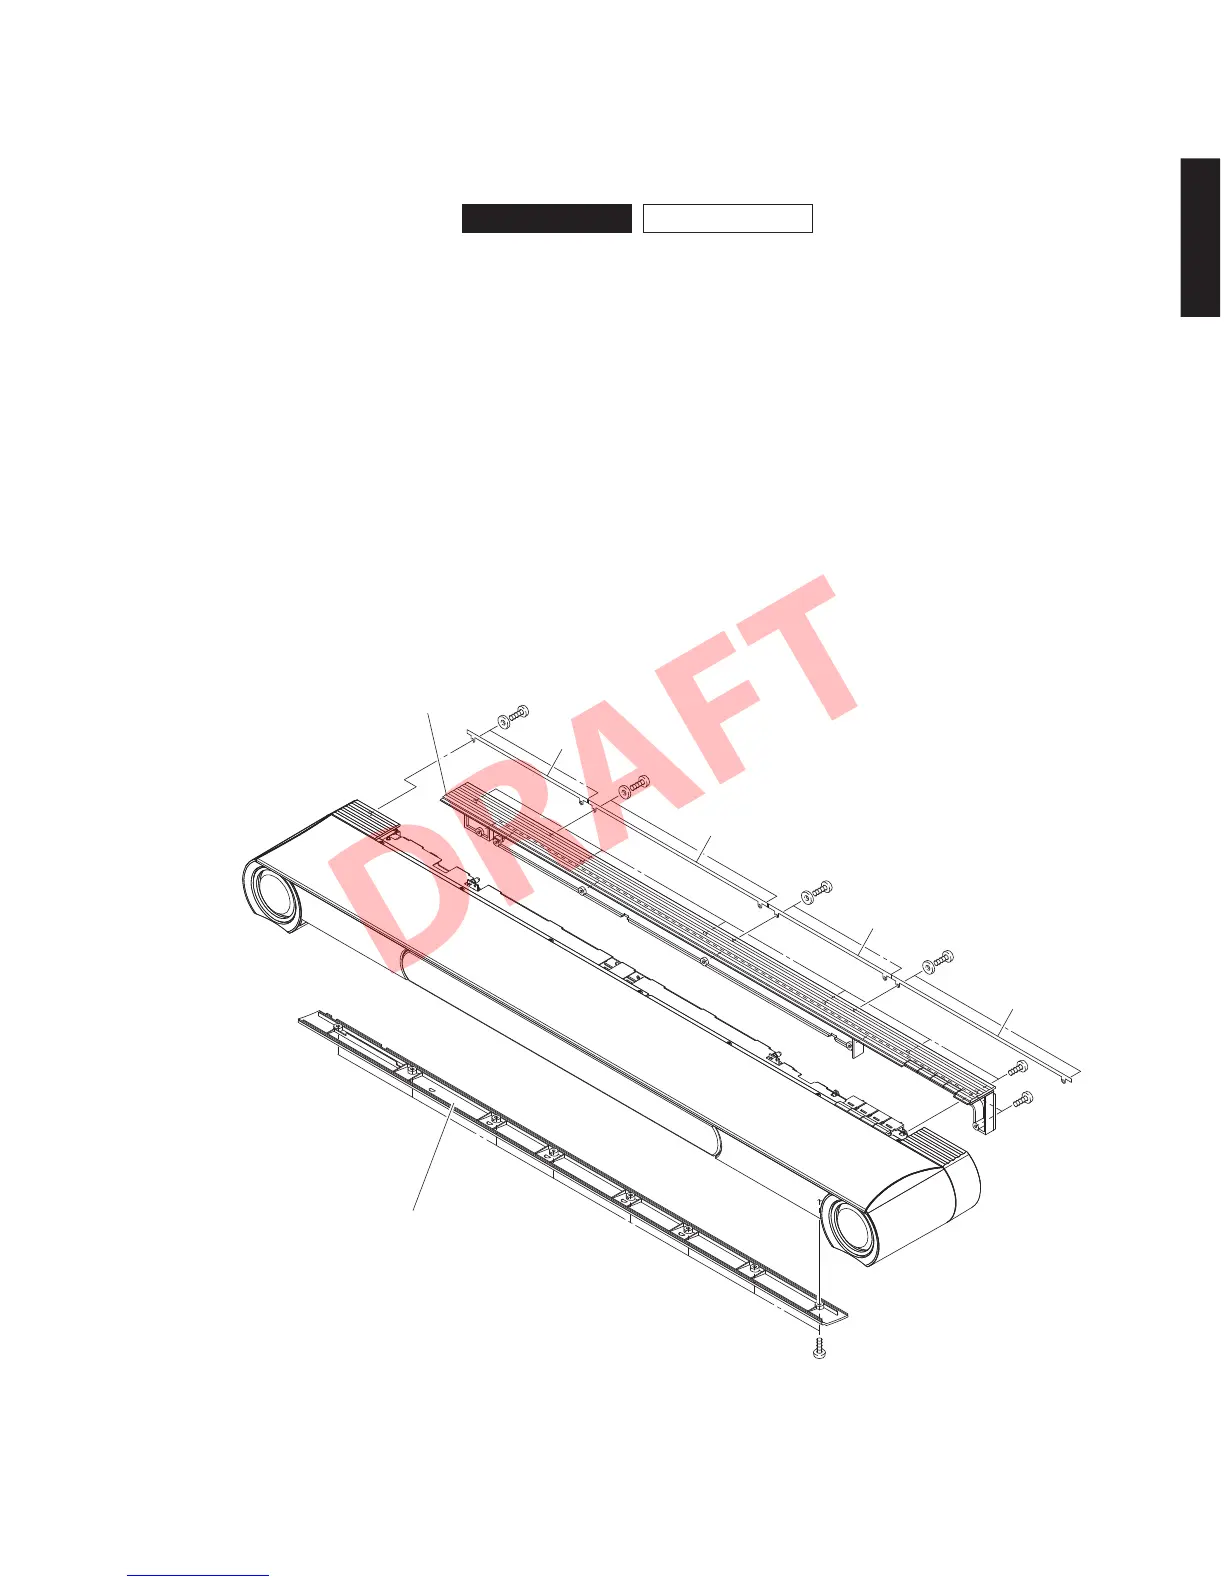
Bottom panel
ボトムパネル
IR bar B
IR バー B
Rear cover
リアカバ ー
IR bar B
IR バー B
IR bar A
IR バー A
IR bar A
IR バー A
①
①
①
①
②
③
②
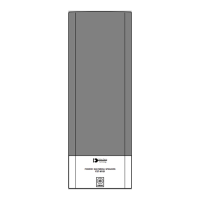
■ DISASSEMBLY PROCEDURES /
分解手順
(Remove parts in the order as numbered.)
Disconnect the power cable from the AC outlet.
* Length of the IR bar /
IR バーの長さ
IR bar A: 281.5 mm (11-1/8" inch)
IR bar B: 191.5 mm (7-1/2" inch)
(番号順に部品を外してください。)
AC 電源コンセントから、電源コードを抜いてください。
YSP-CU4300 と YSP-CU3300 の分解手順はほぼ同じです。
そのため、ここでは代表として YSP-CU3300 の分解手順
を説明します。
1. リアカバーの外し方
a. ①のネジ 8 本を外します。(Fig.1)
b. IRバーAとIRバーBを外します。(Fig.1)
c. ②のネジ 12 本を外します。(Fig.1)
d. リアカバーを外します。(Fig.1)
2. ボトムパネルの外し方
a. ③のネジ 8 本を外します。(Fig.1)
b. ボトムパネルを外します。(Fig.1)
YSP-CU4300 YSP-CU3300
Fig. 1
Disassembly procedures of the YSP-CU4300 and YSP-
CU3300 are almost the same. For that reason, we
explain disassembly procedure of the YSP-CU3300 as a
representative here.
1. Removal of Rear Cover
a. Remove 8 screws (
①
). (Fig. 1)
b. Remove the IR bar A and IR bar B. (Fig. 1)
c. Remove 12 screws (
②
). (Fig. 1)
d. Remove the rear cover. (Fig. 1)
2. Removal of Bottom Panel
a. Remove 8 screws (
③
). (Fig. 1)
b. Remove the bottom panel. (Fig. 1)
25
YSP-CU4300/YSP-CU3300/NS-WSW160
YSP-CU4300/YSP-CU3300/
NS-WSW160