4. Disassembly and reassembly
92R1
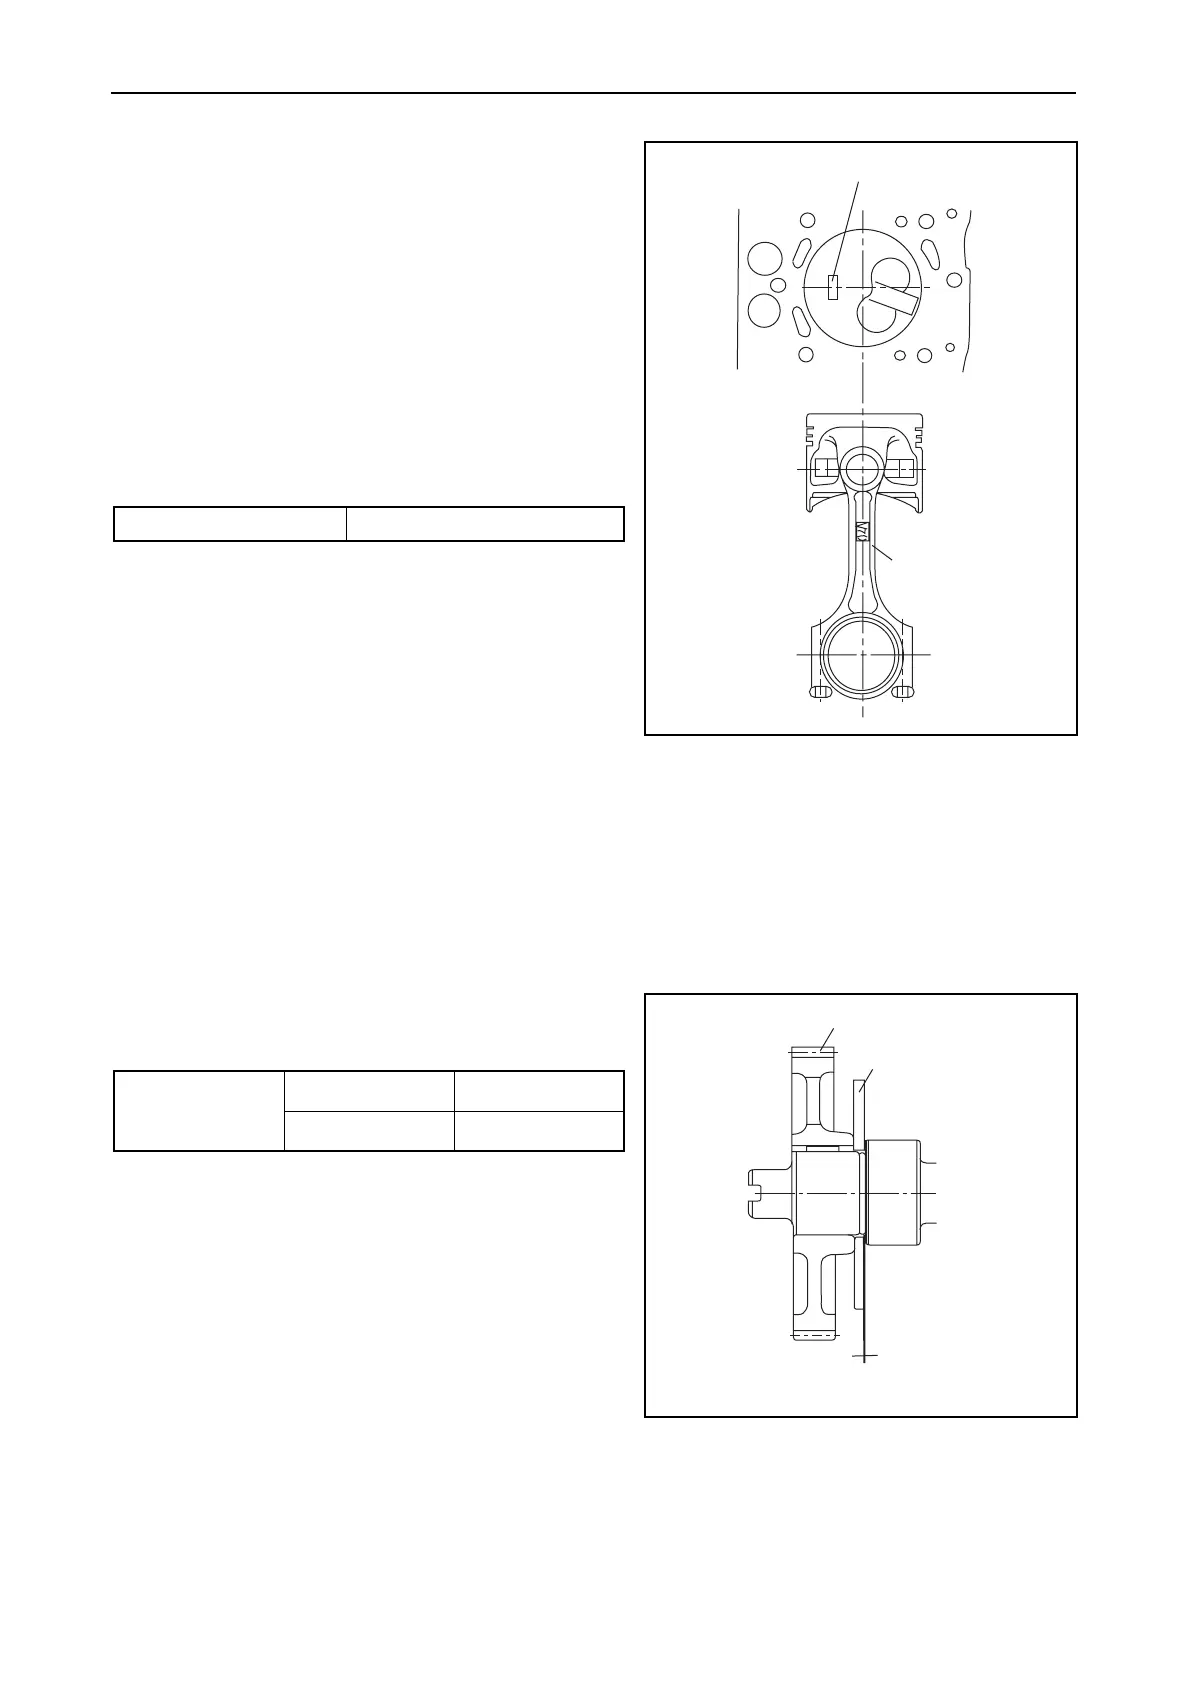
2) Coat the outside of the piston and the inside of the
connecting rod crank pin metal with engine oil and
insert the piston with the piston insertion tool.
NOTE:
1) Insert the piston so that the match mark on the
large end of the connecting rod faces the fuel
nozzle, and the manufacture’s embossed mark
on the stem faces toward the flywheel.
2) After inserting the piston, make sure the ID mark
on the piston top is located at the camshaft side,
looking from the top of the piston.
3) Align the large end match mark, mount the cap,
and tighten the connecting rod bolts.
NOTE:
If a torque wrench is not available, match up with the
mark made before disassembly.
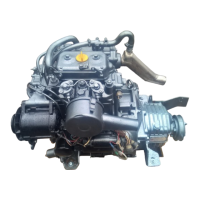
(10) Mounting the camshaft
1) If the camshaft and the camshaft gear have been disassembled, shrink fit the camshaft and the
camshaft gear [heat the camshaft gear to 180-200 deg. C in the hot oil and press fit].
NOTE:
When mounting the camshaft and the camshaft gear, be sure not to forget assembly of the thrust
metal. Also make sure they are assembled with the correct orientation.
2) Coat the cylinder block camshaft bearings and camshaft with engine oil, insert the camshaft in the
cylinder block, and tighten the thrust metal bolts.
3) Measure the camshaft side gap.
4) Make sure that the camshaft rotates smoothly.
Tig htening torque N•m (kgf•m)
Connecting rod bolt 22.6-27.5(2.3-2.8)
mm
Camshaft side
gap
Standard Limit
0.05-0.15 0.25
Camshaft side
Nozzle side
Embossed mark
(Flywheel side)
Piston ID mark
(Camshaft side gap)
Camshaft gear
Thrust metal
Side gap