MULTICYLINDER ENGINES
117
0
11
ring--
{f
g.p
Expan sion
ring gap
6
3. Tighten the connecting rod cap to specification
(T
able
4). Do not rotate the crankshaft while the Plastigage is in
place.
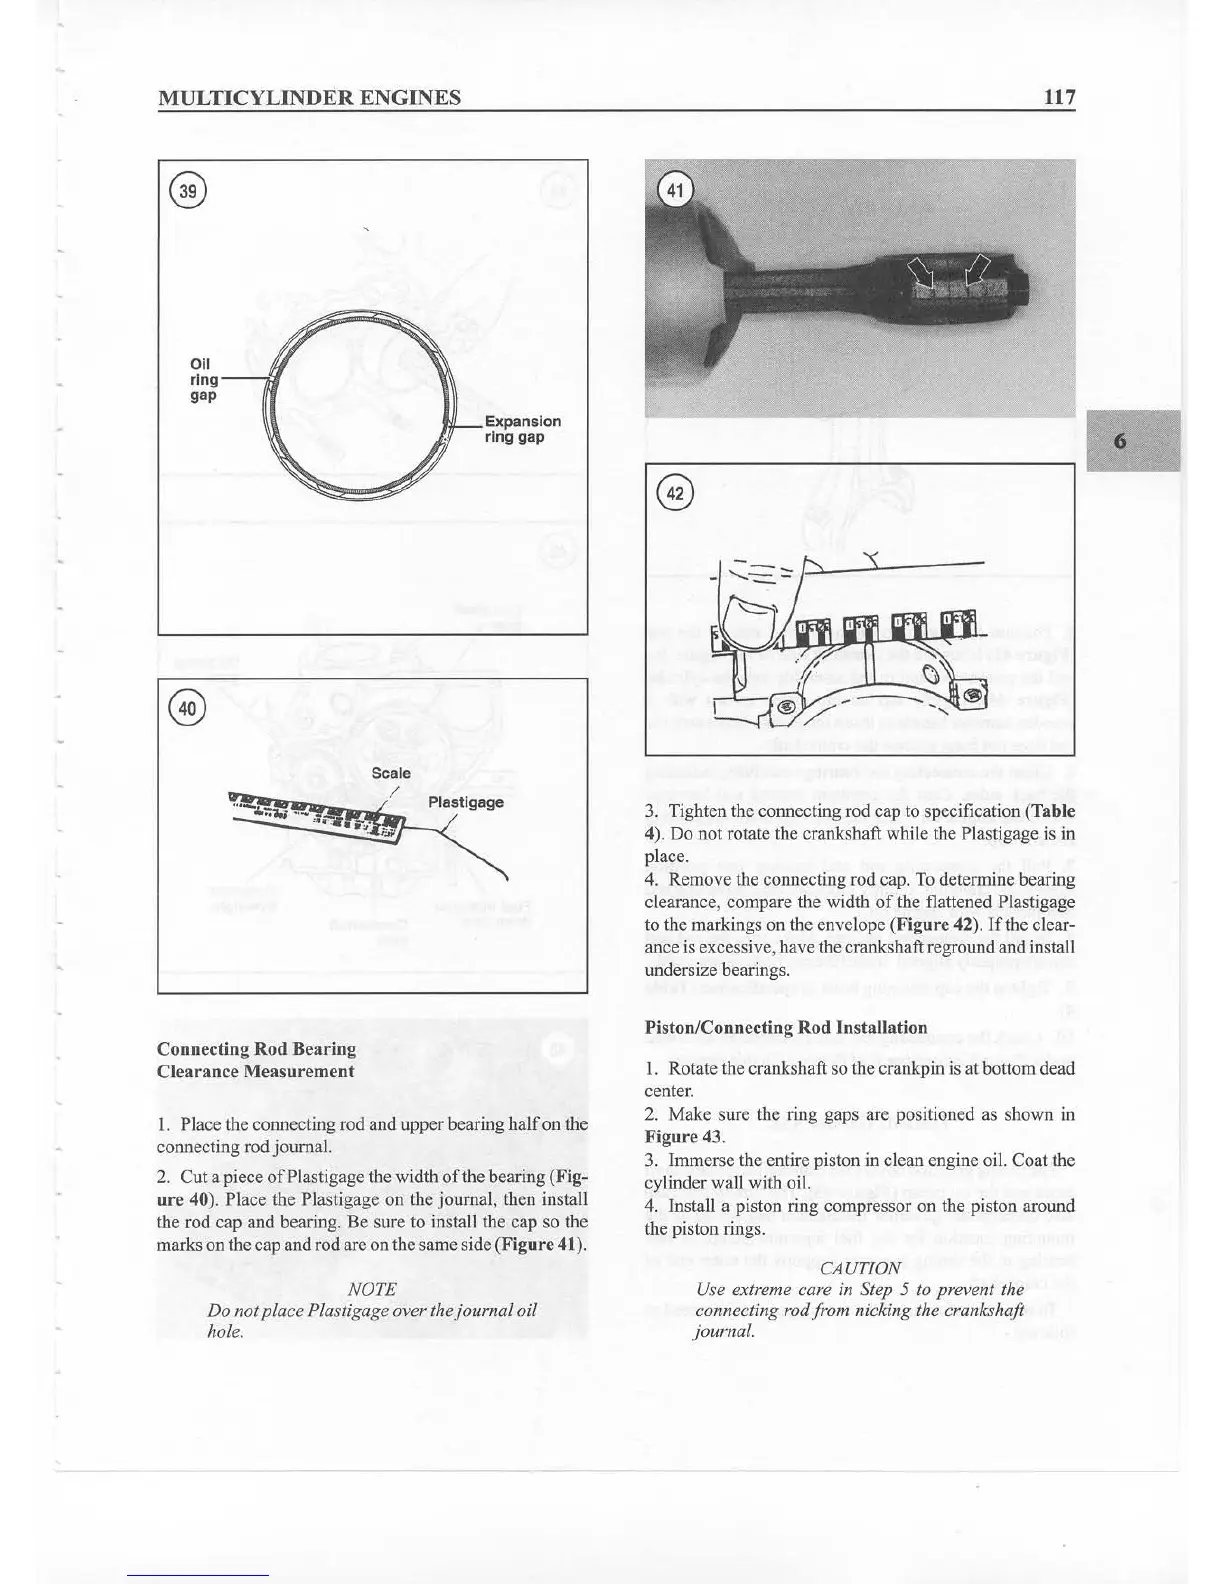
4. Remove the connecting rod cap. To dete rmine bearing
clearance, compare the width
of
the flattened Plastigage
to the markings on the enve lope
(Fig
ure
42).
If
the clear-
ance is excessive, have the crankshaft reground
and
install
undersize bearings.
....
.
;.~
Scale
~~~~~6/
~~
_ Plastl gage
Connecting Rod Bearing
Clearance Measurement
I. Place the connecting rod and upper bearing
half
on the
connecting rod journal.
2. Cut a piece
ofPlastigage
the width
of
the bearing (Fig-
ure 40). Place the Plastigage on the journal, then install
the rod cap and bearing. Be sure to install the cap so the
marks on the cap and rod are on the same side
(Figure
41).
Pisto
n/Connecting
Rod
Insta
llation
I. Rotate the crankshaft so the crankpin is at bottom dead
center.
2. Make sure the ring gaps are positioned as shown in
F
igure
43.
3. Immerse the entire piston in clean engine oil. Coat the
cylinder wall with oil.
4. Install a piston ring compressor on the piston around
the piston rings.
NOTE
Do not
place
Plastigage over the
journal
oil
hole.
CAUTION
Use extreme care in Step
5 to prevent the
connecting rod from nicking the
crankshaft
journal.