COOLING SYSTEM
Hose clamp
Cover
bolts
9. Install the cover while connecting it to the coolant
hose. Tighten the bolts securely.
10. Tighten the hose clamp securely.
11. Operate the engine and check for leaks. Operate the
engine until it reaches normal operating temperature. Im-
mediately shut down the engine
if
overheating occurs and
correct the problem.
167
---
---
;;;';;';;;;';;'~-=---:..
--
--
--
Testing
(Out
of
Engine)
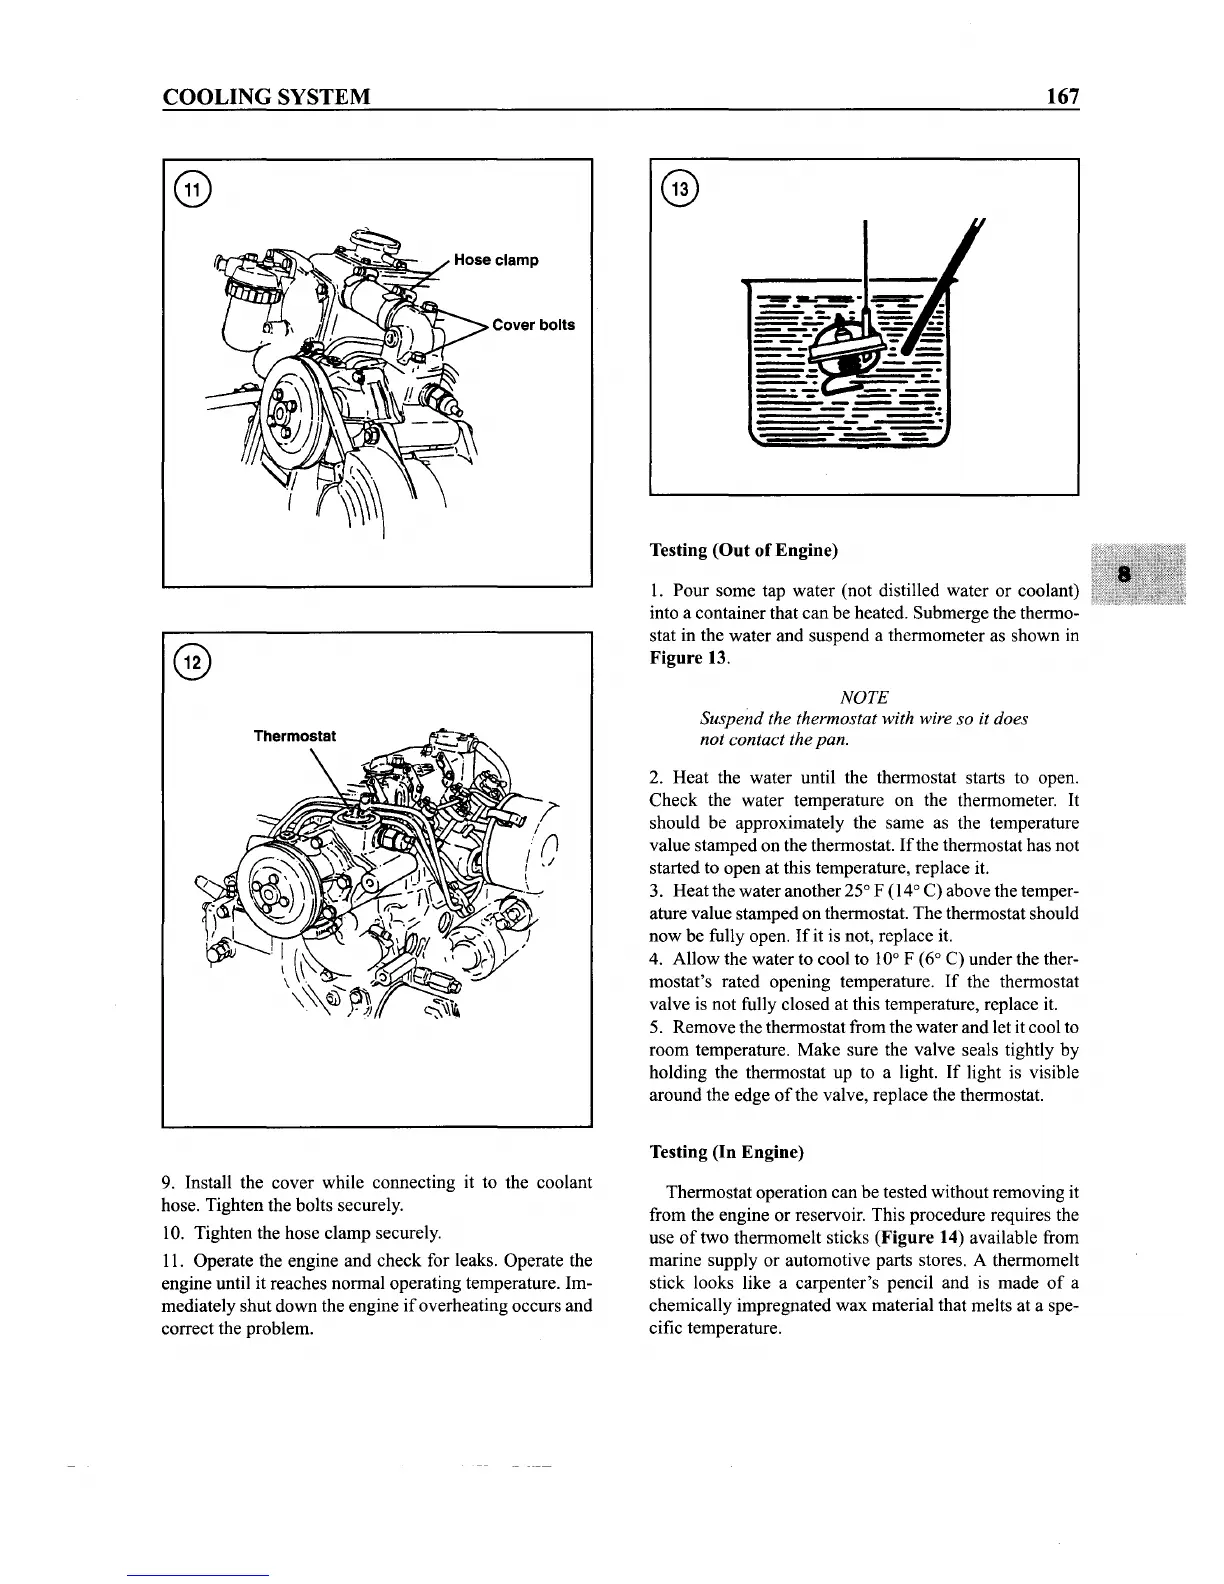
1. Pour some tap water (not distilled water or coolant)
into a container that can be heated. Submerge the thermo-
stat in the water and suspend a thermometer as shown in
Figure
13.
NOTE
Suspend the thermostat with wire so it does
not contact the pan.
2. Heat the water until the thermostat starts to open.
Check
the water temperature on the thermometer. It
should be approximately the same as the temperature
value stamped on the thermostat.
If
the thermostat has not
started to open at this temperature, replace it.
3. Heatthe water another 25° F (14° C) above the temper-
ature value stamped on thermostat. The thermostat should
now
be fully open.
If
it is not, replace it.
4. Allow the water to cool to
10° F (6° C)
under
the ther-
mostat's rated opening temperature.
If
the thermostat
valve is not fully closed at this temperature, replace it.
5. Remove the thermostat from the water and let it cool to
room temperature. Make sure the valve seals tightly by
holding the thermostat up to a light.
If
light is visible
around the edge
of
the valve, replace the thermostat.
Testing
(In
Engine)
Thermostat operation can be tested without removing it
from the engine or reservoir. This procedure requires the
use
of
two thermomelt sticks
(Figure
14) available from
marine supply or automotive parts stores. A thermomelt
stick looks like a carpenter's pencil and is made
of
a
chemically impregnated wax material that melts at a spe-
cific temperature.