172
CHAPTER
EIGHT
A
equipped. Some engines are equipped with an O-ring that
seals between the pump and engine.
5. Reverse the removal steps to install the pump. Refer to
Table
1 for the tightening torque
of
the pump retaining
screws.
2GM, 2GM20,
3GM
and
3GM30
1.
Ifthe
boat is in water, make sure the seacockis closed.
2. Drain the seawater from the engine as described in
Chapter Four.
3. Loosen the hose clamps, then detach the water hoses
from the seawater pump.
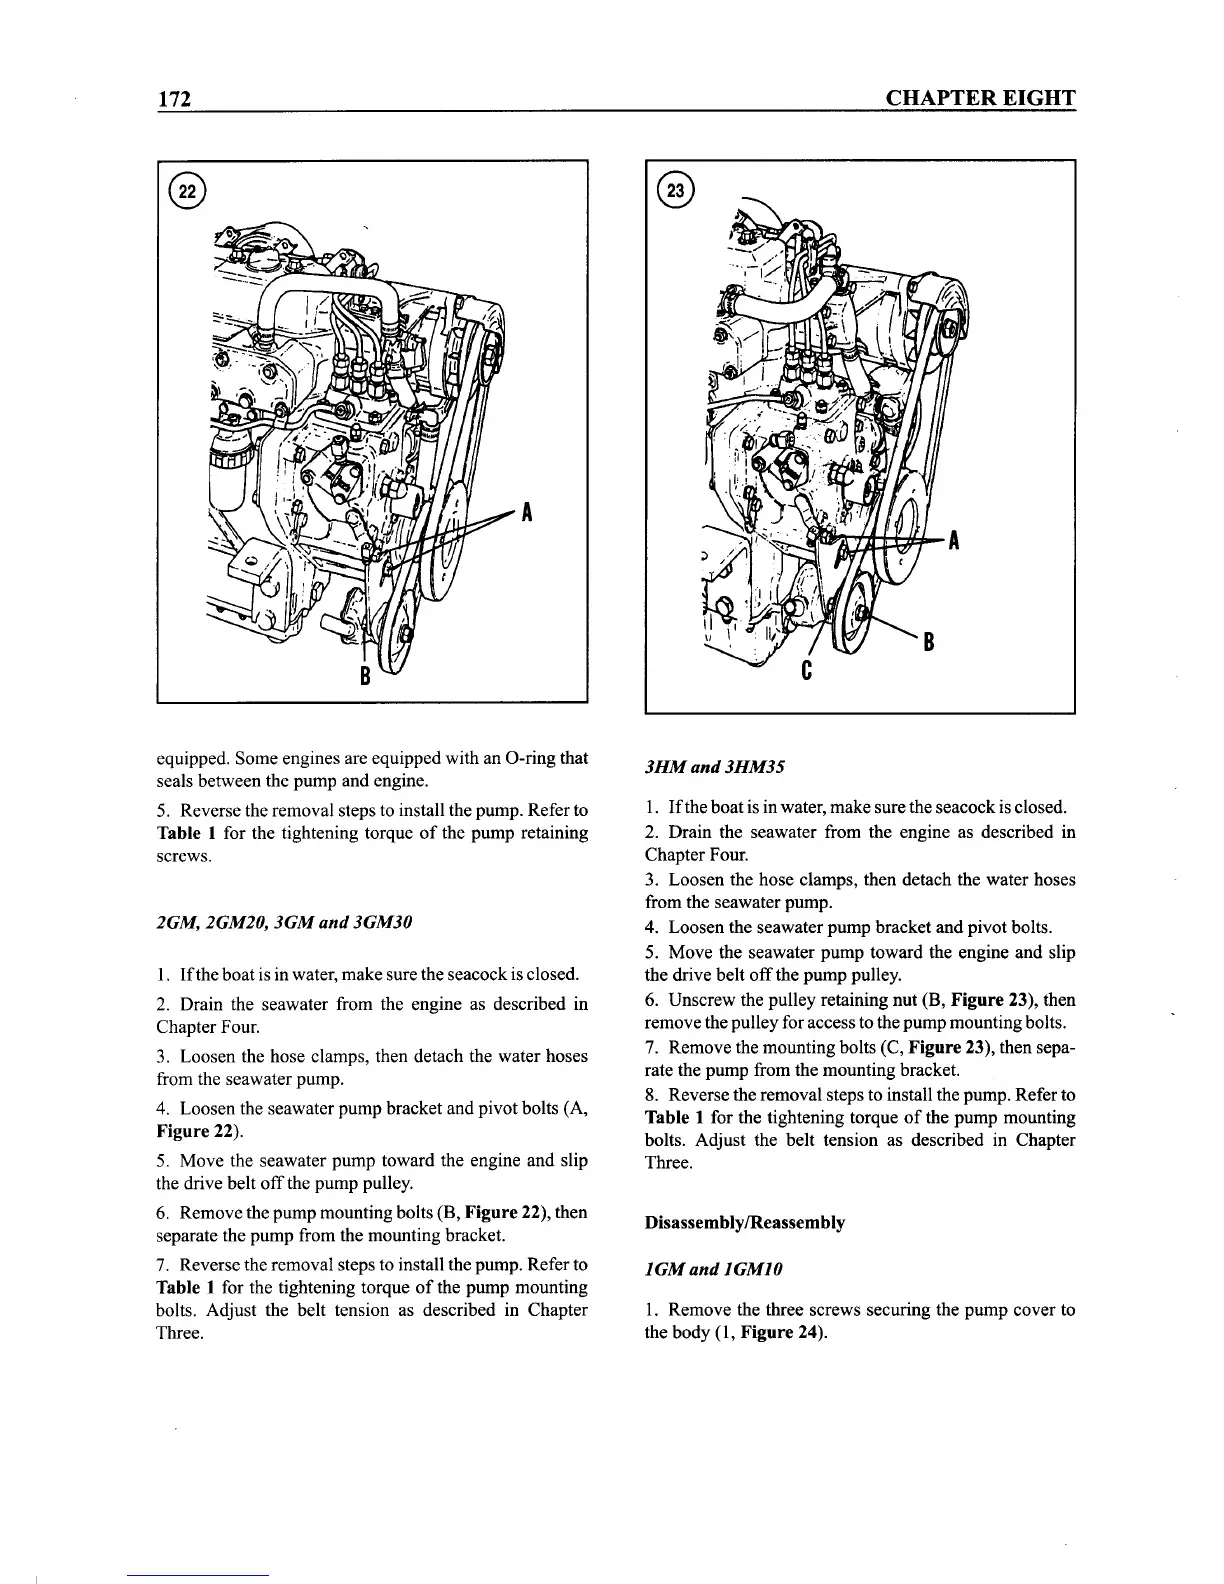
4. Loosen the seawater pump bracket and pivot bolts (A,
Figure
22).
5. Move the seawater pump toward the engine and slip
the drive belt
off
the pump pulley.
6. Remove the pump mounting bolts (B,
Figure
22), then
separate the pump from the mounting bracket.
7. Reverse the removal steps to install the pump. Refer to
Table
1 for the tightening torque
of
the pump mounting
bolts. Adjust the belt tension as described in Chapter
Three.
3HM
and
3HM35
1.
Ifthe
boat is in water, make sure the seacock is closed.
2. Drain the seawater from the engine as described in
Chapter Four.
3. Loosen the hose clamps, then detach the water hoses
from the seawater pump.
4. Loosen the seawater pump bracket and pivot bolts.
5. Move the seawater pump toward the engine and slip
the drive belt
off
the pump pulley.
6. Unscrew the pulley retaining nut (B,
Figure
23), then
remove the pulley for access to the pump mounting bolts.
7. Remove the mounting bolts (C,
Figure
23), then sepa-
rate the pump from the mounting bracket.
8. Reverse the removal steps to install the pump. Refer to
Table
1 for the tightening torque
of
the pump mounting
bolts. Adjust the belt tension as described in Chapter
Three.
DisassemblylReassembly
IGM
and
IGMIO
1. Remove the three screws securing the pump cover to
the body (1,
Figure
24).