20 support@yardistrystructures.com
HardwareWood Parts
#8 x 1-1/2” Wood Screws
x 20 per assembly
Fig. 7.4
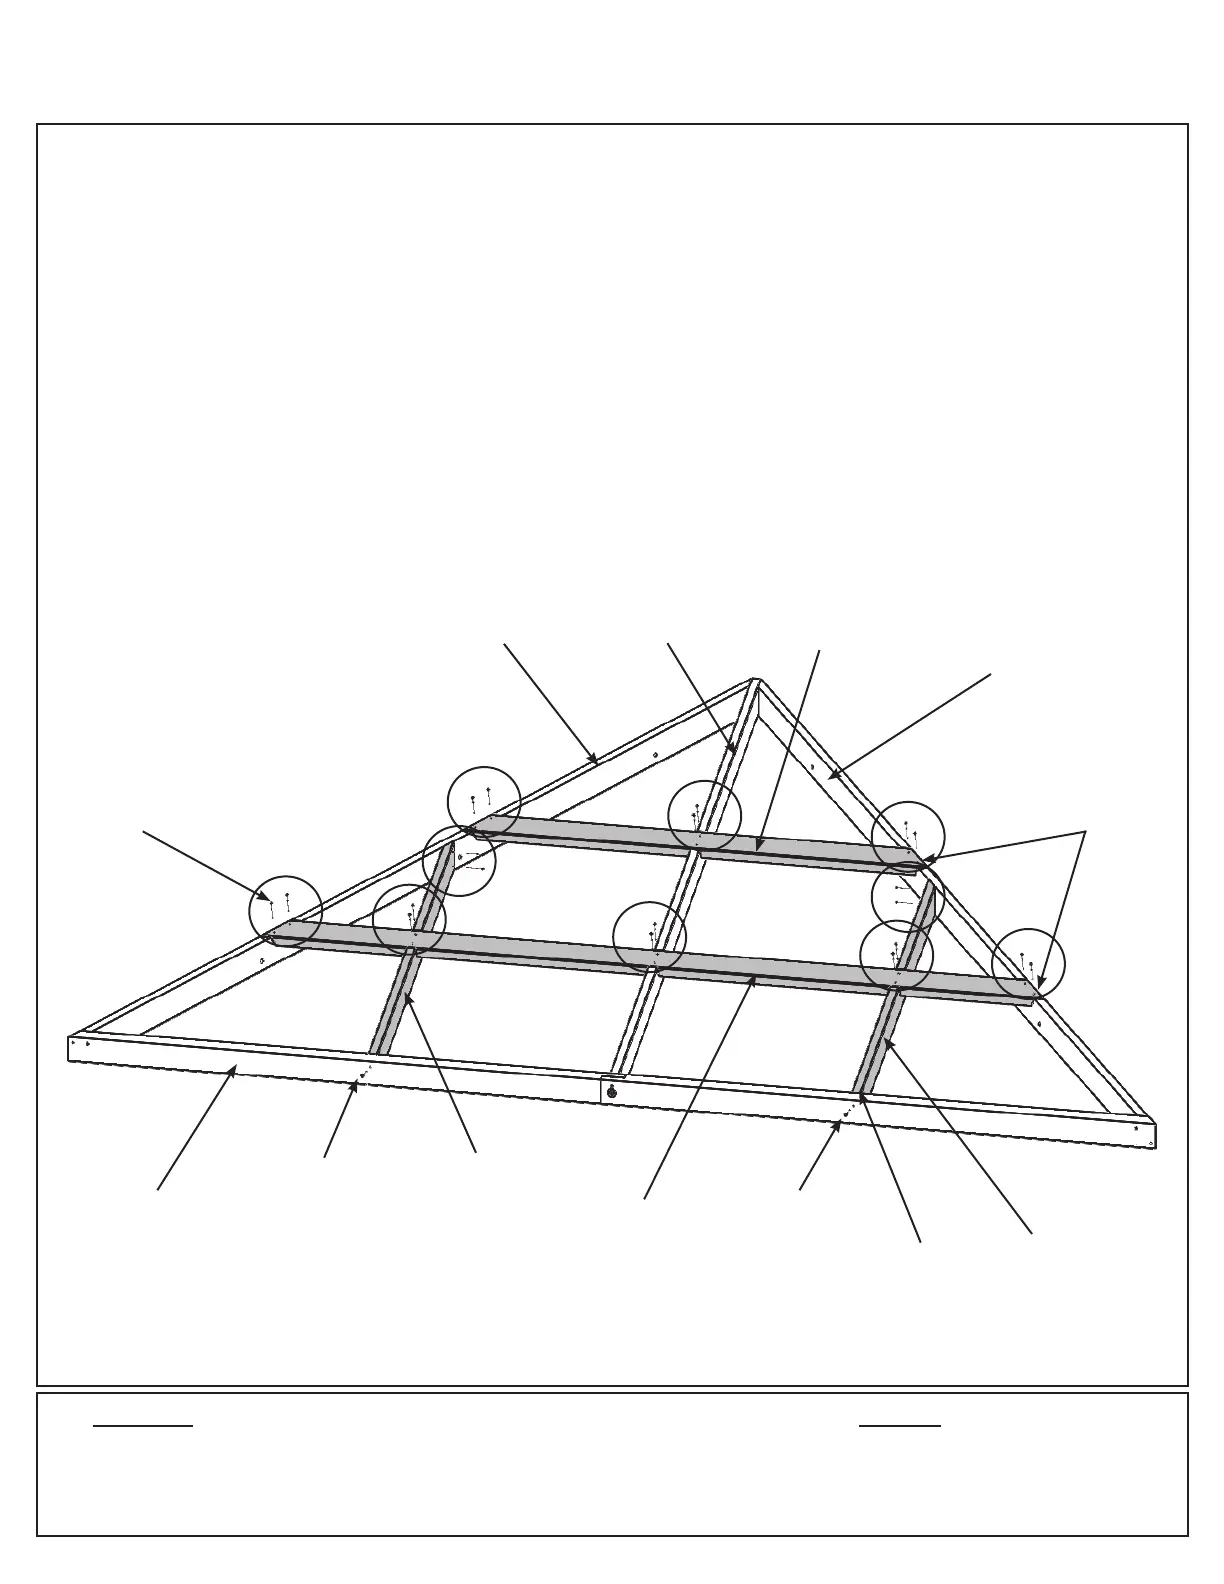
Step 7: Roof Rafter Assembly
Part 2
80 x #8 x 1-1/2” Wood Screw
8 x #8 x 2-1/4” Wood Screw
4 x (732) Short Strap
4 x (733) Strap Long
4 x (734) Rafter Short Right
4 x (735) Rafter Short Left
D: Place one (732) Short Strap in the notches of (729) Corner LT, (737) Corner RT and (736) Rafter so the
ends do not overhang the outside edges of the outside boards then attach with six #8 x 1-1/2” Wood Screws.
(Fig. 7.4)
E: Place one (733) Strap Long in the notches of (729) Corner LT, (737) Corner RT and (736) Rafter so the ends
do not overhang the outside edges of the outside boards. Attach to (729) Corner LT, (737) Corner RT and (736)
Rafter with six #8 x 1-1/2” Wood Screws. (g. 7.4)
F: Place one (734) Rafter Short Right and one (735) Rafter Short Left in the notches of (733) Strap Long and
attach as shown in g. 7.4 with four #8 x 1-1/2” Wood Screws and two #8 x 2-1/4” Wood Screws per board.
G: Complete Steps D, E and F for all four Roof Rafter Assemblies.
(736)
Rafter
No
Overhang
Fascia Beam
Assembly
(729)
Corner LT
(737)
Corner RT
Front View
Flush
(732) Short
Strap
(735) Rafter
Short Left
(733) Strap
Long
(734) Rafter
Short Right
#8 x 2-1/4”
Wood Screws
#8 x 2-1/4”
Wood Screws