19 support@yardistrystructures.com
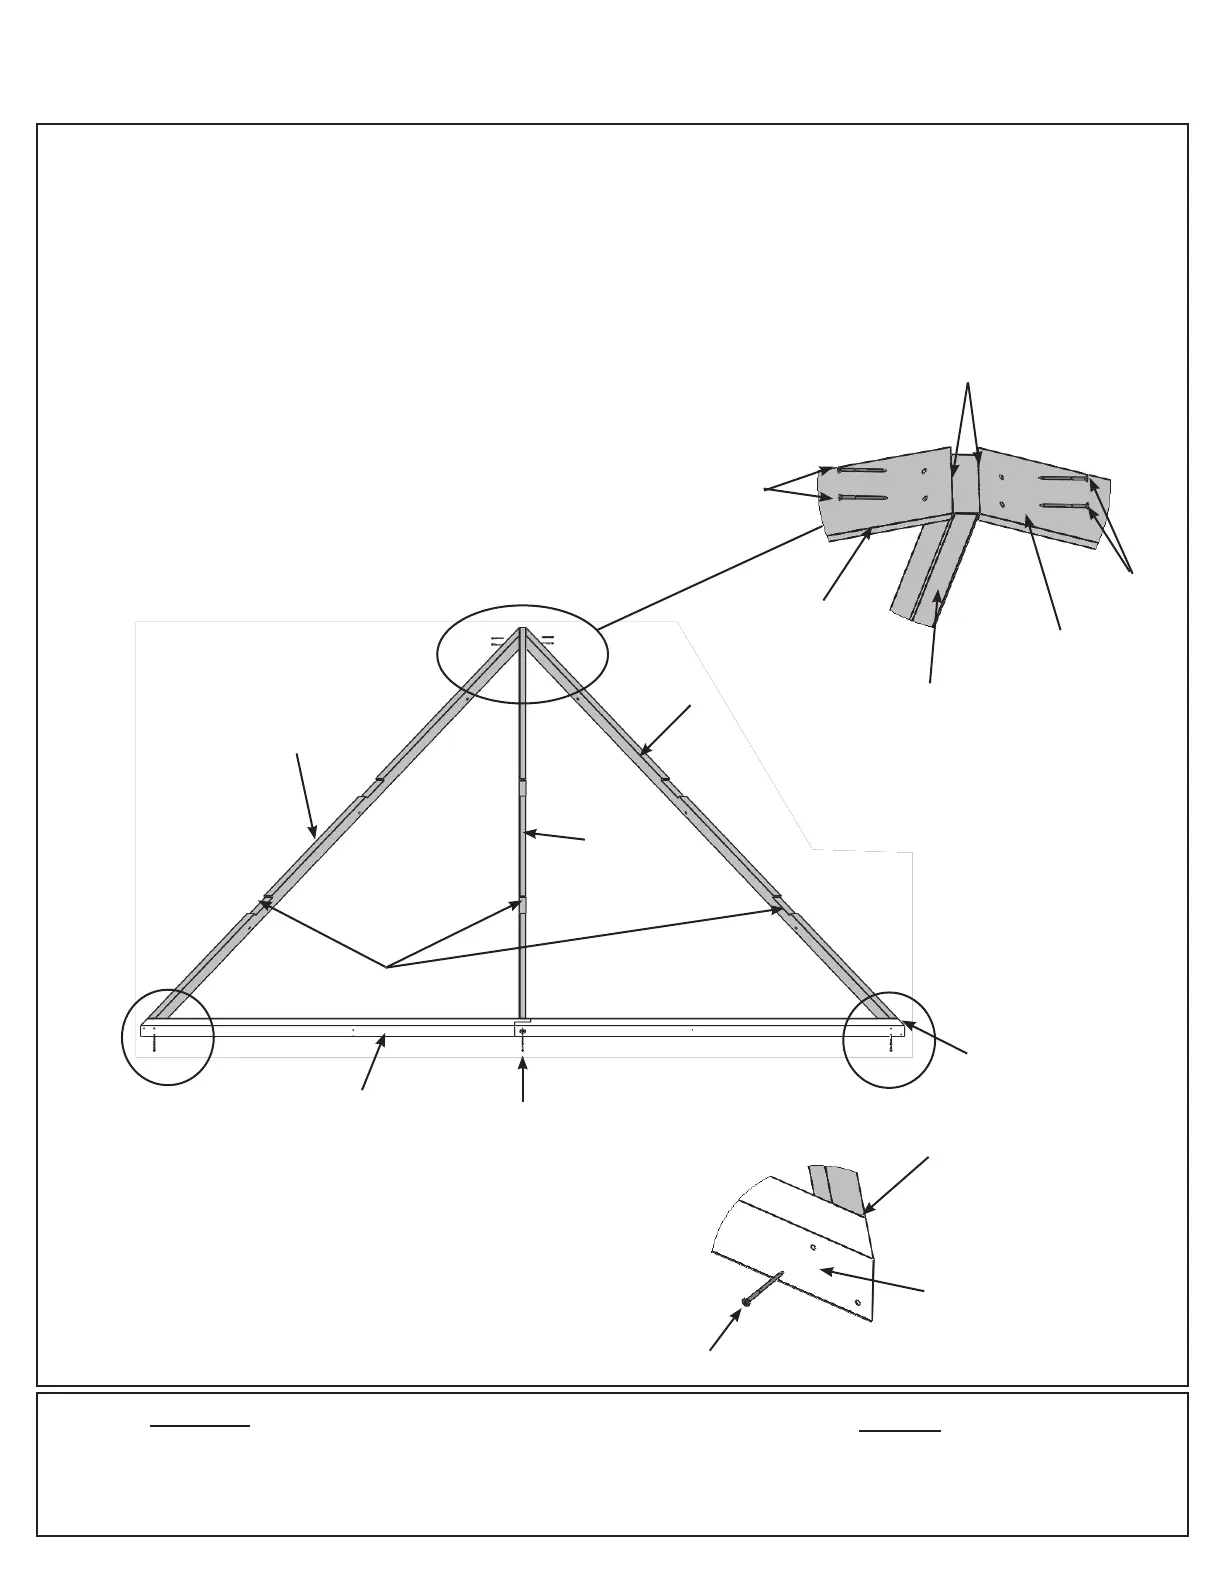
A: On each side of one (736) Rafter place one (729) Corner LT and one (737) Corner RT so the tops and
edges are ush then attach with two #8 x 2” Wood Screws per side. (Fig. 7.1 and 7.2)
B: Place Fascia Beam Assembly from Step 6 on the bottom of (729) Corner LT, (737) Corner RT and (736)
Rafter so the sides are ush then attach with one #8 x 2” Wood Screw at each end and one #8 x 2-1/4” Wood
Screw in the middle. (g. 7.1 and 7.3)
C: Repeat Steps A and B three more times to make four Roof Rafter Assemblies.
Hardware
Wood Parts
#8 x 2” Wood Screw
Top View
Fascia Beam
Assembly
Step 7: Roof Rafter Assembly
Part 1
Fig. 7.1
24 x #8 x 2” Wood Screw
4 x #8 x 2-1/4” Wood Screw
4 x (736) Rafter
4 x (729) Corner LT
4 x (737) Corner RT
Fig. 7.3
Note notches
facing up
Flush
Fascia Beam
Assembly
(736) Rafter
#8 x 2“
Wood
Screws
#8 x 2”
Wood
Screws
Flush
Fig. 7.2
(729)
Corner LT
Front View
Note angle
side up
(736)
Rafter
#8 x 2-1/4”
Wood Screws
(737)
Corner RT
(729)
Corner LT
(737)
Corner RT