24 support@yardistrystructures.com
Hardware
#8 x 1”
Roong
Screws
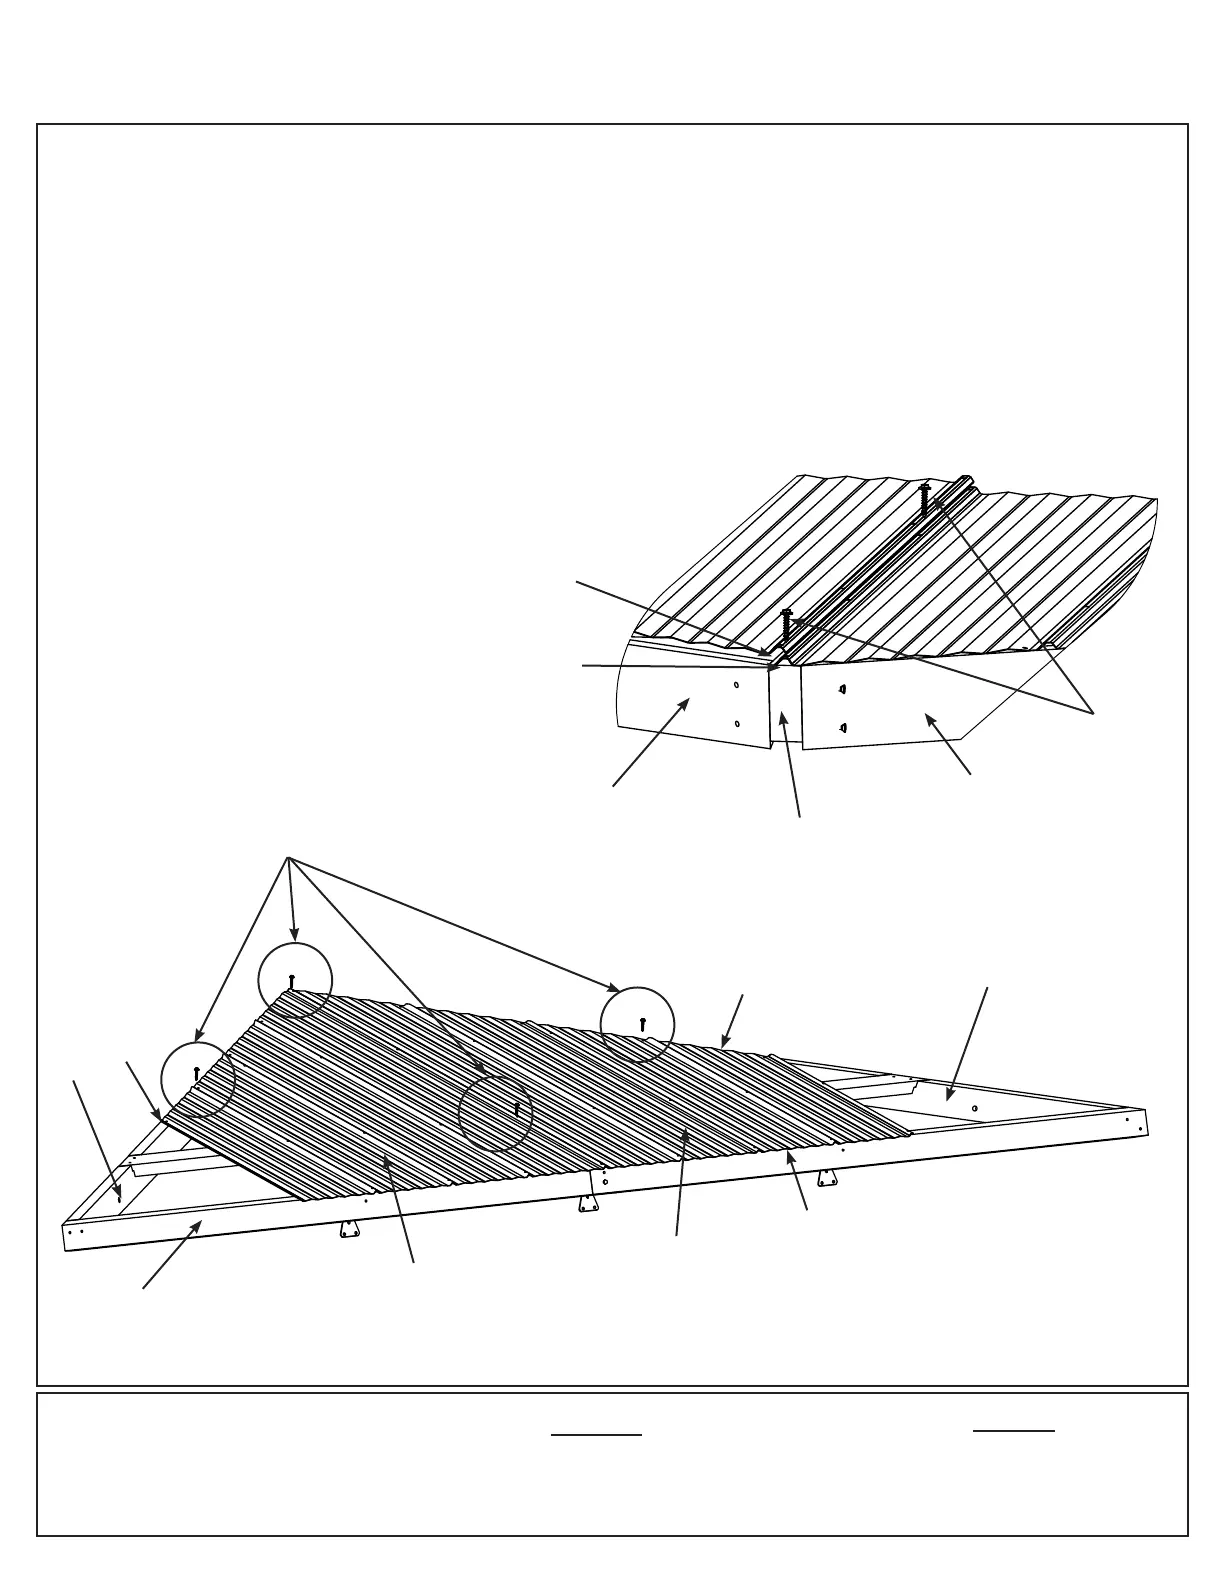
Step 9: Attach Roof Panels
Part 1
A: Place one Long Panel Left on the front of one Roof Rafter Assembly so it is ush to the side of (729) Corner
LT and a slight overhang at the bottom of the Fascia Beam Assembly. Holes should line up with (736) Rafter.
(g. 9.1 and 9.2)
B: Place one Long Panel Right on Roof Rafter Assembly so it overlaps the Long Panel Left and it is ush to the
side of (737) Corner RT and a slight overhang at the bottom of the Fascia Beam Assembly. (g. 9.1 and 9.2)
C: Attach both Left and Right Long Panels to Roof Rafter Assembly with four #8 x 1” Roong Screws in
locations shown in g. 9.1. Be sure not to overtighten screws.
D: Repeat Steps A - C for all four Roof Rafter Assemblies.
Fig. 9.1
Fig. 9.2
16 x #8 x 1” Roong Screw
Roof Parts
4 x Long Panel Left
4 x Long Panel Right
Front View
Fascia Beam
Assembly
(729)
(737)
Top, Side View
Panels overlap
at the seams
(736)
(737)
(729)
#8 x 1”
Roong
Screws
Long Panel
Left
Long Panel
Right
DO NOT overtighten
screws, could cause
damage to roong
material
Flush
Flush
Slight overhang
Lower 3 screws may have
to be removed in next step
to properly place Left and
Right Short Panels
Flush
 Loading...