36 support@yardistrystructures.com
Tight at centre
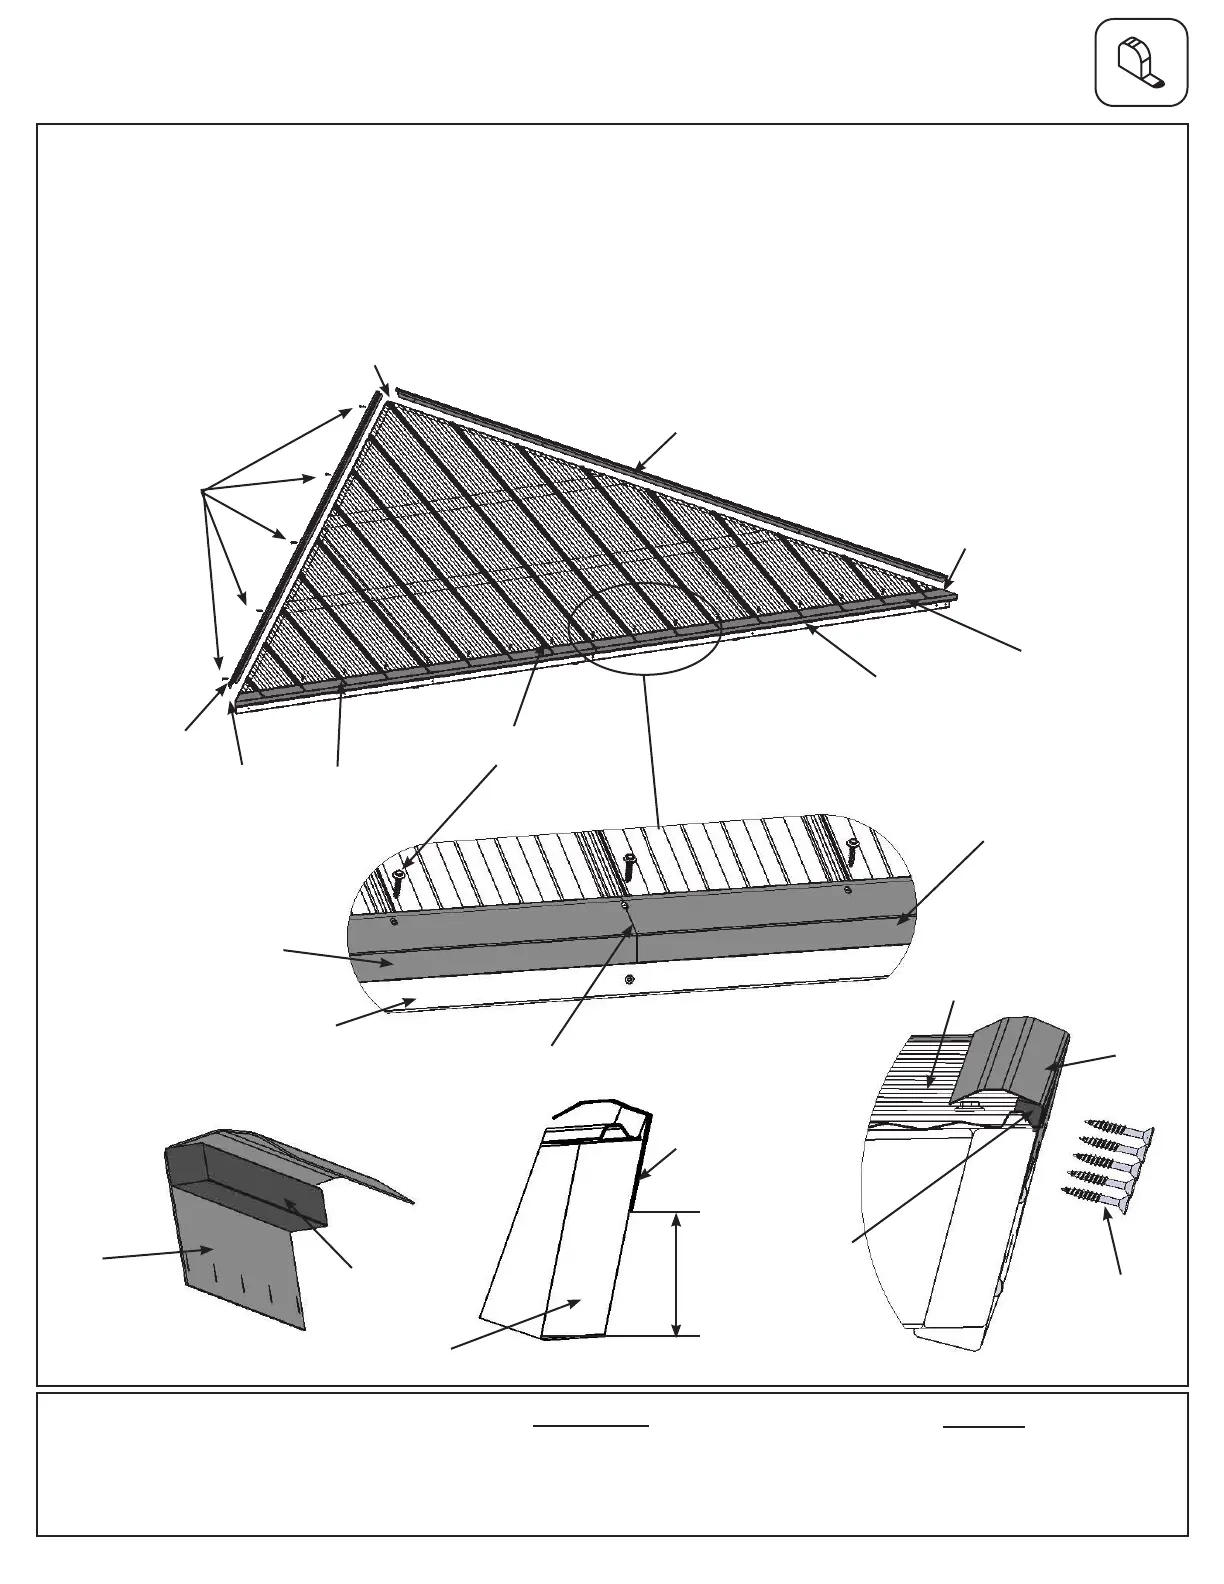
Step 10: Attach Ridge Clips and Roof Edges -
Small Roof Assembly
Hardware
F10.1
34 x #8 x 1” Roong Screw
20 x #7 x 3/4” Wood Screw
A: Place one Roof Edge Left 72.2 and one Roof Edge Right 72.2 on the bottom of each Small Roof Assembly so
the ends are ush with the outside ends of the Fascia Beam Assembly and meet tight in the centre. Attach both
Roof Edges with 17 #8 x 1” Roong Screws per Small Roof Assembly. (F10.1 and F10.2)
B: Place one Weather Seal on the inside of four Ridge Clip 102.5 then place one Ridge Clip 102.5 on each side
of each Small Roof Assembly so they cover the panels. The bottom edge of each Ridge Clip 102.5 should be
2-1/2” (63.5 mm) up from the bottom edge of (623) Rafter Corner Right and (624) Rafter Corner Left. Attach with
ve #7 x 3/4” Wood Screws per Ridge Clip 102.5. (F10.1, F10.3, F10.4 and F10.5)
Weather
Seal
F10.2
#7 x 3/4” Wood Screws
(x 5 per side)
Panels
Components:
2 x Roof Edge Left 72.2
2 x Roof Edge Right 72.2
4 x Ridge Clip 102.5
4 x Weather Seal
Fascia Beam
Assembly
Flush
Flush
#8x 1” Roong
Screws (x 17)
Fascia Beam
Assembly
F10.3
Weather
Seal
Underneath,
Side View
F10.4
Side View
#7 x 3/4”
Wood Screws
(x 5 per side)
Flush
Roof Edge
Left 72.2
Roof Edge
Right 72.2
Roof Edge
Left 72.2
Roof Edge
Right 72.2
Ridge Clip
102.5
Ridge Clip
102.5
Ridge Clip
102.5
Ridge
Clip
102.5
2-1/2”
(63.5 mm)
Rafter
Corner
Ridge
Clip
102.5
F10.5
Side View