Mode 6– Tank Refill
In order to use the charging and flushing modes,
you must have at least six (6) pounds of refrigerant
in the storage tank. Follow this procedure to add
refrigerant to the storage tank. When adding R-
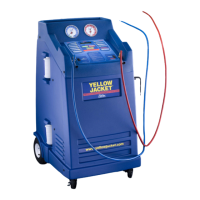
134a to the tank of either a Model 830, you will need
to use the tank refill adapter supplied in the acces-
sory kit. This adapter connects the low side auto
service coupling to the tank of new R-134a refriger-
ant. It should be stored in the tool tray on the top of
the unit.
1. Refer to the Pre-Operation Check List.
2. Select MODE 6– Tank Refill.
The LCD will read “BLUE HOSE===> CYLINDER”
3. Connect the blue low side auto service hose to
the new refrigerant source tank and open the
tank valve. Turn the source tank upside down to
ensure all of the refrigerant is transferred to the
storage tank on the unit.
4. Press the ENTER button. Refrigerant will trans-
fer to the storage tank. The unit will shut off
automatically when either the supply tank is
empty or the storage tank is full.
Press the RESET key to return to the “SELECT
MODE” status.
Mode 7– Refrigerant Management System
The Refrigerant Management System (RMM) built
into the Model 830 tracks all aspects of refrigeration
usage. The information can significantly help you
manage your automobile A/C repair business. In
addition, new federal regulation require strict records
of your refrigerant usage. The software in this sys-
tem is designed to ensure the highest possible accu-
racy in managing refrigerant usage. Refrigerant
measurement during charging is extremely accurate.
In recovery mode, however, accuracy is plus or mi-
nus three ounces based on variations in air tempera-
ture and pressure.
Uses of the refrigerant data include:
• Improved record keeping
• Accurate determination of net profits for your
business
• Reduced billing errors
• Minimized refrigerant loss from leaks and theft
• Reduced operator errors
The refrigerant management information is stored in
nine registers. To access the information, press
Mode 7, REFRIGERANT MANAGEMENT SYSTEM.
Press INCREASE or DECREASE to cycle through
the registers. The registers are:
Register 1: Total number of jobs to date.
Register 2: Cumulative run time in minutes.
Register 3: Refrigerant recovered during last job.
Register 4: Refrigerant charged in last job.
Register 5: Run time of last job.
Register 6: Total amount of refrigerant recovered to
date.
Register 7: Total amount of refrigerant charged to
date.
Register 8: Total of all new refrigerant added to the
storage tank to date.
Register 9: Send data to the optional printer. Press
ENTER to print the refrigerant management data.
11
6. The LCD should read “PUSH START.”
7. Press START to begin flushing operations. The
Model 830 will recover any refrigerant in the A/C
system and charge the system with the selected
flush amount of refrigerant. The refrigerant will
circulate throughout the A/C system and the
Model 830. The unit’s oil separator will remove
the oil from the refrigerant and return the clean
refrigerant to the A/C system. At the end of the
cycle, all refrigerant and oil will be recovered
from the automobile system.
8. The unit will beep to indicate the cycle is com-
plete and the LCD will read “FLUSH CYCLE
COMPLETE.”