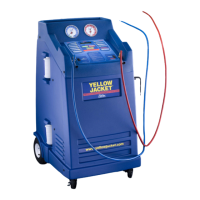
The Vacuum & Charge function of the 830 SERIES is
designed to remove moisture from the automobile A/C
system by pulling a deep vacuum and charging the
system with a precise amount of refrigerant. This mode is
most often used after completing a repair that required
opening the A/C system to the atmosphere. Moisture in
an A/C system can cause erratic operation and must be
removed before recharging the system with refrigerant.
MODE 2 Operational Steps
1. Refer to the Pre-Operation Check List.
NOTE: If desired, the gauges of the 830 SERIES can
now be used to aid investigation of an A/C system
problem. Ensure the automobile A/C system is
turned off prior to selecting a mode on the 830
SERIES.
2. Verify the automobile air conditioning system is
off.
3. Press MODE 2 for Vacuum & Charge.
4. The LCD will read “CONNECT HOSES PRESS
ENTER TO CONTINUE”
5. Connect the high and low side auto service
hoses to the respective high and low side service
ports on the automobile A/C system. Open the
service hose valves.
6. Press the ENTER key.
7. When the LCD reads “SET CHARGE
AMOUNT,” set the amount of Refrigerant to be
charged into the A/C system by pressing and
holding INCREASE or DECREASE until the
desired amount is shown. Release the button
and press ENTER to accept the charge amount
shown on the LCD.
7. When the LCD reads “SET VACUUM TIME,”
set the vacuum time by pressing and holding IN-
CREASE or DECREASE until the desired time is
shown. Release the button and press ENTER to
accept the vacuum time shown on the LCD. Vac-
uum time can be bypassed if the time is set to
zero.
8. When the LCD reads “SET VACUUM HOLD
TIME,” set the vacuum hold time by pressing
and holding INCREASE or DECREASE until the
desired time is shown. Release the button and
press ENTER to accept the vacuum hold time
shown on the LCD. Vacuum hold time can be
bypassed if the time is set to zero. Answer Ques-
tion: OIL INJECT PAUSE ? Y
9. The LCD should read “PUSH
START.”
10. Press START key to begin vacuum and charg-
ing operations.
Note: If the automobile A/C system has pressure on it,
the unit will automatically begin a recovery cycle to insure
that no refrigerant is released into the atmosphere.
12. The 830 SERIES will begin to evacuate the A/C
system and will beep to indicate the end of the
vacuum time.
13. The unit will prompt you to “INJECT OIL NOW”
press and hold the OIL INJECT switch until the
desired amount of oil has been injected into the
system.
14. Press the ENTER key to continue
15. Record the vacuum level shown on the low
pressure gauge and press START to begin the
vacuum hold time. The hold time will count
down on the LCD and the unit will beep at the
end of the hold time. If vacuum hold time was
set to zero, the unit will transition into charge
mode.
16. Record the final vacuum level shown on the low
pressure gauge. If the two recorded vacuum
levels are different, the A/C system may have a
leak and might not retain refrigerant when
charged. The 830 SERIES will automatically
start the charge cycle.
The unit will begin the charge process using the vacuum
charge method. If the charge amount is not charged in 2
minutes time the unit will begin a power charge cycle to
insure that an accurate charge is achieved.
17. Verify the message on the LCD reads “VAC &
CHRG COMPLETE.”
18. Press the RESET button. The LCD should read
“CHECK OIL LEVELS.” Unit will force a hose
clearing routine (see Full cycle).
19. Shut the service valves and disconnect the high
and low side auto service hoses from the auto-
mobile.
Press the RESET button to return to the “SELECT
MODE” status.
Mode 2– Vacuum & Charge
recommendations. Add an amount of new oil
equal to the amount collected in the oil drain
bottle.
8