Filter Maintenance
“MAINT-FILTER CHG DUE”
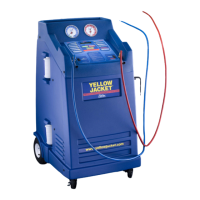
The Model 830 has a unique filter system which
ensures the refrigerant transferred to the storage
cylinder is clean and moisture-free. The filters must
be changed periodically to ensure the system is
working properly. A maintenance reminder prompts
you when to change your filters. All refrigerant must
be removed from the old filters before they are
removed. Follow the filter change procedures care-
fully to minimize refrigerant loss and ensure only
clean, moisture-free refrigerant is transferred into
the storage cylinder.
Pressing the ENTER key will turn the reminder off
until the next time you start the unit. Pressing the
RESET key will reset the reminder until the next
scheduled maintenance.
Filter Change Steps
1. Turn off the Main Power.
2. Press and hold the DECREASE button and turn
on the power. This starts the unit in a special
Filter Change Mode.
3. The LCD will display “CLOSE LIQUID VALVE
ON TANK, PUSH START.”
4. Close the liquid valve on the storage cylinder.
Normally this valve has a red handle.
5. Press START and the LCD will display
“CONNECT HIGH SIDE SERVICE HOSE.”
6. Connect the red, high side auto service hose to
the service port located on the “T” fitting
connected to the tank vapor port. This port may
have a brass or red plastic cap which must be
removed before attaching the service hose. Do
not disconnect the short hose from the tank!
7. Press START to begin filter evacuation. The
LCD will display “PLEASE WAIT-
EVACUATING FILTERS.”
The unit will completely evacuate all refrigerant from
the two filters and the internal components of the
unit. The red service hose will be the only
component containing refrigerant when the cycle is
complete. The outside of the filters will develop
frost during evacuation. This is normal and
indicates liquid refrigerant is being removed from
the filters. This operation takes about twenty (20)
minutes.
8. When the cycle is complete, the unit will beep
and the LCD will display “EVACUATION
COMPLETE.”
9. Remove the front cover of the unit.
10. Make note of the flow direction arrows on the old
filters.
11. Loosen the filter bracket. Remove the filters and
discard them. Replace with new filters ensuring
the flow direction arrow is the same as it was on
the old filters.
12. Check all fittings for leaks to ensure no
refrigerant is lost during subsequent system
operation.
13. Remove the red high side auto service hose
from the “T” fitting and replace the service port
cap. Open the liquid valve on the storage tank.
The 830 series is ready for operation.
14
Troubleshooting Information
The Model 830 has a number of sophisticated
features which makes it by far the most user friendly
A/C service system in the world. The unit was
designed to be extremely easy to operate, service
and troubleshoot. Although the Model 830 was
manufactured with high quality components, a
component failure could cause the 830 to operate
incorrectly. YELLOW JACKET® recognizes the
importance of keeping your equipment operational
and rapidly restore it to service when a problem
occurs.
Whenever a problem occurs, please read this
section. It is designed to provide you with additional
information to help diagnose a system problem.
Read this section thoroughly prior to calling technical
services. This will reduce the time needed to restore
your system to normal operation. Technical support
can be reached at 1-800-769-8370.