SB160 | OWNER’S MANUAL
8
FRAME ASSEMBLY
TOOLS NEEDED
• Torque wrench(es), 5-25 Nm,
CW and CCW Directions
• 2.5mm allen key
• 3mm allen key
• 4mm allen key
• 5mm allen key
• 6mm allen key
• 8mm allen key
• 10mm allen key
• 8mm guide pins
• 3” socket extender
• Blue Loctite (243)
• Grease
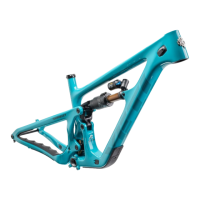
01
Press Shaft Eyelet Spacer (3.24) into rear
shock eyelet.
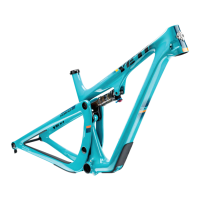
03
Install 2x Cable Port Clamps (3.29) to the front
triangle with 2x M4 x 10L FHCS (3.33).
Install 1x Cable Port Clamp (3.29) to the
rear triangle NDS Chainstay with 1x M4 x 10L
FHCS (3.33).
Tighten until snug. Hardware can be torqued
to 2-3 Nm after housing installation.
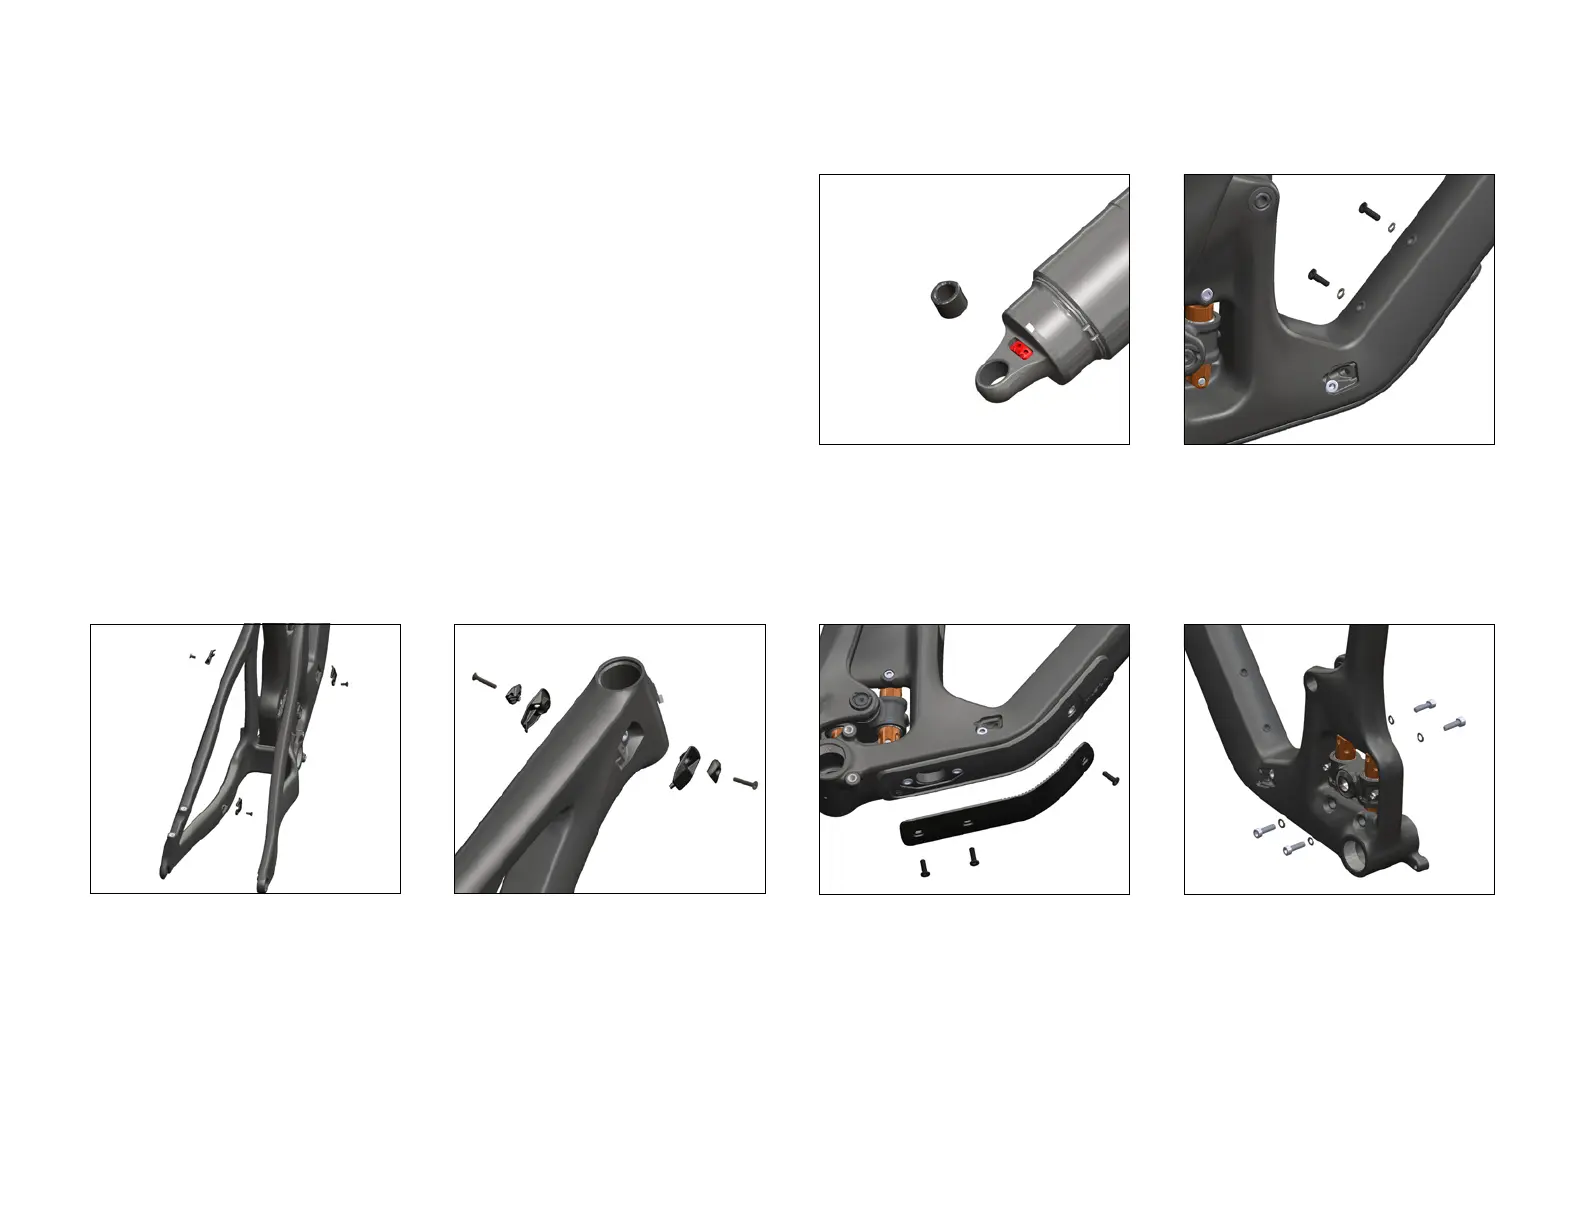
02
Install 2X Low Prole H20 Bolts (3.27) and
Washers (3.28) to front triangle.
Torque: 4 Nm (or hand tight)
06
Assemble Switch Innity Link (3.13) into frame
using 4x SHCS (3.11) with Washers (3.12). Grease
Zerks should face to the Non-Drive Side.
Torque in a cross pattern: 12 Nm
Repeat torque to ensure all fasteners are
fully tight.
05
Install Lower DT Protector (3.37) to the front
triangle using 3x Low Prole M5 Screws (3.27)
Torque: 5 Nm
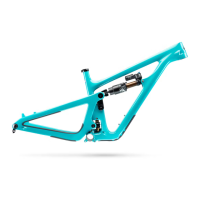
04
Place a Head Tube Cable Port Cover (3.32) into
each recess behind the head tube.
Place a Double Port Clamp (3.30) into the non-
drive side cover and a Single Port Clamp (3.31)
into the drive-side cover. Secure with M4 x 25L
FHCS (3.26).
Tighten until snug. Hardware can be torqued
to 2-3 Nm after housing installation.
YETI TIPS
Make sure your tools are in good condition.
A worn allen key can round the hex on a
bolt not allowing for proper torque.
Torque settings are listed throughout the
instructions and on page 7 of this manual.
It is important to prep all bolt threads.
The instructions denote whether to use
a Loctite compound or grease and part
locations, listed in parentheses, are shown
in the exploded view on page 16. Please
ensure all prep call outs are followed.
WARNING: Failure to follow prep instructions
could lead to serious frame issues.
WARNING: Service on Yeti bicycles requires
special knowledge and tools. Yeti Cycles
recommends that all service and repairs be
performed by an authorized Yeti Dealer.