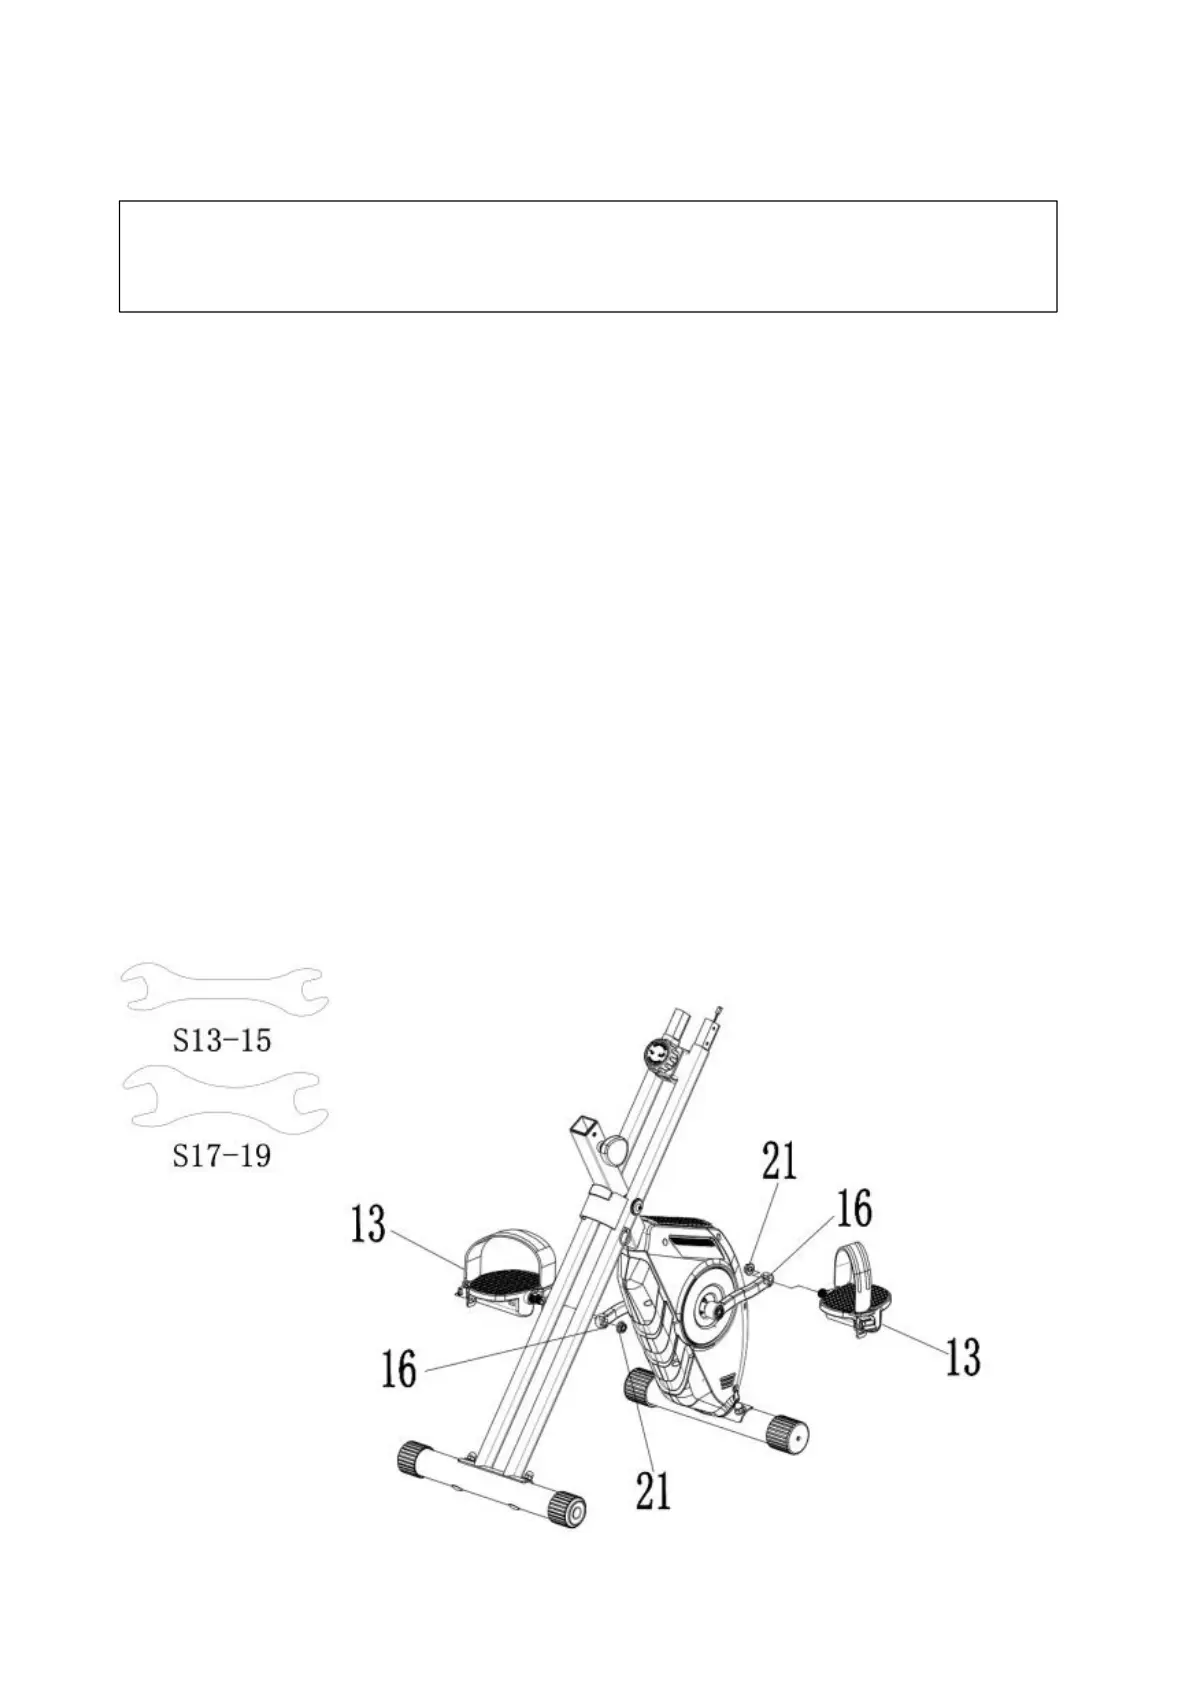
Step2: Install the Left and Right Pedal
Required parts:
1. Turn the resistance of the Brake Knob to level 8.
2. Install the Left Pedal (with L mark):
Unscrew the Lock Nut (#21) from the Left Pedal (#13). Align the Left Pedal
(#13) with the Left Crank (#16) at 90°, note to align the threads of the Left Pedal (#13) bolt
to the threads of the Left Crank (#16). Turn the Left Pedal (#13) bolt
COUNTER-CLOCKWISE by hand as tightly as you can, then use Multifunctional Wrench
S13~15, S17~19 to tighten and secure. Then, install the Lock Nut (#21) to the Left Pedal
(#13) axle, turn the Lock Nut (#21) CLOCKWISE as tightly as possible with the
Multifunctional Wrench S13~15, S17~19. Attach the Left Foot Strap (with L mark).
3. Install the Right Pedal (with R mark):
Unscrew the Lock Nut (#21) from the Right Pedal (#13). Align the Right Pedal
(#13) with the Right Crank (#16) at 90°, note to align the threads of the Right Pedal (#13)
bolt to the threads of the Right Crank (#16). Turn the Right Pedal (#13) bolt CLOCKWISE
by hand as tightly as you can, then use Multifunctional Wrench S13~15, S17~19 to tighten
and secure. Then, install the Lock Nut (#21) to the Right Pedal (#13) axle, turn the Lock Nut
(#21) COUNTER-CLOCKWISE as tightly as possible with the Multifunctional Wrench
S13~15, S17~19. Attach the Right Foot Strap (with R mark).
1 Left & Right Pedal (L/R) (#13) 1 Lock Nut (#21)
1 Multifunctional Wrench S13~15 (#34) 1 Multifunctional Wrench S17~19 (#35)
 Loading...