NOTE: All screws and bolts are preinstalled.
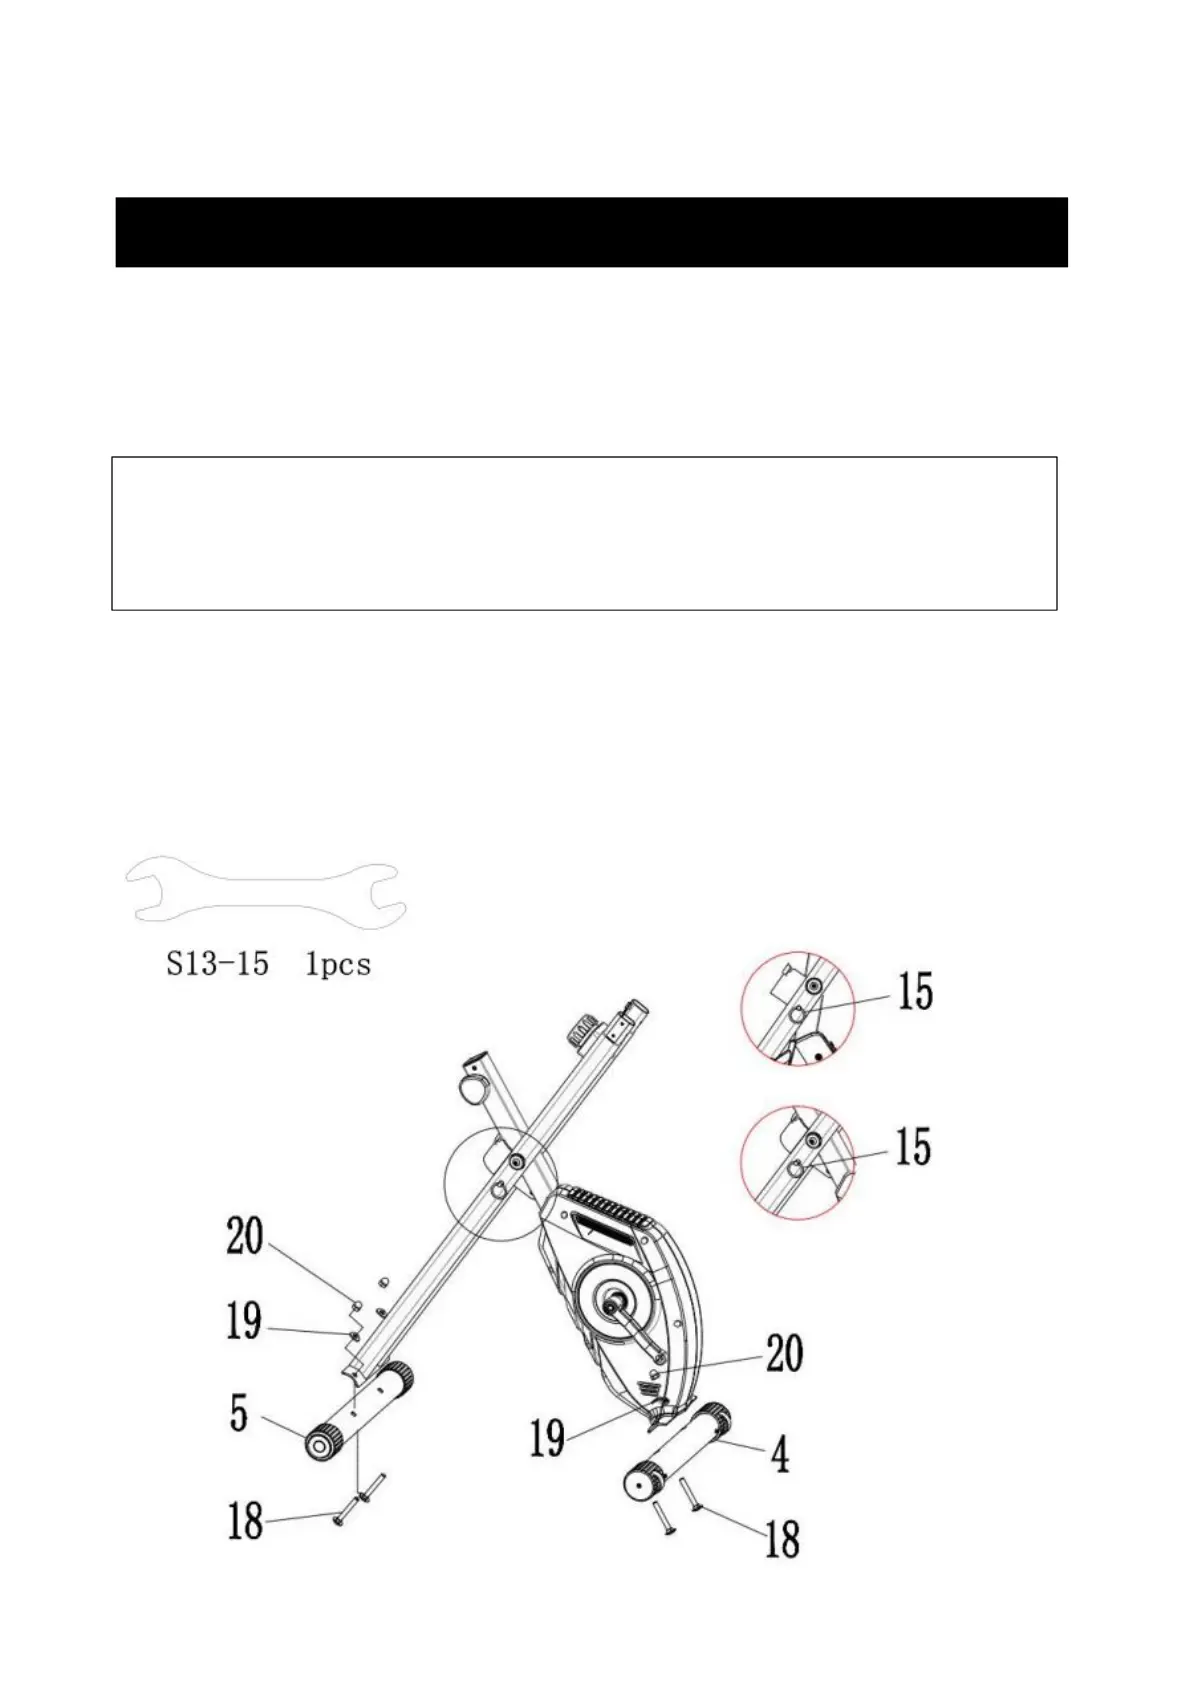
Step1: Install the Front and Rear Stabilizer
Required parts:
1. Pull out the Lock Pin (#15) from the Main Frame (#1) and adjust Main Frame (#1) to the
correct position, then insert Lock Pin (#15) to tighten the Main Frame (#1).
2. Lift the Main Frame (#1) up by hand and attach the Front Stabilizer (with wheels) (#4) to
the Main Frame (#1), the frame holes should align to stabilizer holes for installation, tighten
with Carriage Bolts (#18), Wave Washers (#19), Screw M8 (#20) and Multifunctional
Wrench S13~15 (#34).
3. Repeat the procedure for Rear Stabilizer (#5).
1 Front Stabilizer (with wheels) (#4) 1 Rear Stabilizer (#5 )
4 Carriage Bolts (#18 ) 4 Wave Washers (#19)
1 Screw M8 (#20 ) 1 Multifunctional Wrench S13~15 (#34)
 Loading...