-6-
Rear Camera Installation
1. Connect one end of the Mini USB cable into the Mini USB Port (9) on the dash
cam. Connect the other end into the Mini USB Port (16) on the rear cam.
2. Turn on the dash cam. The rear-lens view will automatically appear on the
display screen in Dual format (PiP).
Tip:
To view full-screen, press the 'Down' button (5) to switch while in Standby
mode (no recording). Or enter the Setting menu and find [Display] to select
different display views.
3. Whilst looking at the display screen and without removing the adhesive
backing, find a suitable location for installing your rear cam on your rear
windshield.
4. Having found a suitable location on your rear windshield, peel off the
protective plastic backing from the adhesive mount. Press firmly against your
rear windshield to secure.
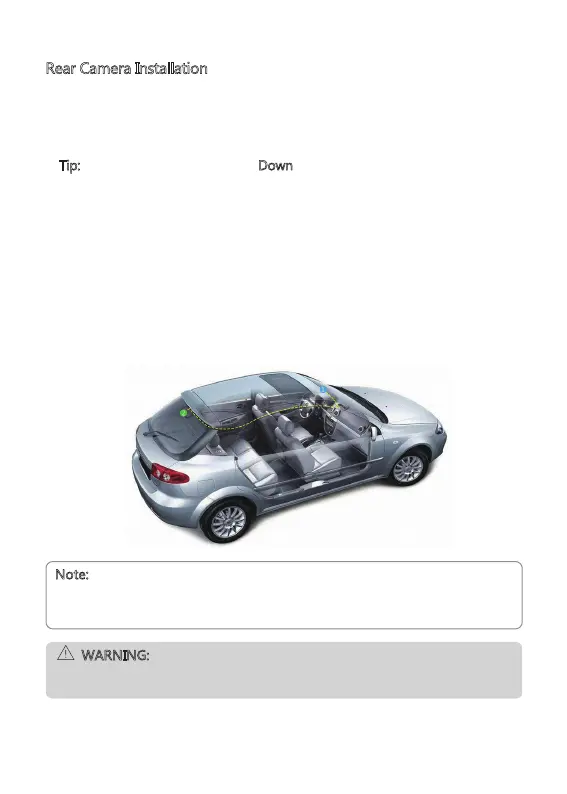
5. For a more organized car environment, the rear cam USB cable can be routed
as indicated by the dashed line in the diagram.
WARNING:
Do not install the device on a tinted window - doing so may damage the tint
film.
Note:
• Consult your vehicle's technical manual or consult a professional if you are
not sure how to remove interior panels.