Print Head Replacement - LP 980358-290A
Preparations
Protect against static discharge. Your work area must be static-safe and include
a properly grounded conductive cushioned mat to hold the printer and a
conductive wrist strap for yourself.
Open the printer by pulling the release latches forward, then lifting the top cover. Remove media.
Removal
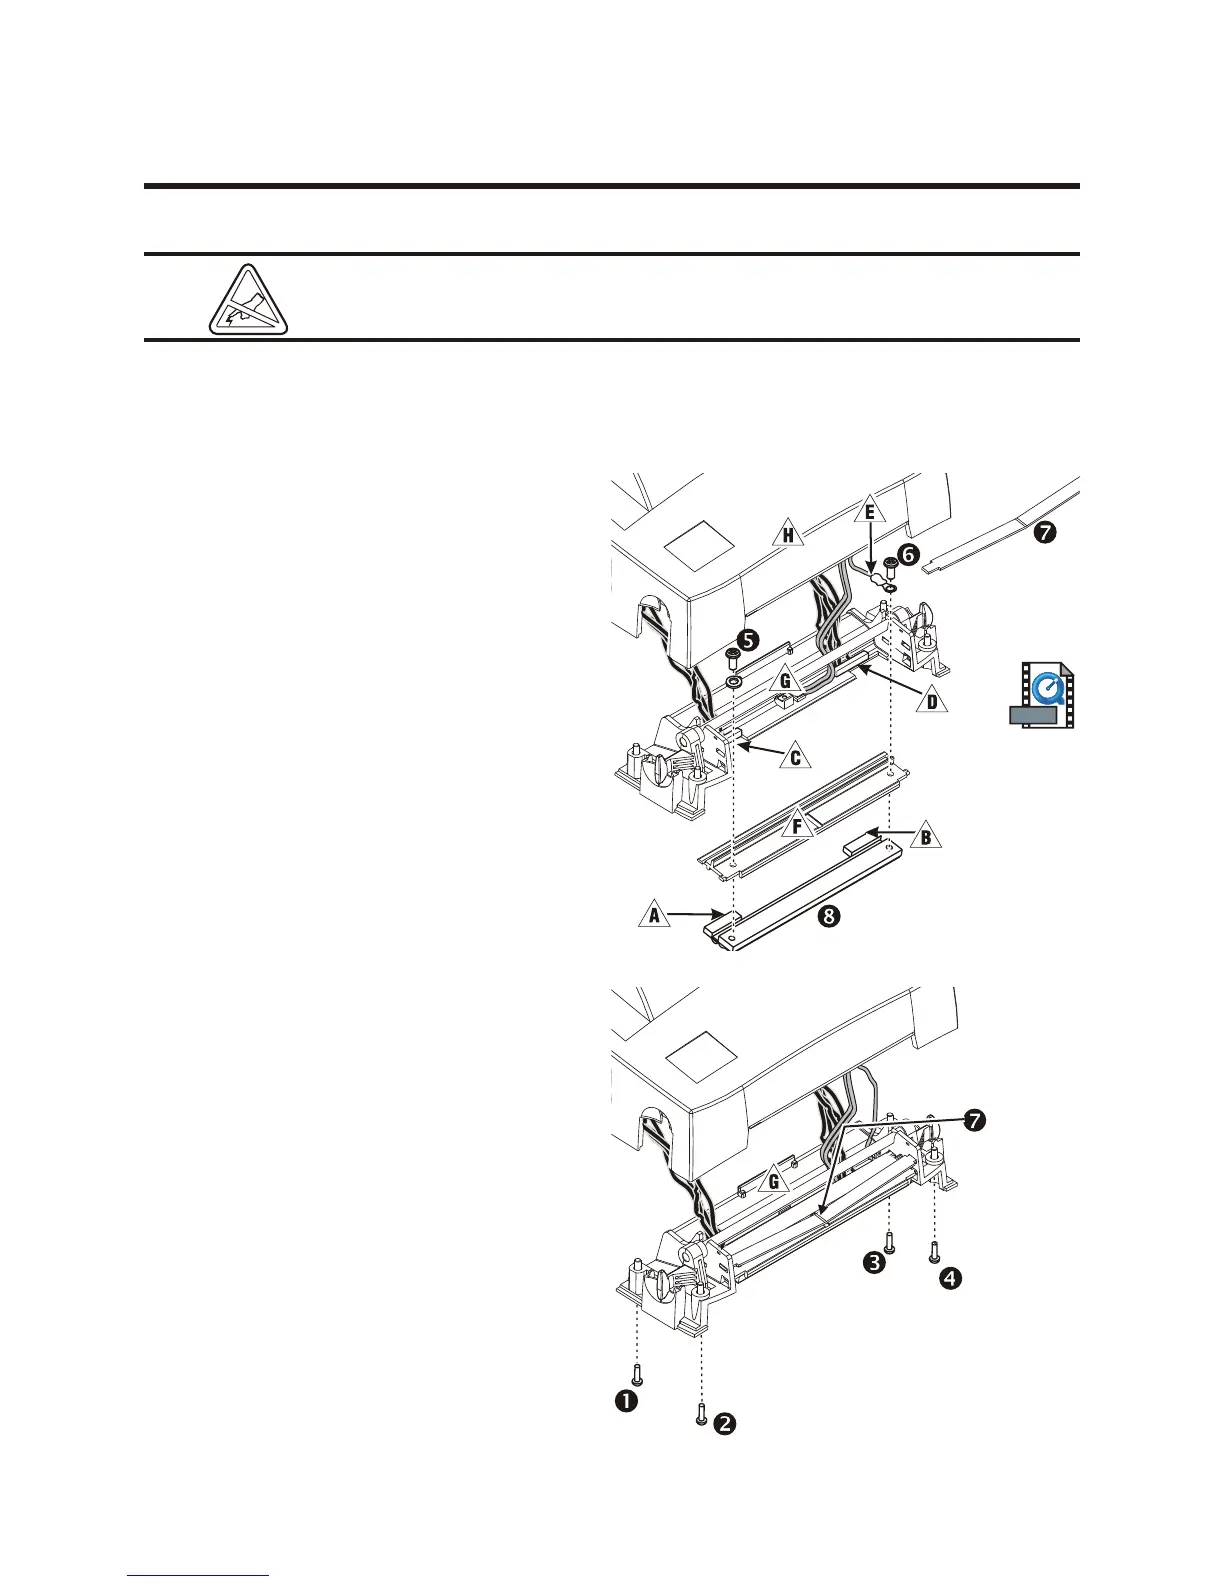
1. Use a #1 Phillips driver to loosen the four
screws 1234 that hold the latch frame '
to the top case (.
2. Grasp the print head spring 7 and pull it to
the left; then, slide it free of the latch frame.
3. Gently pull the wire bundles #$ from the
print head 8.
4. Use a #1 Phillips driver to loosen the two
screws 56 and release the print head from
the latch frame ' and bracket &.
Assembly
1. Route the print head cables #$ under
latch shaft and plug into the receptacles
!" on the print head 8.
2. Hold the print head 8 against the print head
bracket & while replacing the screws 56
and washers; attach the ground wire %
using the right screw and washer. Use a #1
Phillips driver to tighten the screws.
3. Slip the left end of the print head spring 7
into the left side of the latch bracket ';
then slide the right end into the other side.
The angle of the "v" fits into the indent on
top of the print head bracket.
22 980358-001 Rev. B