Print Head Replacement - TLP 980358-590A
Preparations
Protect against static discharge. Your work area must be static-safe and include
a properly grounded conductive cushioned mat to hold the printer and a
conductive wrist strap for yourself.
Open the printer by pulling the release latches
forward, then lifting the top cover. Remove
any ribbon from the carriage.
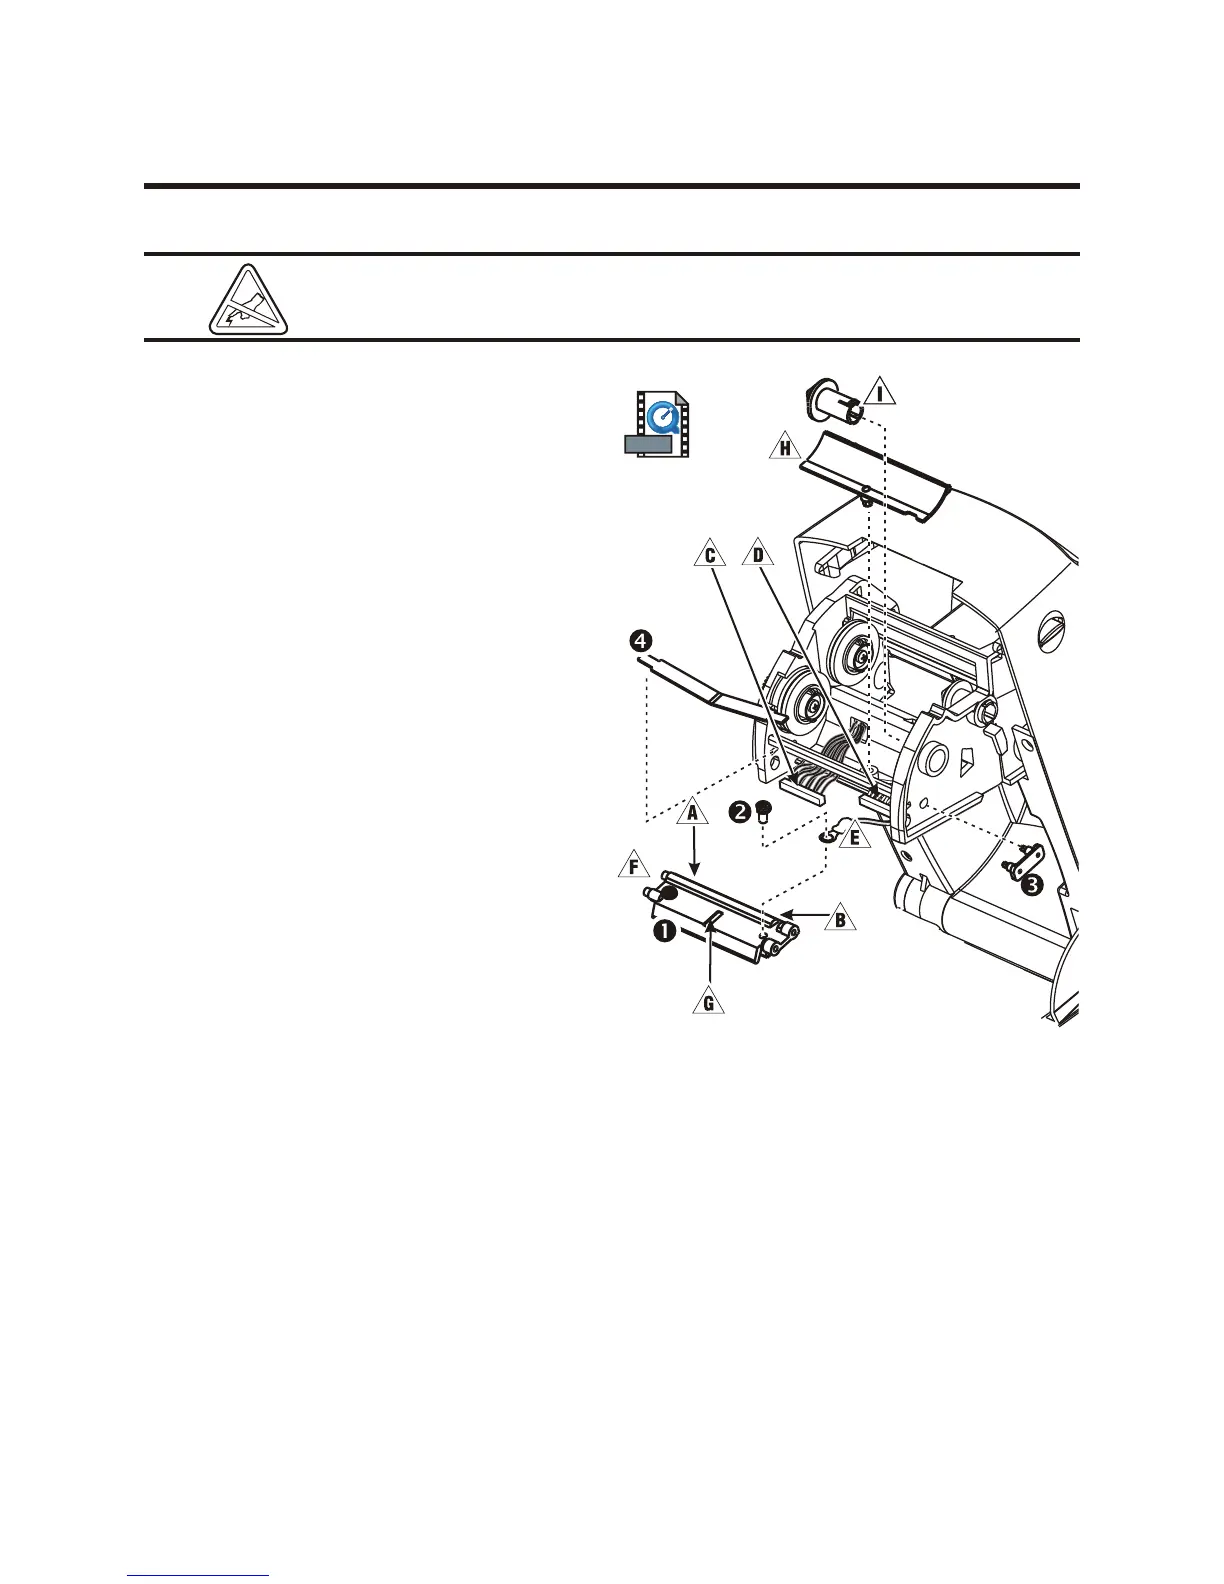
Removal
1. Grasp the print head spring 4 and pull it to
the left; then, slide it free of the carriage.
2. Use the spring to pry the print head clip 3
off the right side of the carriage.
3. Pull the print head and bracket 1 forward.
4. Use a #2 Phillips driver to remove the
screw 2 that holds the ground wire.
5. Unplug both bundles #$ of print head
wires from the left and right connectors.
Assembly
1. Detach the wire cover (.
2. Detach the ribbon take-up hub ).
3. Align the print head and bracket 1 to plug the left ! and right " connectors into the black #
and white $ wire bundles.
4. Attach the ground wire % and secure it with the screw 2. Use a #2 Phillips driver to tighten it.
5. Insert the bracket pegs & into the left side of the carriage.
6. Align the right side of the bracket and insert the print head clip 3 through the right side of the
ribbon carriage into the bracket.
980358-001 Rev. B 81