SR23 - 923-03509 3-12 CS - SERVICING
ADJUSTMENTS
PRELIMINARY SETUP
1. Allow receiver to warm up for 15 to 20 minutes.
2. Degauss receiver.
3. Connect crosshatch generator to the receiver and
“rough in” the static (center) convergence.
Follow Convergence Status.
4. Adjust for best focus.
PURITY ADJUSTMENT
1. Purity tab positioning
Set the 2 pole purity tab together at 3 or 9 o’ clock
positions and the 4 and 6 pole purity tabs together
at 12 or 6 o’ clock positions.
2. Move yoke to maximum forward funnel position.
3. Now switch crosshatch generator to a red field.
4. Pull yoke towards rear of CRT neck centered or until
red raster is displayed.
5. If red raster is not displayed as a pure red field, ad-
just the 2 pole purity tabs until a pure field is ob-
tained.
6. Check for proper yoke tilt setting.
CONVERGENCE ADJUSTMENT
1. Release locking assembly
2. Connect crosshatch generator to the receiver and
adjust static (center) convergence as follows:
a. Adjust the 4 pole static control by moving the two
tabs separately to converge red and blue lines hori-
zontally. Move the two tabs together around neck of
CRT in a 45º arc) from the top dead center position
to converge red and blue lines vertically.
b. After the 4 pole control has been adjusted to super-
impose the red and blue lines on top of one another.
Use the 6 pole static adjustment to place converged
red and blue lines over the green line. Move the two
tabs together around neck of CRT (in a 30º arc) from
the top dead center position to move the lines verti-
cally. Adjusting the two tabs separately will move con-
verged beam to the left or right. Using a cross hatch
generator capable or producing individual fields, ad-
just generator to produce a red field. Use purity tabs
to center a red stripe.
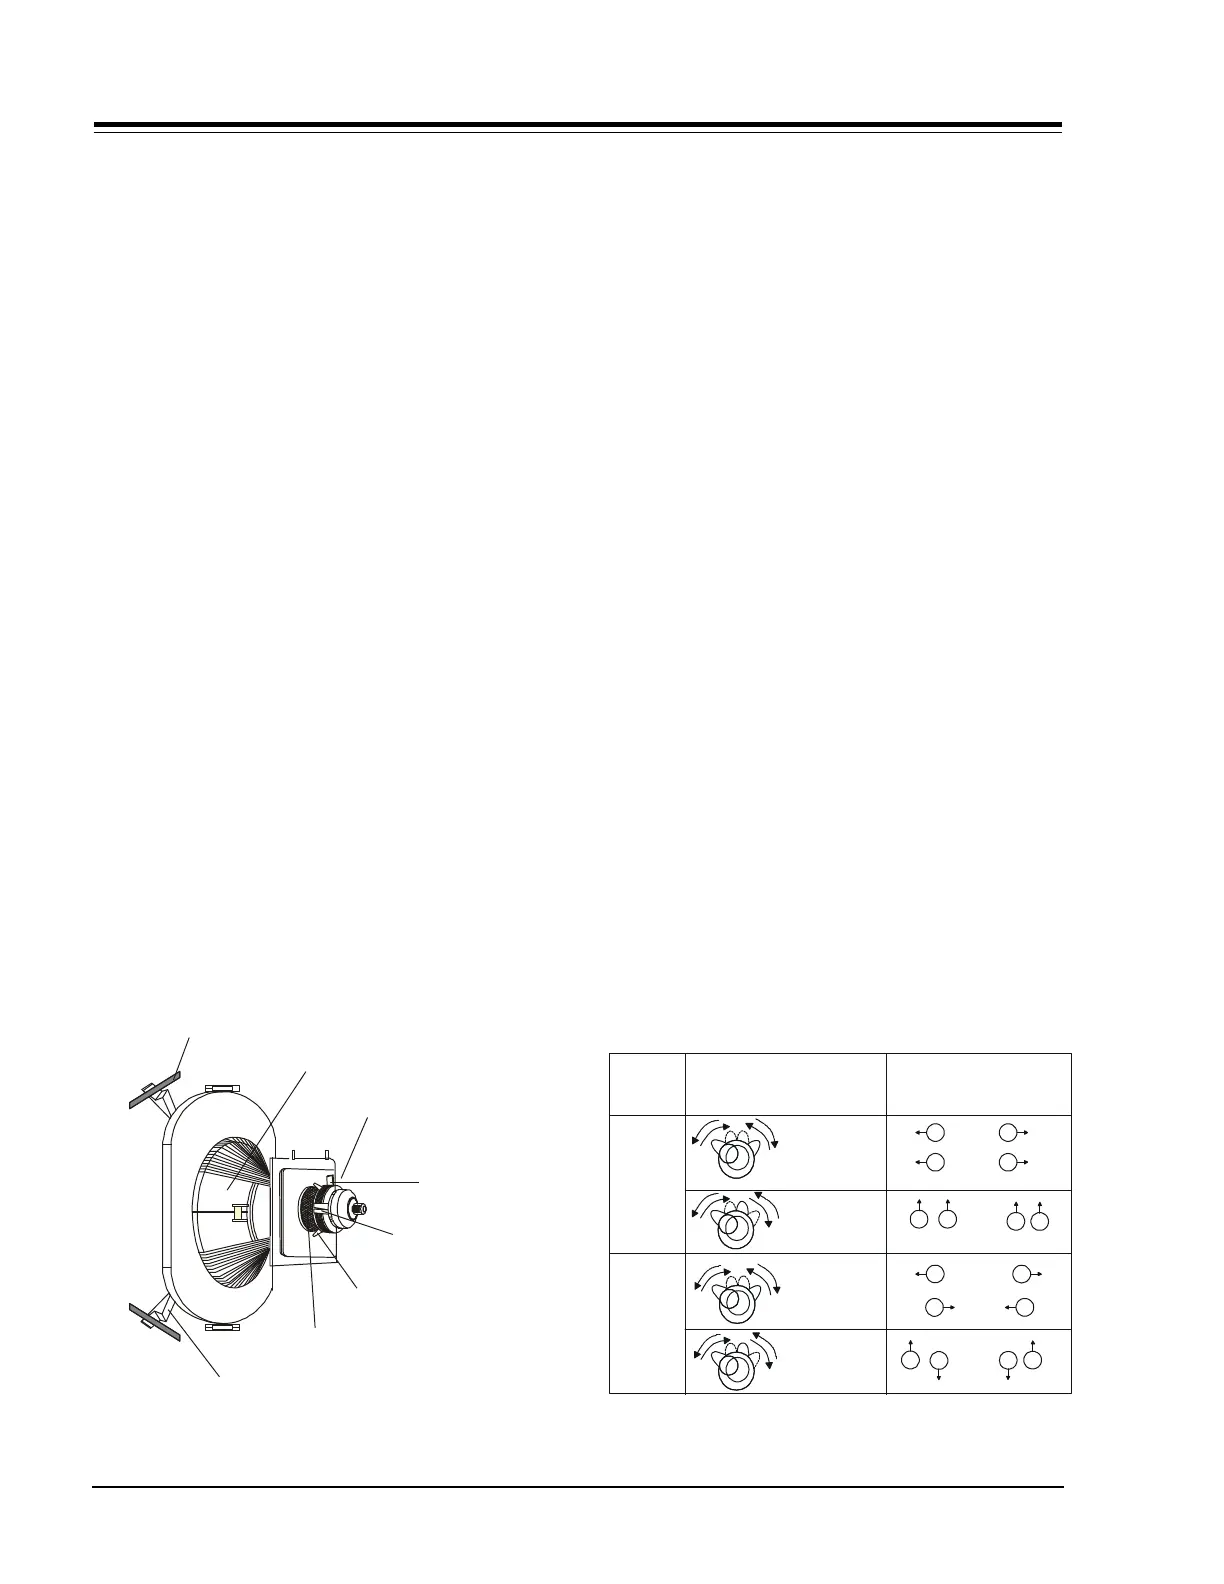
PURITY & CONVERGENCE SETUP PROCEDURE
Wedges’ Adhesive Tape (3)
Rubber Wedges (3)
Deflection Yoke
Purity & Convergence
Magnet Assembly Unit
6 Pole
Purity Magnet
4 Pole
Ring
Pairs
6 Pole
Convergence
R&B over G
Convergence
R over B
4 Pole
Rotation direction
of Both Tabs
Opposite
Opposite
Same
Same
Movement of Red
and Blue Beams
B
B
B
R R
B
BR
R
B
R
R
OR
OR
OR
B
B
R
R
OR
Adjust Tabs Beam Movement
for Convergence