21
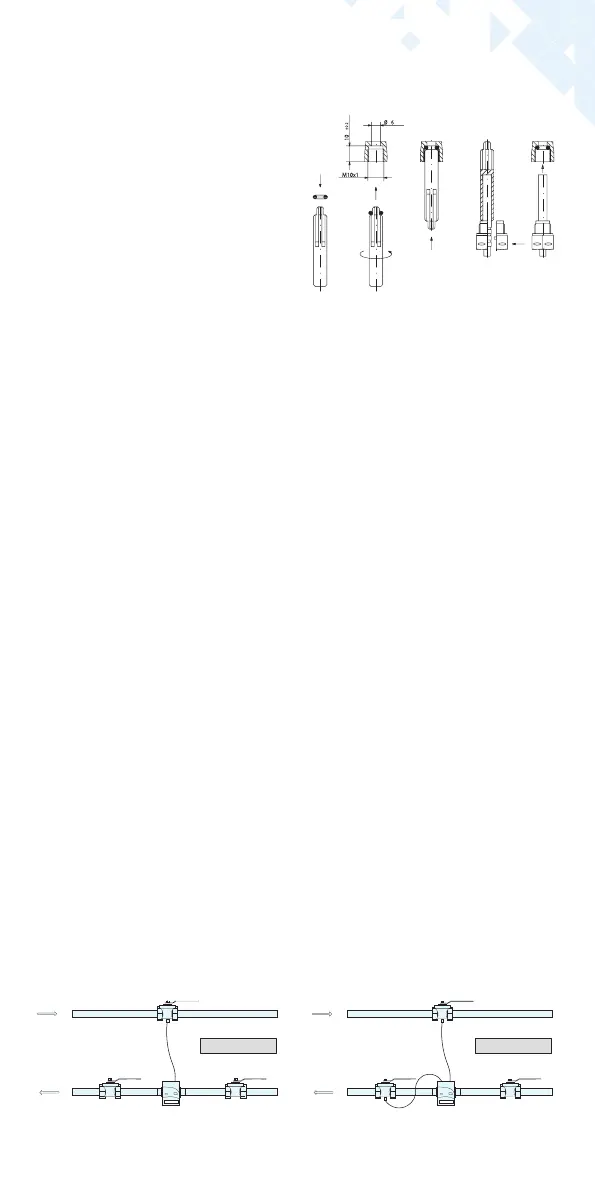
Mounting example
■
The temperature sensor instal-
lation point which is optionally
integrated in the ow sensor must
be secured.
■
Secure the sensor aer instal-
lation against unauthorised
removal with appropriate sealing
(included in accessories kit)!
■
At the versions with temperature
sensor type TS-45-5 (see type
plate at the sensor cable) both
sensors must be always immersed
directly in contact with the heat
conducting uid. The installation
in sensor pockets is not allowed.
Installation with existing immersion
sleeves
In Germany the C5 can be put into
use in connection with existing im-
mersion sleeves in accordance with
the article “Putting into use of MID
homologated temperature sensors”
released in the PTB notications 119
(2009), Edition 4. Based on current
information, the regulation has a pe-
riod of validity until 30.10.2026. For
the identication and marking of the
usable existing immersion sleeves
in connection with the C5 meter, an
identication and marking set can be
delivered from our company (order
number 137382).
■
The connecting cables may not be
buckled, extended or shortened!
■
The seal at the sensor installation
point on the ow sensor may not
be damaged.
■
Remove locking screw and seal
at the ball valve completely, if
existing.
■
Attach the O-ring to the installa-
tion aid (the 2nd O-ring is only a
spare O-ring). Using the installa-
tion aid, insert the O-ring into the
installation point according to
DIN EN 1434 with a slight circular
motion.
■
Using the other end of the instal-
lation aid bring the O-ring into the
correct position.
■
Mounting with plastic adapter:
– Insert the 2 halves of the plastic
connector into the sensor’s
three notches (crimps) and
press them together.
■
Use the mounting aid as position-
ing aid.
■
Mounting with brass adaptor:
– Slide brass screwing with
loosely mounted groove pin
onto temperature sensor in right
position
– Slide temperature sensor into
mounting aid until mechanical
stop (28 mm)
– Check again, if brass screwing is
in right position (the groove pin
must be pressed in the upper
groove which is in the closest
position to the temperature
sensor cable)
– Press in groove pin ush
– Remove mounting aid
■
Insert the temperature sensor
into the installation point and
screw it in tightly until the dead
stop of the seal on the 12-point
is reached (mounting torque 3-5
Nm).
Asymmetrical sensor installation for zelsius®
C5-CMF with one temperature sensor integrated
in the ow sensor
Symmetrical sensor installation for zelsius®
C5-CMF
Supply
Return
Consumer
Supply
Return
Consumer
 Loading...