Install the MXK
MXK Hardware Installation Guide
51
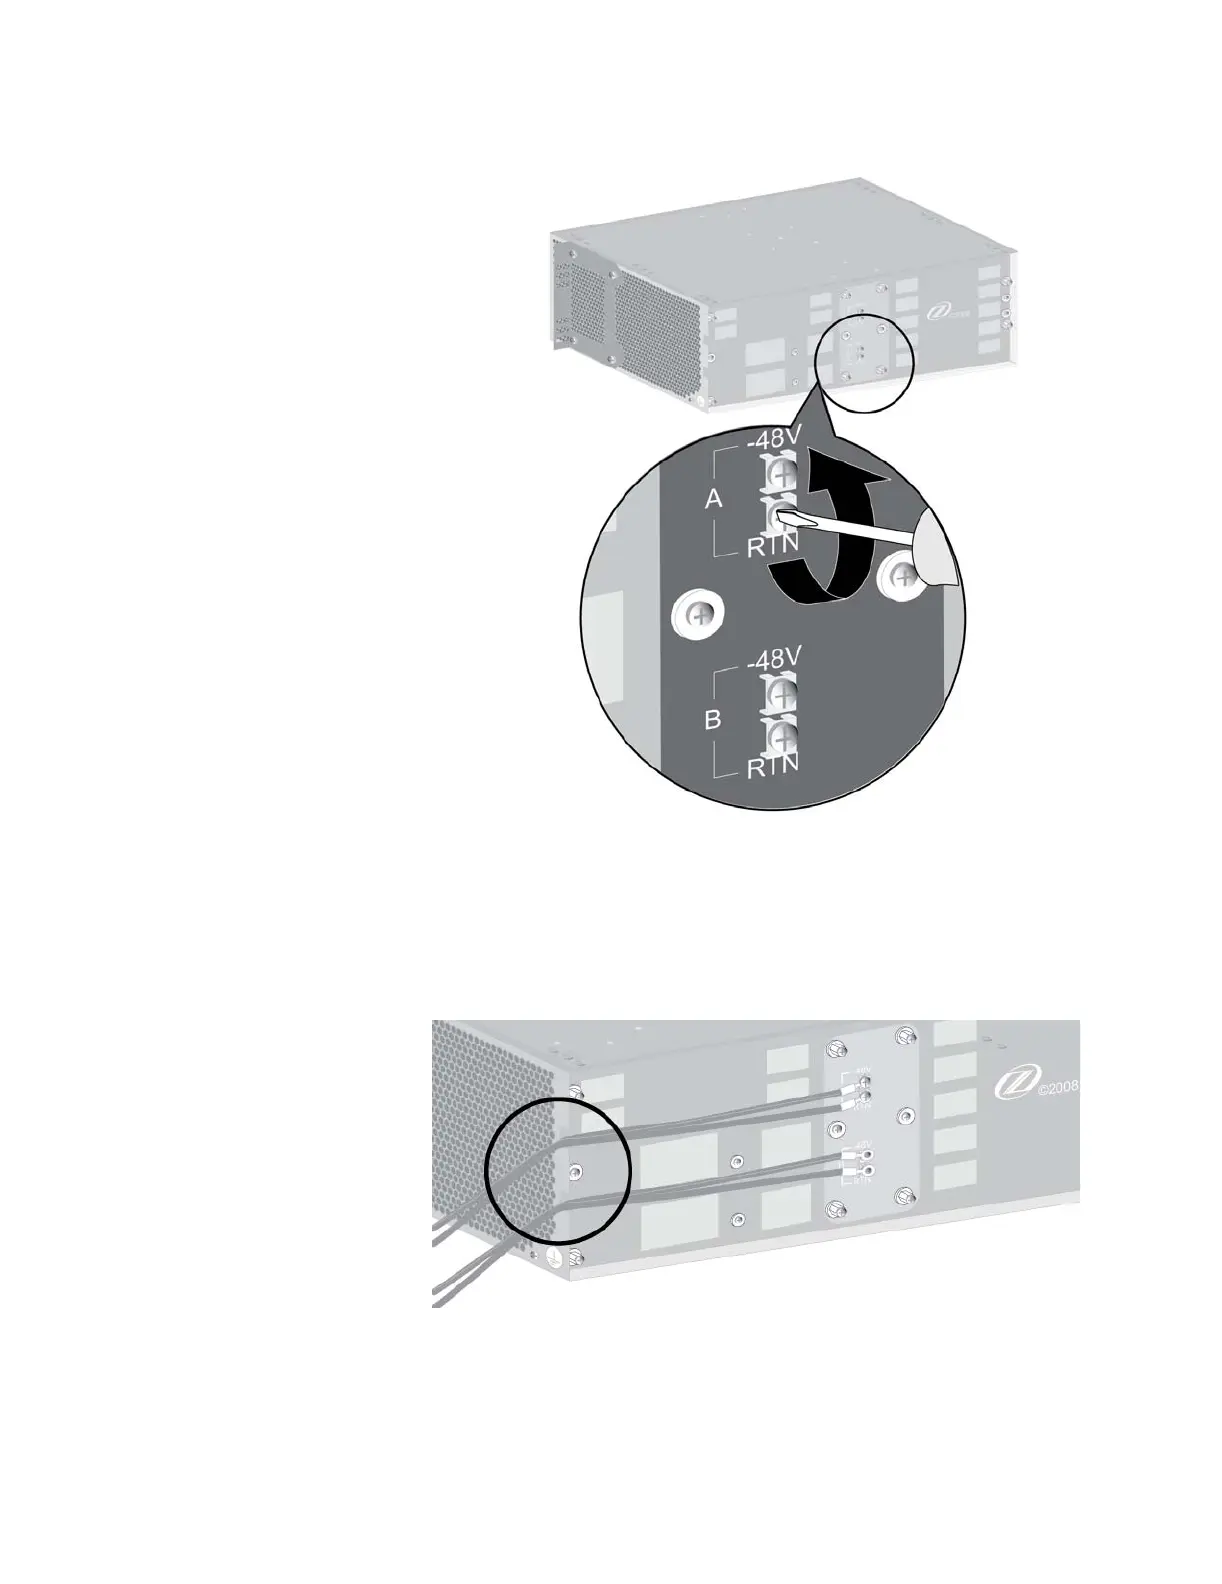
3 Dress the power supply A wires through the upper notch on either side of
the rear of the chassis. Connect them to the upper (A) power terminals
using insulated #6 ring lugs, with the negative wire on terminal –48V and
the positive wire on terminal RTN. In the same way, dress the power
supply B wires through the lower chassis openings and connect them to
the lower (B) power terminals.
4 Tighten the wire clamp screws.
Tighten the wire clamp screws using a suitable torque driver to 8 ± 1
inch-lbs (0.9 ± 0.1 N·m). Do not overtighten.