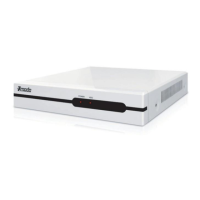
1.4 Installation & Wiring
Hard Drive Installation
A Hard Disk Drive (HDD) is not installed by the manufacturer unless the item is specifically purchased with a
HDD.
The user may install a SATA HDD with between 250GB and 2TB of storage after receiving the system.
We recommend Western Digital Caviar Green AV-GP hard drives or Seagate Pipeline hard drives because
they are engineered specifically for use in security camera environments.
Hard Drive Installation Procedure
1. Open the NVR top cover while the NVR is unplugged from its power source, take out the damping
washers in the screw bag, and then put the 4 damping washers into the clamping slots (four protruding
steps) in the case;
2. Connect the SATA data cable and HDD power cord to the HDD;
3. Lift up the hard drive with your hand, and turn over the case to make sure that the four holes at the bottom
of the case correspond to the hard drive mounting holes, and then fix the hard drive using four 4 M3*12
Head Screws plus plain washers;
4. Connect the SATA data cable and HDD power cord to the backplane (if not already connected);
5. Close the cover and fix the case with screws.
Note 1: Please select the video surveillance dedicated hard drive that recommended by the hard drive
manufacturer, in order to meet the requirements of long time & large amount of data read and write. Make
sure to purchase from an official
reseller to ensure the quality of the hard disk. Recommended resellers
include Newegg.com, Tiger-Direct, and Best Buy.
Note 2: Please format HDD for the first use, or system will send error notification of “Hard disk error”
accompanied with an audible alarm.
Note 3: No washers are actually needed for installation. The damping washers only help with noise reduction.
Wiring Instruction
Connect to the Power Supply
You should first make sure that the AC voltage connected with the NVR power adapter matches with the
requirements. Then, connect the power adapter to power input on the NVR, the power indicator on
the
front panel will turn on, indicating the power is connected correctly.
Note: Please use the power adapter included in the package to avoid any damage to the equipment.
Network Access
The device provides a standard RJ45 interface to be used with an Ethernet cable, which can easily provide
access to the LAN or WAN. During the network connection, you should provide sufficient bandwidth to
ensure the stability, smoothness, and clarity of the images transmitted over the network. It is recommended
that you have at least 1mbps upload speed from your Internet Service Provider (ISP). For remote viewing, if
the upload speed is less than 1mbps, then you may have connectivity issues trying to view multiple cameras
at the same time.