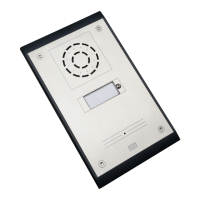
Installation manual 2N® IP Uni
•
•
•
•
•
•
•
•
•
•
•
•
•
•
•
•
2. Description and Installation
Here is what you can find in this section:
2.1 Before You Start
2.2 Mechanical Installation
2.3 Electric Installation
2.4 Button Tags
2.5 Extending Module Connection
2.1 Before You Start
Product Completeness Check
Before you start pleasecheck the contents of your2N
®
IP Unidelivery:
1x2N
®
IP Uni
1xTorx 10 / Torx 20 double-ended wrench
1x brief manual
1x mounting template
1xA5 transparent name plate foil
1xspare name plate
1xbrick flush mounting box
4x (4x12) mm stainless steel, torx screws for plastics
2xcable ties
4x frame seals
1x Certificate of ownership
2.2 Mechanical Installation
Content
Common Mounting Principles
Flush Mounting - Classic Bricks
Flush Mounting - Plasterboard
Wall Mounting
Common Mounting Principles
•
Tip
Select flush mounting where possible to make your product elegant looking, more
vandal resistant and more secure.

 Loading...