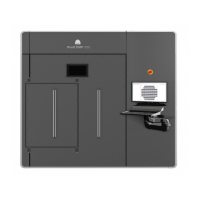
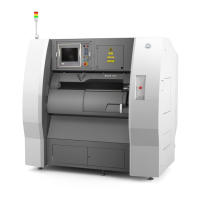
Do you have a question about the 3D Systems ProJet 860Pro and is the answer not in the manual?
Details copyright, trademarks, and usage rights for 3D Systems Inc. products and software.
States that the full warranty statement is available on the 3DS Central web site.
Outlines compliance with FCC rules regarding digital devices and radio frequency energy.
Defines the terms, conditions, and limitations of warranty and liability for 3D Systems products.
Highlights key improvements and features of the x60Pro printers.
Provides detailed technical specifications for ProJet 660Pro and 860Pro models.
Lists the necessary hardware and software for operating the 3D printer.
Explains the 3DP® Technology process used by the ProJet x60Pro printers.
Defines key terminology and components related to the ProJet x60Pro system.
Details the main exterior and interior components of the ProJet x60Pro system.
Identifies and describes the components on the rear of the ProJet x60Pro printer.
Describes the service station component and its function within the printer.
Explains the purpose and location of the parking caps on the printer.
Details the carriage, print heads, and pogo pins assembly.
Explains how to use the control knob for navigating menus and functions.
Provides an overview of the LCD menu structure for ProJet 660Pro and 860Pro.
Lists resources for additional information on the printer and software.
Provides contact information for technical support and customer service.
Instructions for vacuuming loose Core material from the printer build chamber and components.
Steps to clean the debris separator to maintain vacuum system efficiency.
Procedure for cleaning the parking caps to ensure print head longevity and accuracy.
How to clean the fast axis rails and carriage for smooth movement and accuracy.
Steps to clean the service station for optimal printer performance and print head health.
Guide to installing the necessary 3DPrint software for printer operation.
Steps to open a 3D model file within the 3DPrint software.
How to verify and set default printer settings before starting a build.
Guidance on reviewing and confirming build settings prior to printing.
Checklist for ensuring the printer's build area is clean and ready for printing.
Instructions on how to initiate and manage the printing process via 3DPrint.
Explains the drying cycle after printing to add strength to the part.
Overview of the two-stage cleaning process (coarse and fine) for printed parts.
Procedures for removing bulk Core material from the build area.
Steps for removing residual Core material using the PPU or CRS.
Reminder to perform routine cleaning after part removal and before post-processing.
Method for finishing parts using Epsom salt water for a smooth surface.
Details on using ColorBond infiltrant for strengthening and durability.
Information on using StrengthMax infiltrant for superior strength in functional models.
Explains the Printer Status dialog for checking printer readiness before printing.
Step-by-step guide for replacing printer print heads.
Instructions for adding binder to the printer cartridges when prompted.
Procedure for adding Core material to the printer's feeder.
Steps to refill the cleaning solution cartridge when it is low.
Guide on how to replace the printer's waste tray when it is full.
Ensures the build bed platform is correctly positioned for printing.
States the printer cannot start with the cover open and must be closed.
Procedure for lubricating the fast axis bearings when prompted.
Steps to lubricate the piston screw on the ProJet 660Pro model.
Steps to lubricate the piston screws on the ProJet 860Pro model.
Procedure for lubricating the slow axis bearings when prompted.
Guide to cleaning the alignment sensor window after print head changes.
How to clean debris from the fast axis pulleys for optimal motion.
Steps to clean the slow axis rails and pulleys for smooth operation.
Procedure for cleaning the spreader roller to ensure smooth horizontal surfaces.
Guidance on preparing the printer for extended periods of non-use.
Initial troubleshooting steps to attempt before calling service.
Flowchart for diagnosing and resolving printer power-up issues.
Addresses errors related to print heads and weak part quality.
Troubleshooting steps for failed print head alignment patterns.
Solutions for errors related to the printer's fast axis movement.
Solutions for errors related to the printer's slow axis movement.
Steps to resolve issues connecting the printer to the network.
Explains and provides solutions for packet timeout communication errors.
Introduces common part quality issues and directs to specific sections.
Addresses issues causing streaky prints or layer splitting.
Diagnoses problems causing poor horizontal or vertical surface finish.
Covers various other issues like vacuum suction and binder cartridge errors.
Provides detailed explanations for specific printer error codes.
Links to resources for materials and service information.
Information to gather before contacting service for troubleshooting assistance.
| Technology | MultiJet Printing (MJP) |
|---|---|
| Resolution | 600 x 540 dpi |
| Connectivity | Ethernet |
| Layer Thickness | 32 microns |
| Power Requirements | 208-240 VAC, 50/60 Hz, 30 A |
| Materials | Visijet M2R-WT, Visijet M2R-CL, Visijet M2-GYP |
