11Translation of Original Instructions
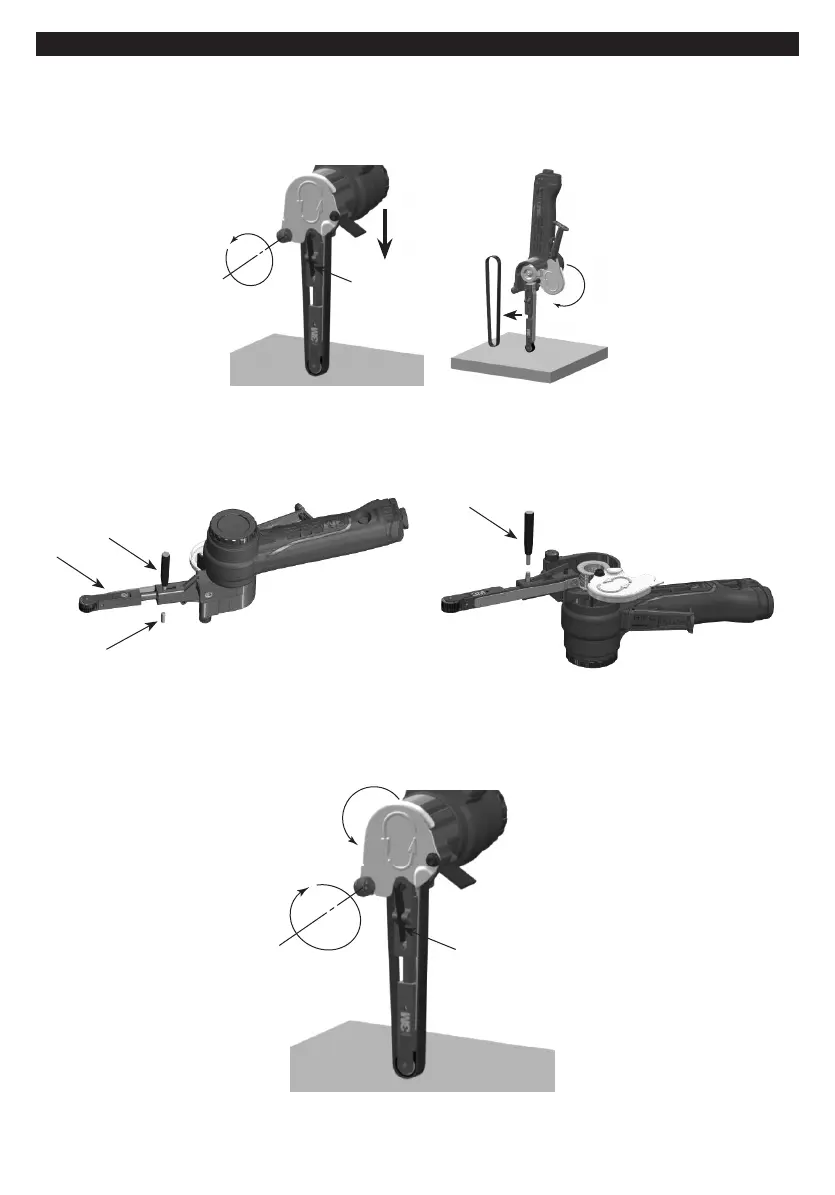
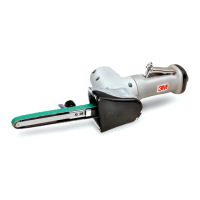
TO INSTALL/REMOVE THE CONTACT ARMS
1. Disconnect the tool from the air line.
2. Hold the tool with the contact arm facing downward. Push the contact arm against a hard surface until the safety latch (A) clicks
into the locking position.
3. Release the set screw (B).(See Fig. 1)
4. Rotate the belt cover (C) and remove the belt.(See Fig. 2)
(Fig. 1)
B
A
(Fig. 2)
C
5. Press the safety latch (A) to release the contact arm to its original position.
6. Place the tool in horizontal position with the cap facing upward (See Fig. 3). Use a pin punch (D) to tap out the pin (E). Remove and
replace the contact arm (F).
7. Place the tool with the cap facing downward. (See Fig. 4). Use a pin punch (D) to install the pin (E).
D
F
E
(Fig. 3)
D
(Fig. 4)
8. Repeat Step 2.
9. Install the belt.
10. Repeat Step 5.
11. Flip back the belt cover and tighten the set screw (B). (See Fig. 5)
B
C
A
(Fig. 5)