INSPECTING THE RESPIRATOR COMPONENTS
P/N 595373-01 Rev C 202004
11
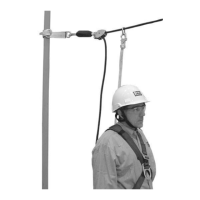
5 Verify that the quick-disconnect operates properly. Breathing regulators equipped with a quick disconnect use a
pull-back sleeve coupling.
a While pushing the plug D into the socket, pull the locking sleeve E back toward the guard. The plug D will
separate. See Figure 2-7.
Figure 2-7 Testing the quick-disconnect
b To reconnect, align the HUD plug with the mating connector. A collar on the female coupling prevents
misalignment of the connectors. Verify that the HUD plug is properly aligned and fitted into the mating socket.
– Push plug D into the socket until the locking sleeve E pops forward.
– Test for proper engagement by tugging on the coupling.
6 If the regulator is not attached to the facepiece, proceed as follows:
a Align the regulator outlet port with the facepiece port. (The red purge valve on the regulator will be in the 12
o’clock position). Insert the regulator into the facepiece port.
b Rotate the regulator counterclockwise (as viewed from inside of facepiece) until the red purge valve knob is
on the left side of the facepiece. The lock tab of the E-Z Flo+ regulator or the latch on the E-Z Flo C5
regulator will lock into the facepiece retainer with a click. When the lock tab or latch is properly engaged,
the regulator will not rotate.
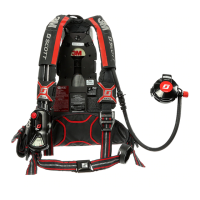
7 Verify that a full cylinder is properly installed in the backframe and that the reducer hose coupling is
hand-tightened to the cylinder valve outlet.
If you do not find any damage to the respirator, proceed to “Performing Operational Testing” on page 12.
NOTE
Do not use tools to tighten the hose couping, Over-tightening the hose coupling may damage the gasket
seal.
 Loading...