30
70-2011-5643-0 Issue Date: 10/2015
3M
™
Steri-Vac
™
Sterilizer/Aerator GS Series
Site Planning and Installation Guide
VI: Install Guide for 3M
™
In-Wall Mounting Unit
General Information
Note: All figures for this section
are located at the end of
Section VI for reference.
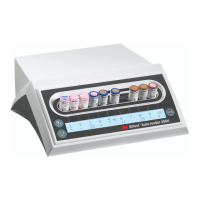
The 3M
™
In-Wall Mounting Unit 1238 is a kit that contains the 3M
™
Stacking Rack 1237 along with a
stainless wall bezel and front trim for flush mount installation as shown in Figure 18. The Stacking Rack
is a two level apparatus that holds two 3M
™
Steri-Vac
™
Sterilizer/Aerator GS Series, Model GS5 or one
GS Series sterilizer, Model GS5 and one 3M
™
XL Aerator.
The purchaser should understand and comply with all national, state and local regulations related to
installing the In-Wall Mounting Unit 1238.
To begin the installation process, remove the Stacking Rack 1237 from its shipping carton.
Be sure to check for any shipping damage and report any damage immediately to the shipping
company. Inspect the major components as depicted in Figure 20.
To prepare the In-Wall Mounting Unit 1238 for installation, remove the feet from the bottom of the
Stacking Rack 1237 and install the supplied casters using
5
/
16
× 1 inch bolts, nuts and washers.
Turn the Stacking Rack over so it is sitting on the casters and locate the upper frame and joining tabs.
Attach the joining tabs to the upper frame with
5
/
16
× 1 inch bolts. Remove two of the plastic caps from
the front of the Stacking Rack and install the upper frame as shown in Figure 19.
General Specifications
The Access Area is the space into which the In-Wall Mounting Unit 1238 is placed. The access area
must be well ventilated:
• to maintain an ambient temperature of not greater than 35°C (100°F). Higher ambient
temperatures may impact the Sterilizer/Aerator 38°C cycle temperature or cause 38°C cycle
to abort.
• by having a minimum of 10 air exchanges per hour.
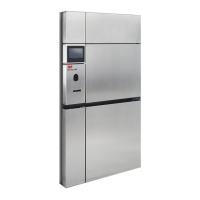
Finished Installation
• Figure 18 provides a diagram of a completed installation. This example shows a GS Series sterilizer,
Model GS5 on the top shelf and a second GS Series sterilizer, Model GS5 on the bottom shelf.
• Figure 21 shows the dimensions of the door frame opening required for the In-Wall Mounting Unit.
• Figure 22 shows the wall preparation for a double door GS Series sterilizer pass-through
configuration.
 Loading...