TroubleshootingGuide
27|Page
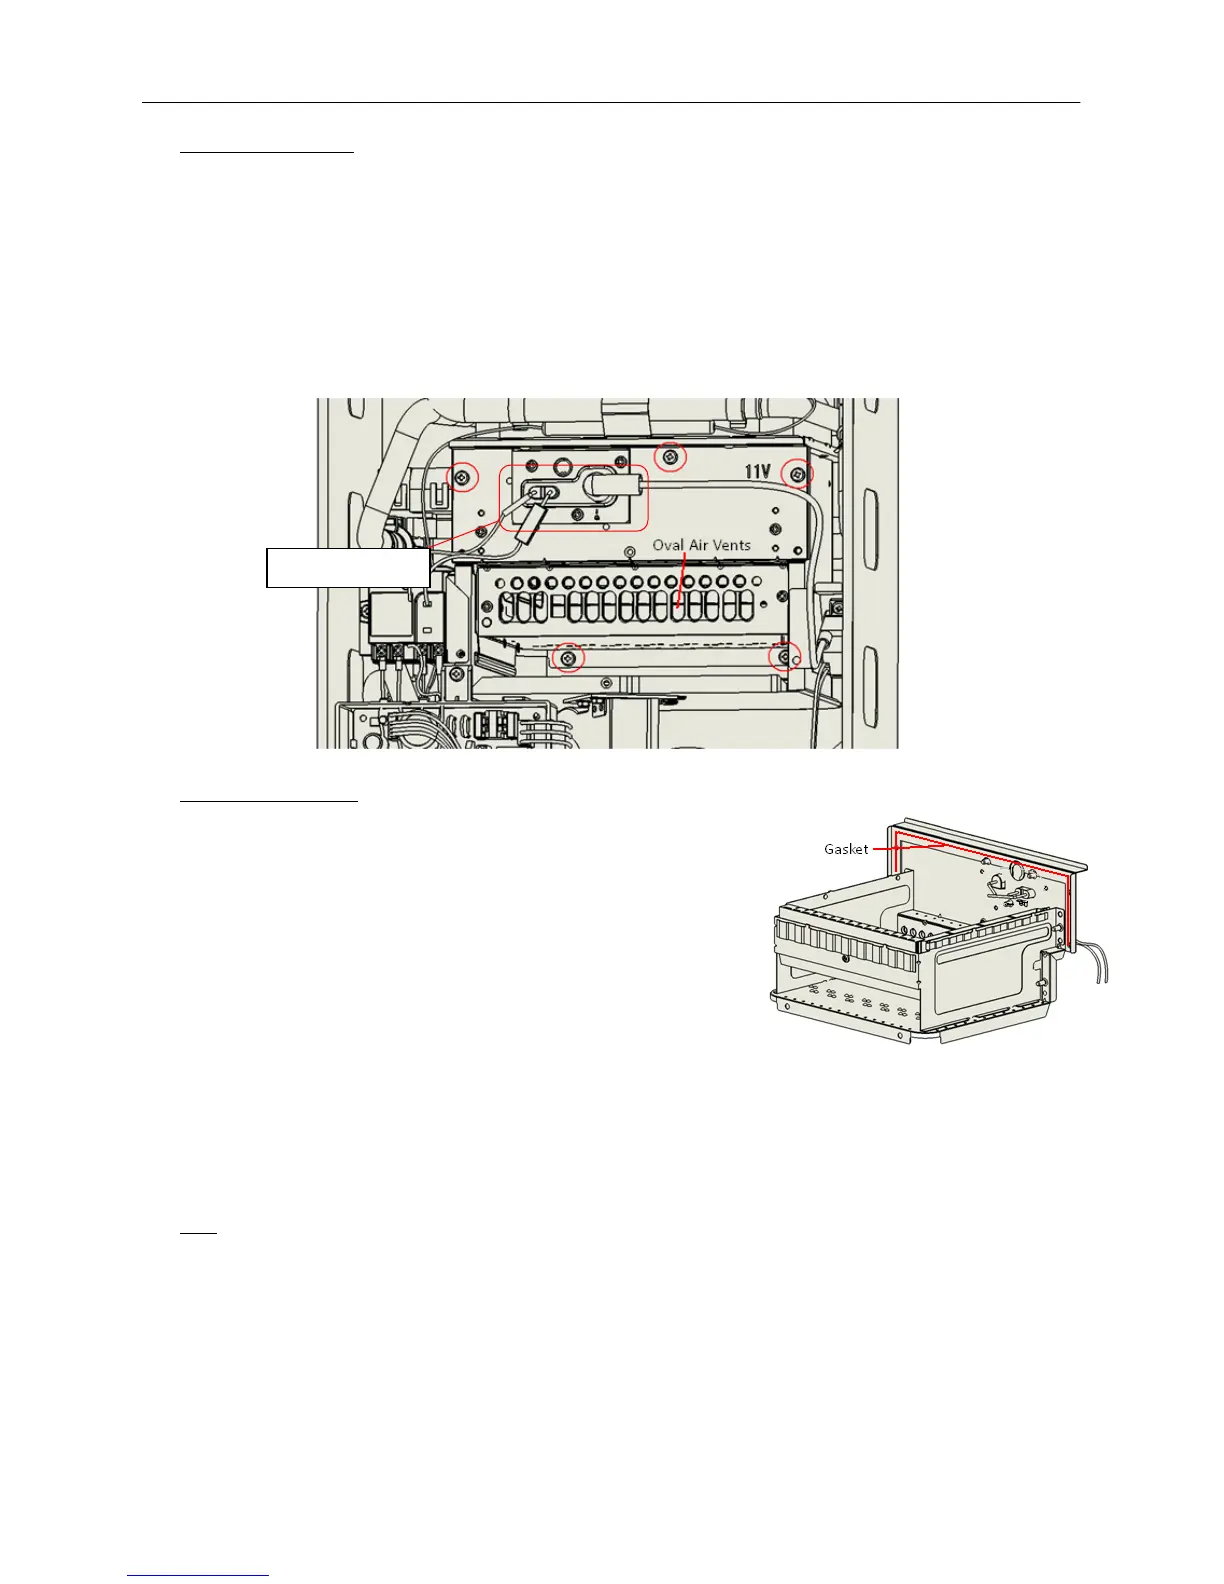
6) BURNERASSEMBLY
‐Nowproceedtoremovetheburnerassembly.
a. RemovethefivewidepanheadPhilipsscrewsholdingtheburnertothecombustionchamber.
Therearethreeatthetopoftheburner.Therearetwoatthebottomoftheburnertotheback
ofthecombustionchamber.
b. Disconnecttherodassembly:Orangeflamesensor,YellowAFR,Blackigniterwire
c. Removetheburner.Itmaybehardtotakeout,sotrythefollowing:
i. Withpliers,graspbetweentheovalairventsinthefrontoftheburneronthefarleftandpull
firmly.
Repeatontherightvent.
ii. Nowpullfromthecenteranditshouldslideoutreadily.
d. Inspectthegasket.(Minorsurfacetearsareallowable.Majorseparationsarenotacceptable.
7) CLEANTHEBURNER
–Usedegreaserinapumpactionbottle.
a. Protecttheburnergasketfromdirectwaterpressure.
IFthegasketbecomescompromised,pleasecontactthe
TechnicalServiceDepartmentforfurtherassistance.
b. Thoroughlysaturatetheburnerwiththecleaningsolution
fromthetop,downthroughtheslots,aswellasthe
openingsinthefrontoftheburneruntiltheburneris
soakingwet.
c. Lettheburnersitfor5minutes.
d. Removetheburnerfromthesolution.Settheburner
ina
sinkinitsnormaluprightpositionandwashtheburner
withahighflowofwaterdownintotheslots,startingatthebackandmoving forward.Again,
ensurethatnocontactismadewiththegaskets.
e. Usecompressedairtoclearexcessivewaterfromtheburner
afterrinsing.Inspectthegasket.
(Minorsurfacetearsareallowable.Majorseparationsarenotacceptable)
8) FAN
‐Thefanisprobablycoatedwithdustaswell.
a. Placeatowelatthebottomoftheheatexchangertocoverthesquareporttothefan.This
towelwillcatchallthedustblowninthenextstep.
b. Usecompressedairtoblowintothefan.It
willrotateanddustwillflyoutofthefanhousing
intothetowelabove.
Rod Assembly
Figure27
Figure28