TroubleshootingGuide
25|Page
6. MAINTENANCE
Become familiar with the components before attempting these procedures, utilizing the Installation
Manualandreferencingthecomponentschematiconthelastfewpagesofthemanual.
Safetyisthemostimportantpartofthisguide.Theseproceduresmustbedonebyalicensedcompetent
technician.A.O.Smithisnotliable
fortheactionsofthetechnicianifhe/shefailstoadheretoanyorall
safetyprocedures,specificallyinregardstoelectricalandgassafety.
CLEANINGTHERODASSEMBLY
1) TOOLS
‐Gatherthefollowingmaterialstogether:
a. Sheetof100GritSandpaper
b. #2PhilipsScrewDriver
c. Flashlight
2) POWER
‐Disconnectpowertoyourunitbyeitherunpluggi ngitfromthewalloutlet,orbythecircuit
breaker,dependingonthesetup.The3‐digitLEDonthePCBshouldnotbelit.
3) FRONTCOVER
‐Removethefrontcover.Itis
heldonbytwoscrewsonthetopcornersofthe
tanklessunit.
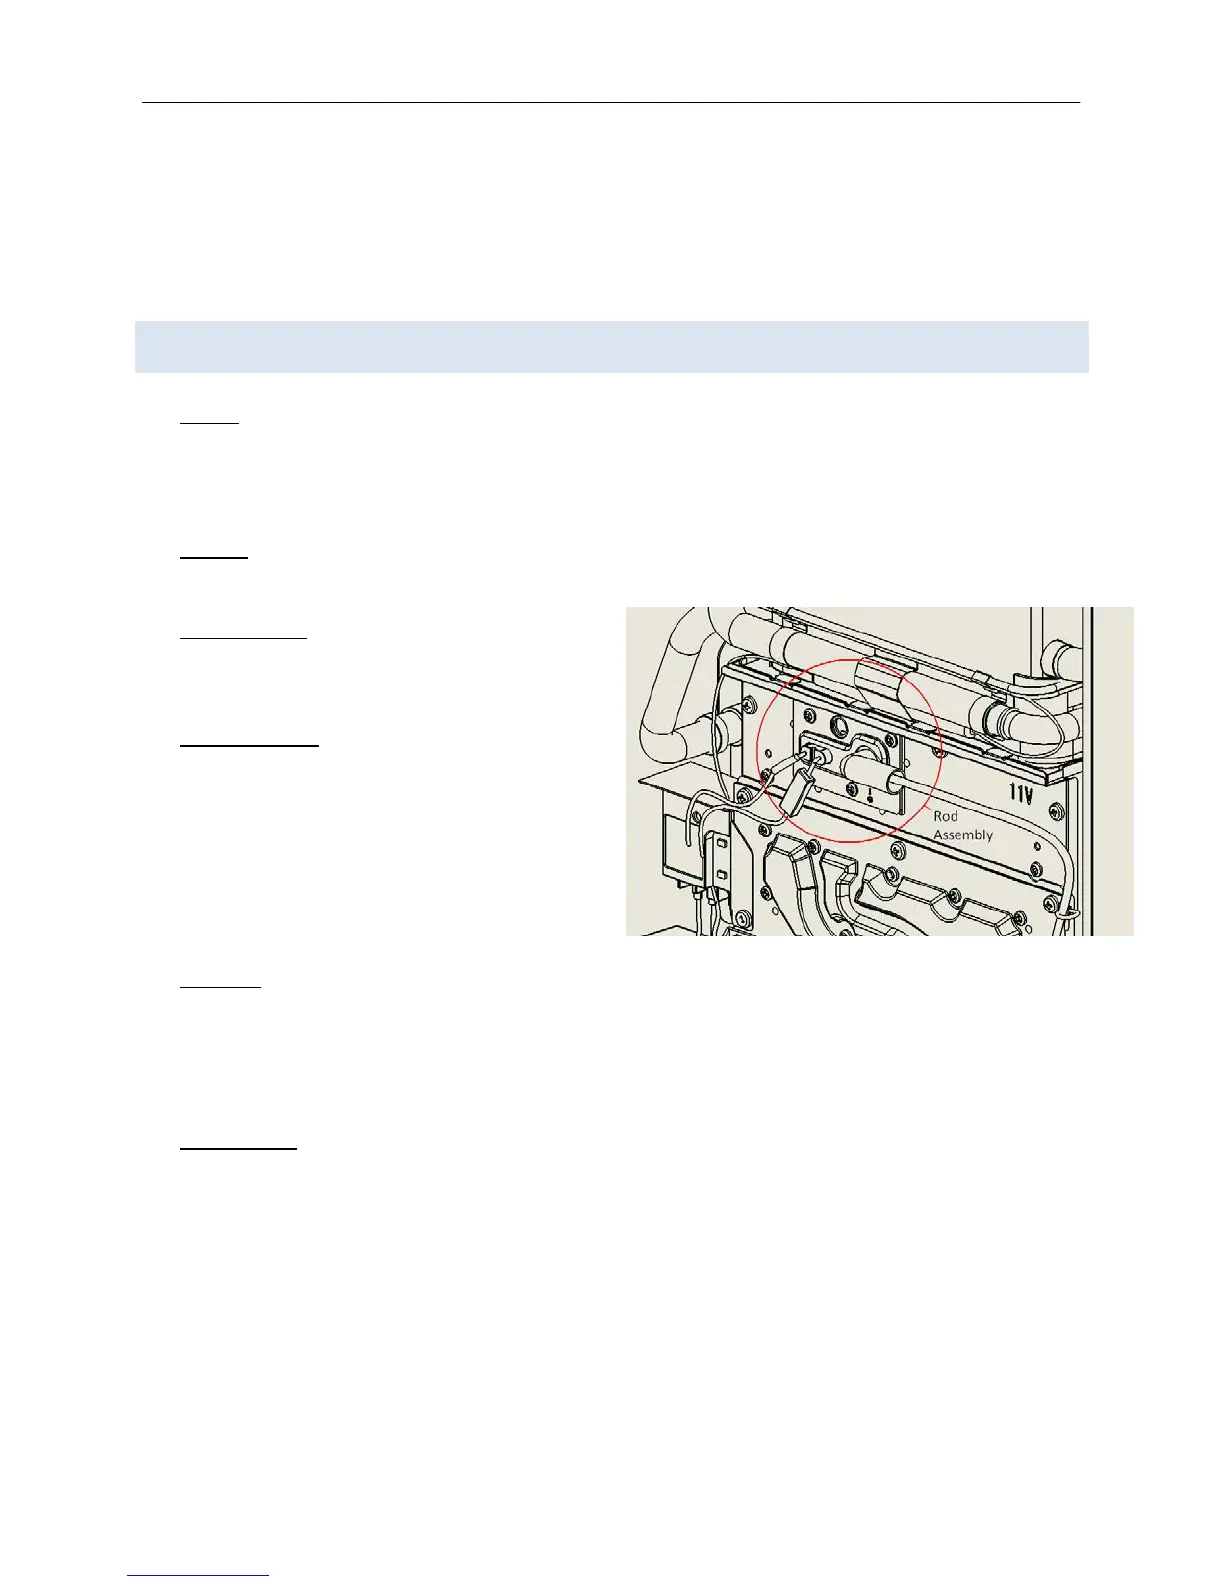
4) RODASSEMBLY
–
a. Locatetheblack,yellow,andorangewires
locatedinthecenteroftheunit.
b. RemovethethreePhillipsheadscrews
holdingthepanelinplace.
c. Pulltheassemblyout.Caution,allpieces
areseparate.Becarefultonotlosethe
sightglass.
5) SENSORS
–Itisimportanttobeverygentlewiththesensorswhilecleaningthem,astheywilleasily
bendoutofplace.Theiroriginalpositionrelativetotheburnerneedstobeunalteredtofunction
properly.
a. Cleantheflamesensorwith100gritsandpaper,thoroughlytoabrightfinish.
b. Cleantheairfuelratiorodwith100gritsandpaper, thoroughlytoabrightfinish.
6) REASSEMBLE
‐Reassembletheunitinreverseorder–sightglass,gasket,rods,andmetalcover.Key
pointstoremember:
a. Connectall3wiresonfrontofburner.
b. Inspectallofthegaskets.
Figure24