29
6. MEASUREMENT
6-1 Preparing the Sample (For the SV-A series)
* Vibration or shock during transportation may cause a display value error. Before measurement,
calibrate the viscometer using the sample cup that will be used for measurement. For calibration
with purified water, refer to “8-2-3 Simplified Calibration Using Purified Water”. (Only for SV-1A/10A)
Model: SV-1A
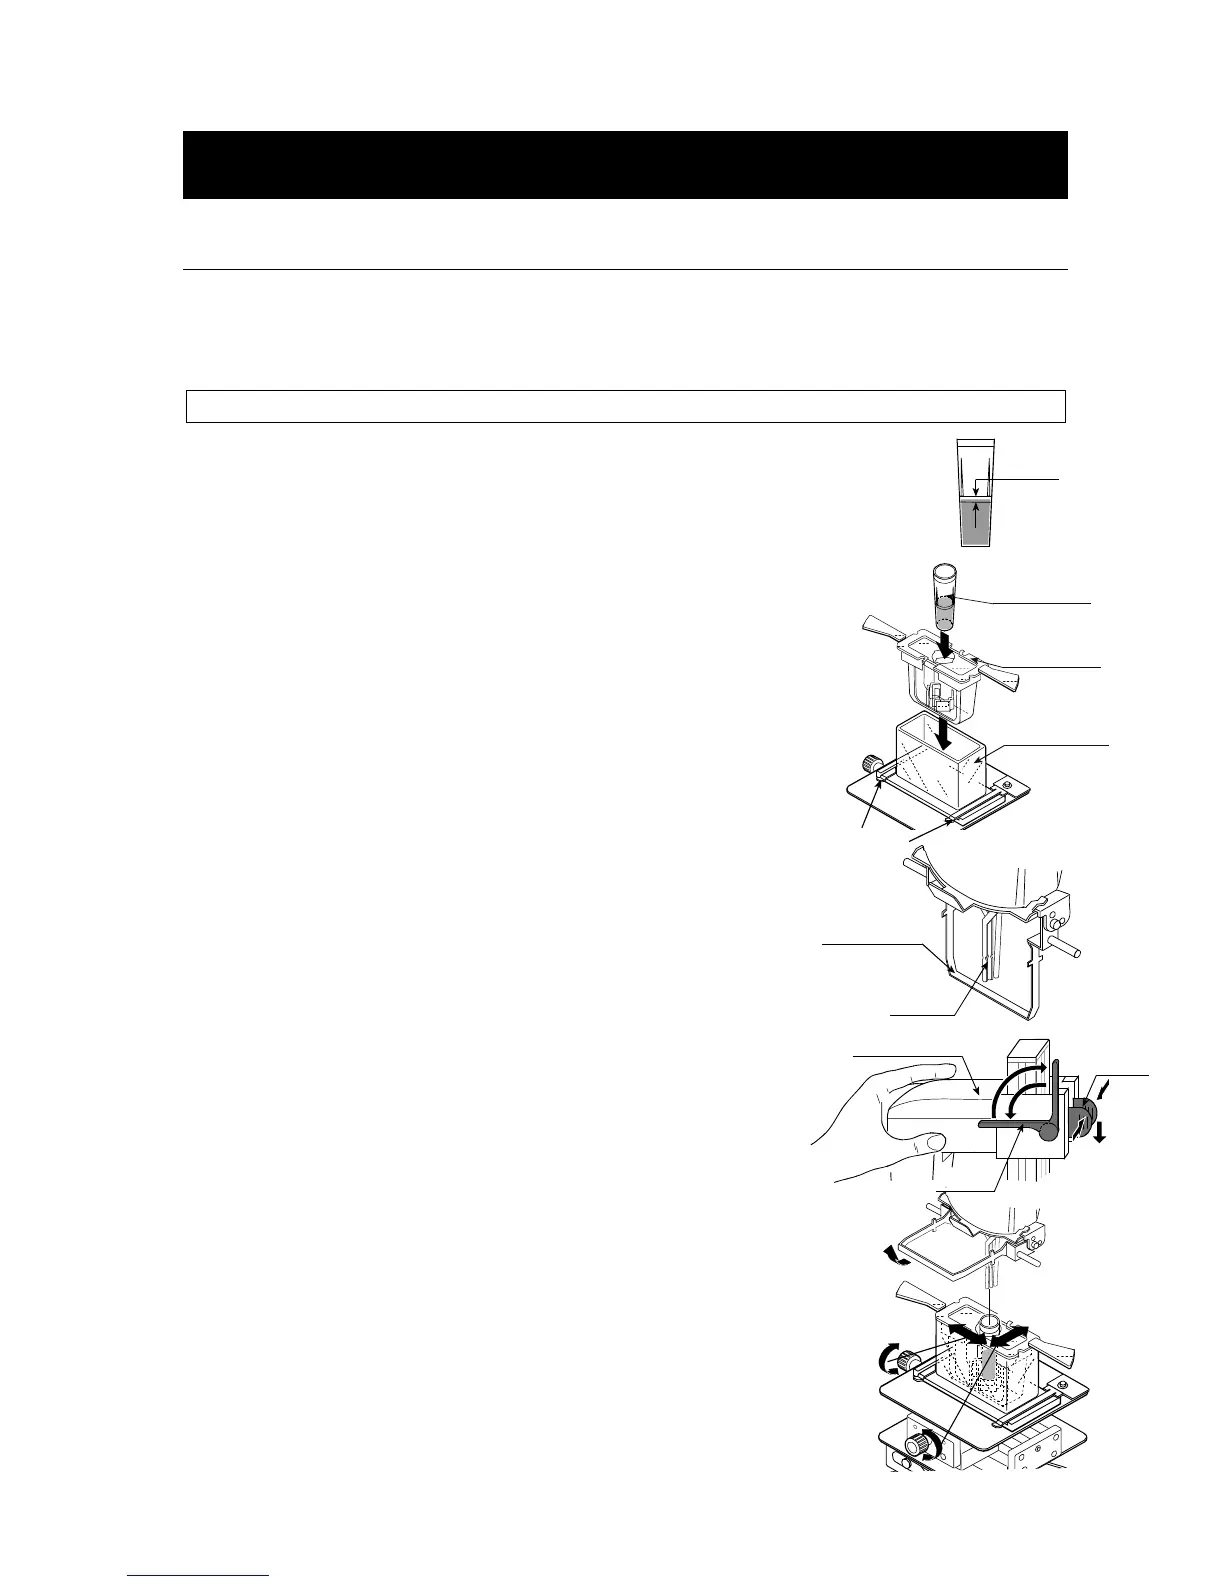
1 Pour the sample into the cup until its surface is between the level
gauges.
- With the 2 mL sample cup, the lower level gauge indicates 1.8
mL, the upper level gauge indicates 2 mL.
- With the 45 mL sample cup, the lower level gauge indicates 35
mL, the upper level gauge indicates 45 mL.
*The glass sample cup does not have level gauges.
2 Attach the cup on the table along the guides.
- With the 2 mL sample cup, place the sample cup in the sample
cup holder (For 2 mL), and set it into the 45 mL sample cup.
* When using the sample cup holder,
select either the transparent
holder or the black holder, depending on the sample color.
3 Confirm that the protector is in the position as shown in the
figure.
Raise the lever to release the sensor unit.
4 Pinch the grips, support the front side of the sensor unit and
gently lower the sensor plates above the sample surface.
Adjust the X-Y-Z stage if necessary.
5 Lower the lever to secure the sensor unit.
6 Confirm that the positioning of the sensor plates is in center of
the sample cup by adjusting the X-Y-Z stage.
- When using the 2 mL sample cup, raise the protector.
Sample cup
(2 mL)
Sensor
plate
Protector
Level
gauges
Lever
Grips
Sensor unit
Guides
Sample cup
<2 mL>
Sample cup
holder
<For 2 mL>
Sample cup
<45 mL>
 Loading...