76
10-4 Configuration of the COM port
When connecting the SV-A / SV-H series to a personal computer, confirm that the COM port setting
match up.
(1) Configuring of the COM port
1 Click the START bottom → the“Setting” →
the“Control panel”.
2 Double-click the“System”
.
3 Click the“Hardware”
Tab, and click
the“Device Manager” .
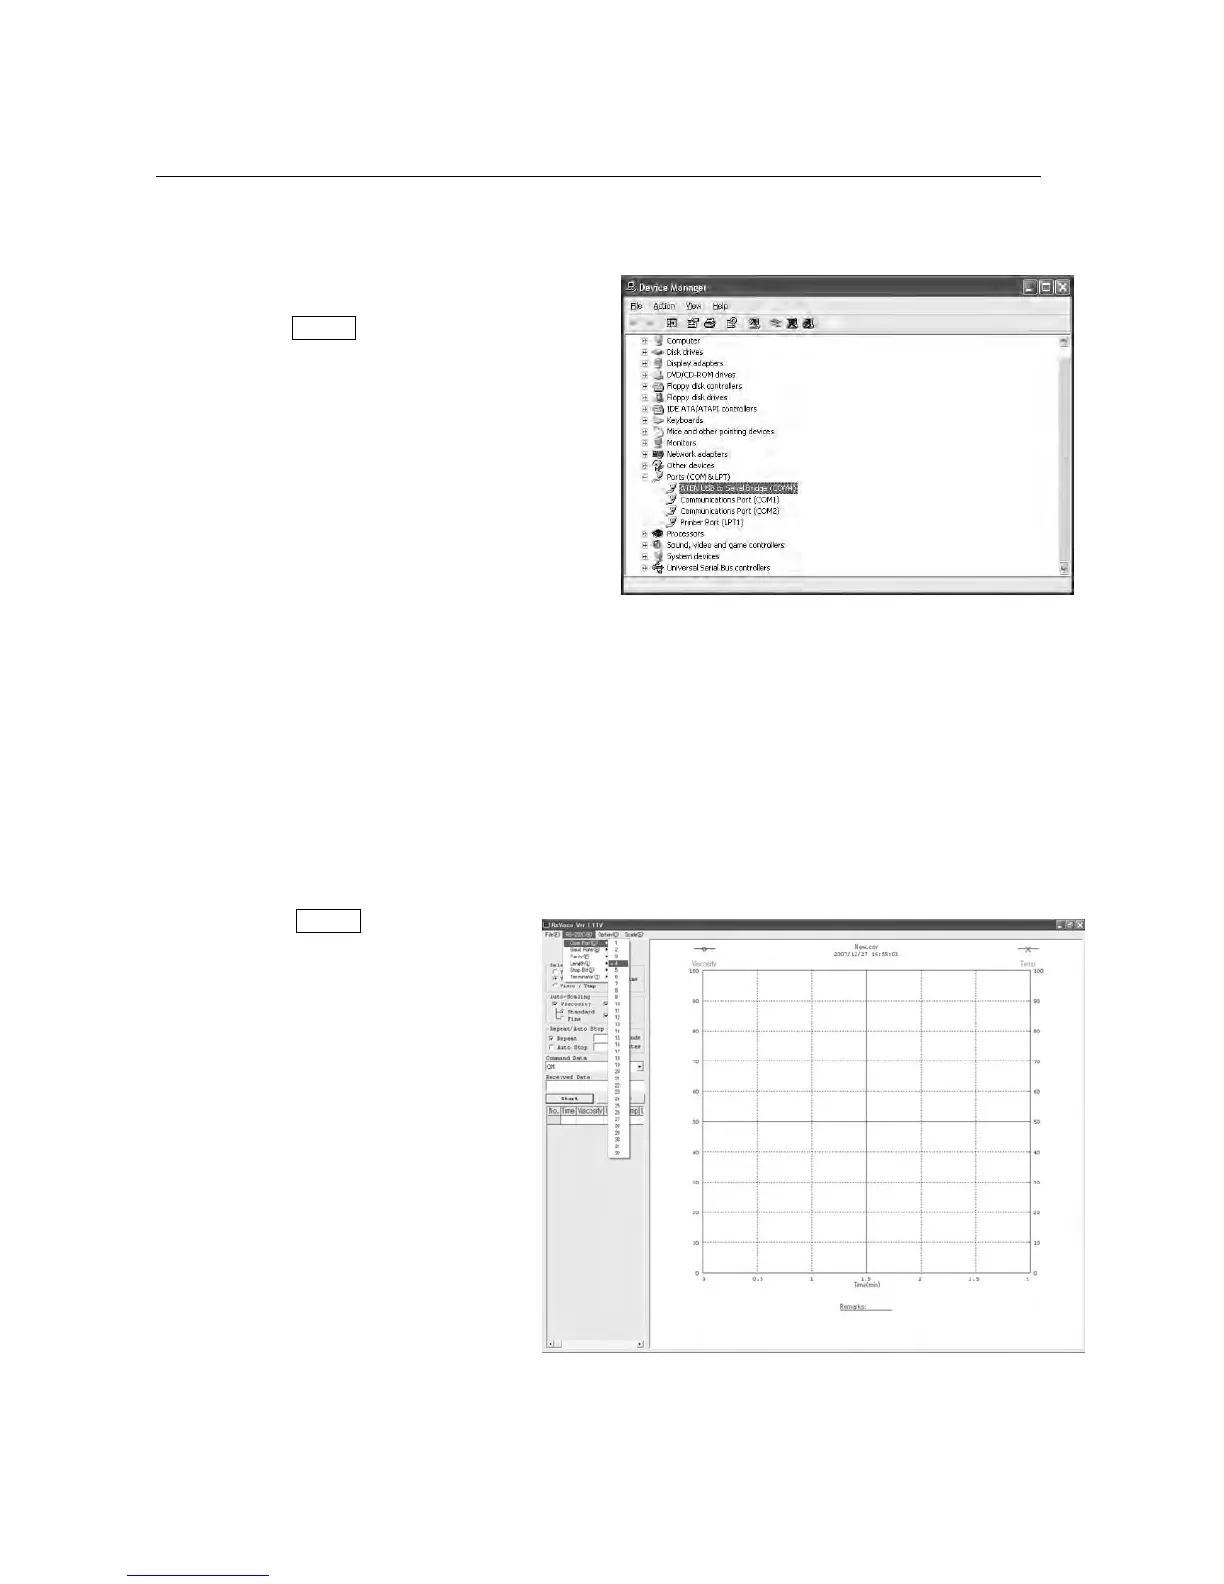
4 Double-click the“Port (COM and LPT)”
,
confirm the number of the COM port.
When using the USB converter, “ATEN USB
to Serial Bridge (CM4)” is displayed.
With this example, the COM port is displayed
set to “4”. The COM port of the personal
computer is displayed as “Communications
Port (COM1)”.
With this example, The COM port of the personal computer is two. Therefore, the COM port
number that is connected to the personal computer directly is displayed as “1” and “2”.
When a personal computer has many COM ports, all of the COM ports are displayed
sequentially (Example: Communications Port (COM1), Communications Port (COM2)…)
Confirm the COM port number by the connecting position of the COM port.
(2) Setting of the COM port (Example: graphing software“RsVisco”)
1 Click the START bottom →
the“Program” → the“A&D
WinCT-Viscosity” → the“RSVisco”.
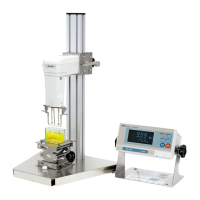
2 With “RS-232C (R)” of menu →
the“COM Port (C)”, set the COM
port described above “ (1)
Configuring of the COM port”
Conforming the COM port with the Device Manager
(Example of the COM port of the USB converter set to “9”)
Setting the COM port with the RsVisco
(Example of the COM port set to “9”)


 To Next Page