TROUBLESHOOTING
10 USB-Link 2 Technical Guide
Communication Settings and LED Descriptions
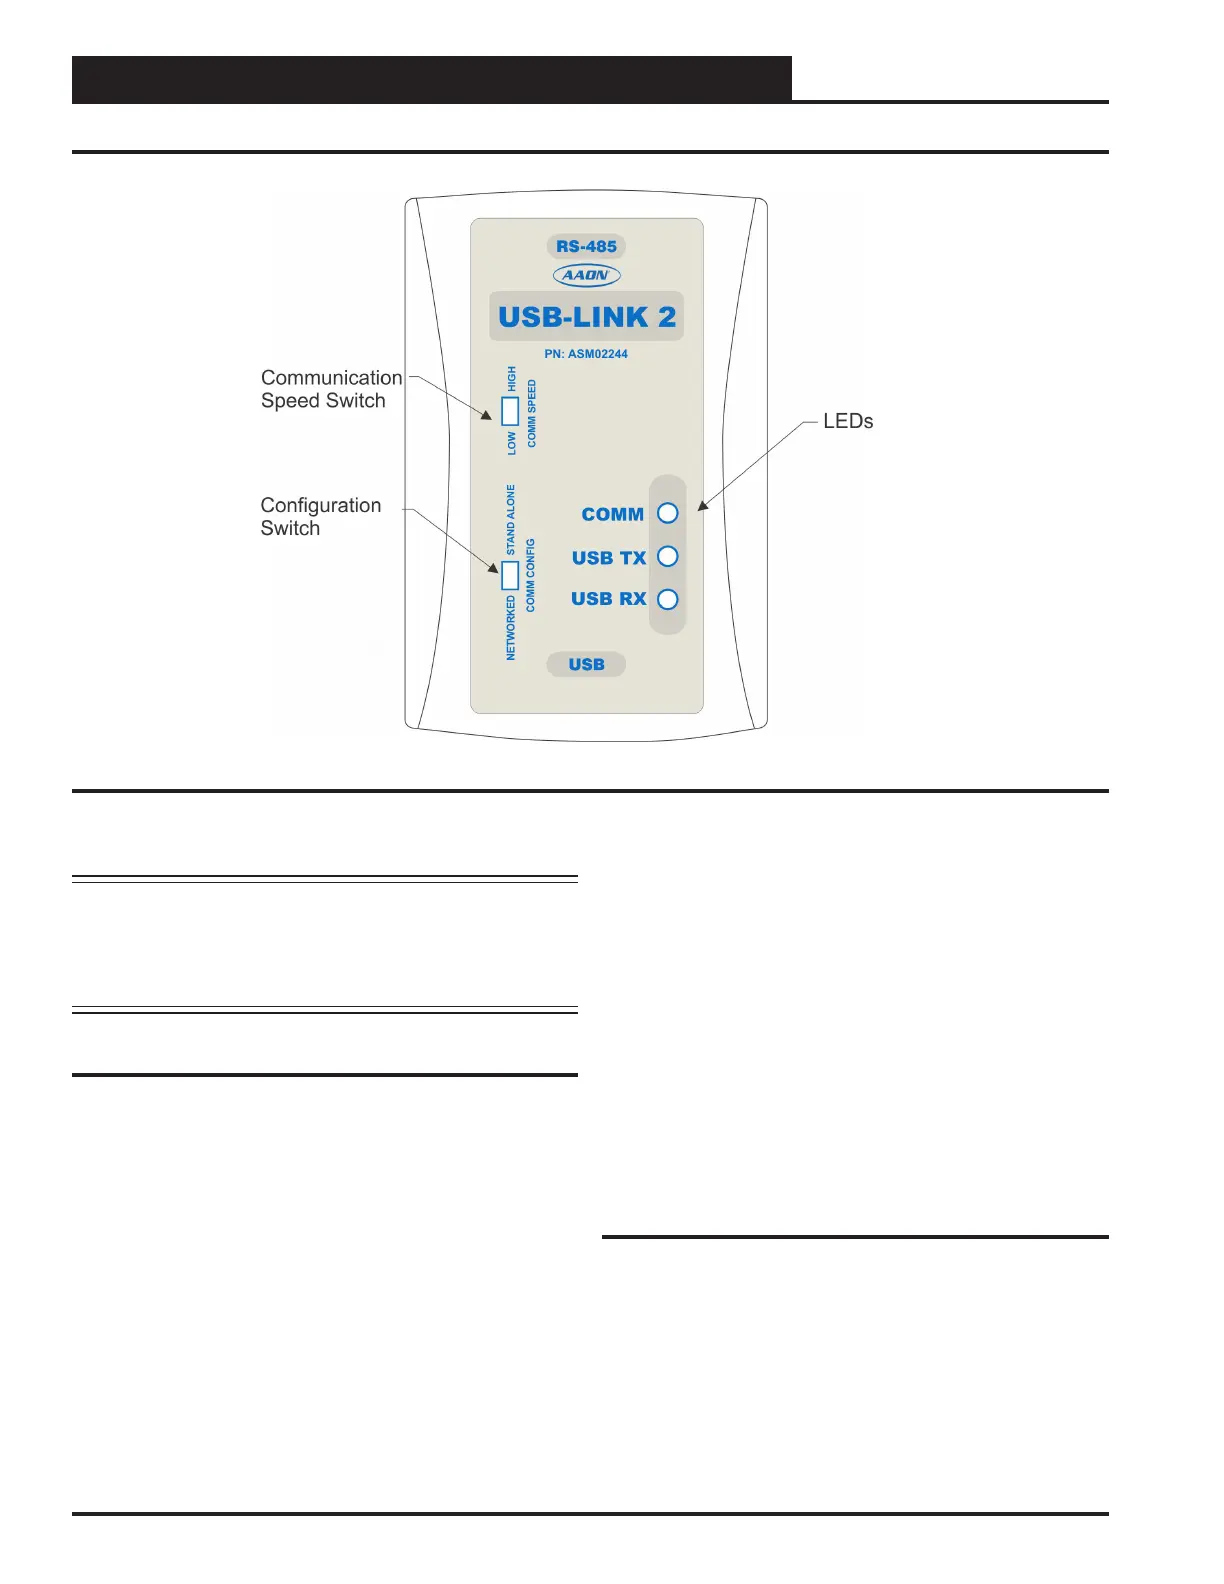
Figure 3: USB-Link 2 Conguration Switch, Communication Speed Switch, and LEDs
Communication Speed
The communication speed switch for low or high speed is found to the
left of the LEDs. See Figure 3 above. To set the communication speed
switch, insert a pen tip to move the switch up or down.
Low Speed - The switch should be set to LOW if using VCM-X or
older generation Orion Controllers, older generation Auto-Zone
Controllers, or VCB-X or GPC-XP Controllers that are set to Low
Speed.
High Speed - The switch should be set to HIGH if using Pioneer
Gold Controllers, VCCX2 Controllers, AZ2 Controllers, or
VCB-X or GPC-XP Controllers that are set to High Speed.
USB-Link 2 LED Descriptions
COMM - Indicates communication activity between the USB-Link 2
and the controller(s) that the USB-Link 2 is connected to. When
this LED is ashing, data is being exchanged.
USB TX & USB RX - Indicates communication activity between the
USB-Link 2 and the computer that the USB-Link 2 is
connected to. The LEDs will ash only when data is sent from
Prism 2 to the USB-Link 2 via USB.
NOTE: Whenever you change the conguration or
communication speed setting on the USB-Link 2,
you must cycle the power to the USB-Link 2 by
disconnecting and reconnecting the USB power
supply cable.
USB-Link 2 Switch Settings
Conguration Switch
The conguration switch for stand alone or network mode is found to the
left of the LEDs. See Figure 3 above. To set the conguration switch,
insert a pen tip to move the switch up or down.
Stand Alone - No MiniLink or CommLink - The slide switch on the
USB-Link 2 should be set to “Stand Alone” when you are trying
to talk to a stand alone controller or multiple controllers on a loop
without a CommLink or a MiniLink wired to the
communications loop.
Network - MiniLink or CommLink connection - The slide switch on
the USB-Link 2 should be set to “Network” any time there is a
CommLink or MiniLink wired to the communications loop.