Assembly Instructions / A100-H
4 Installing the turbocharger / 4.3 Placing the turbocharger on the
bracket
© Copyright 2020 ABB. All rights reserved. HZTL455311P0004_EN Rev.B July 2020
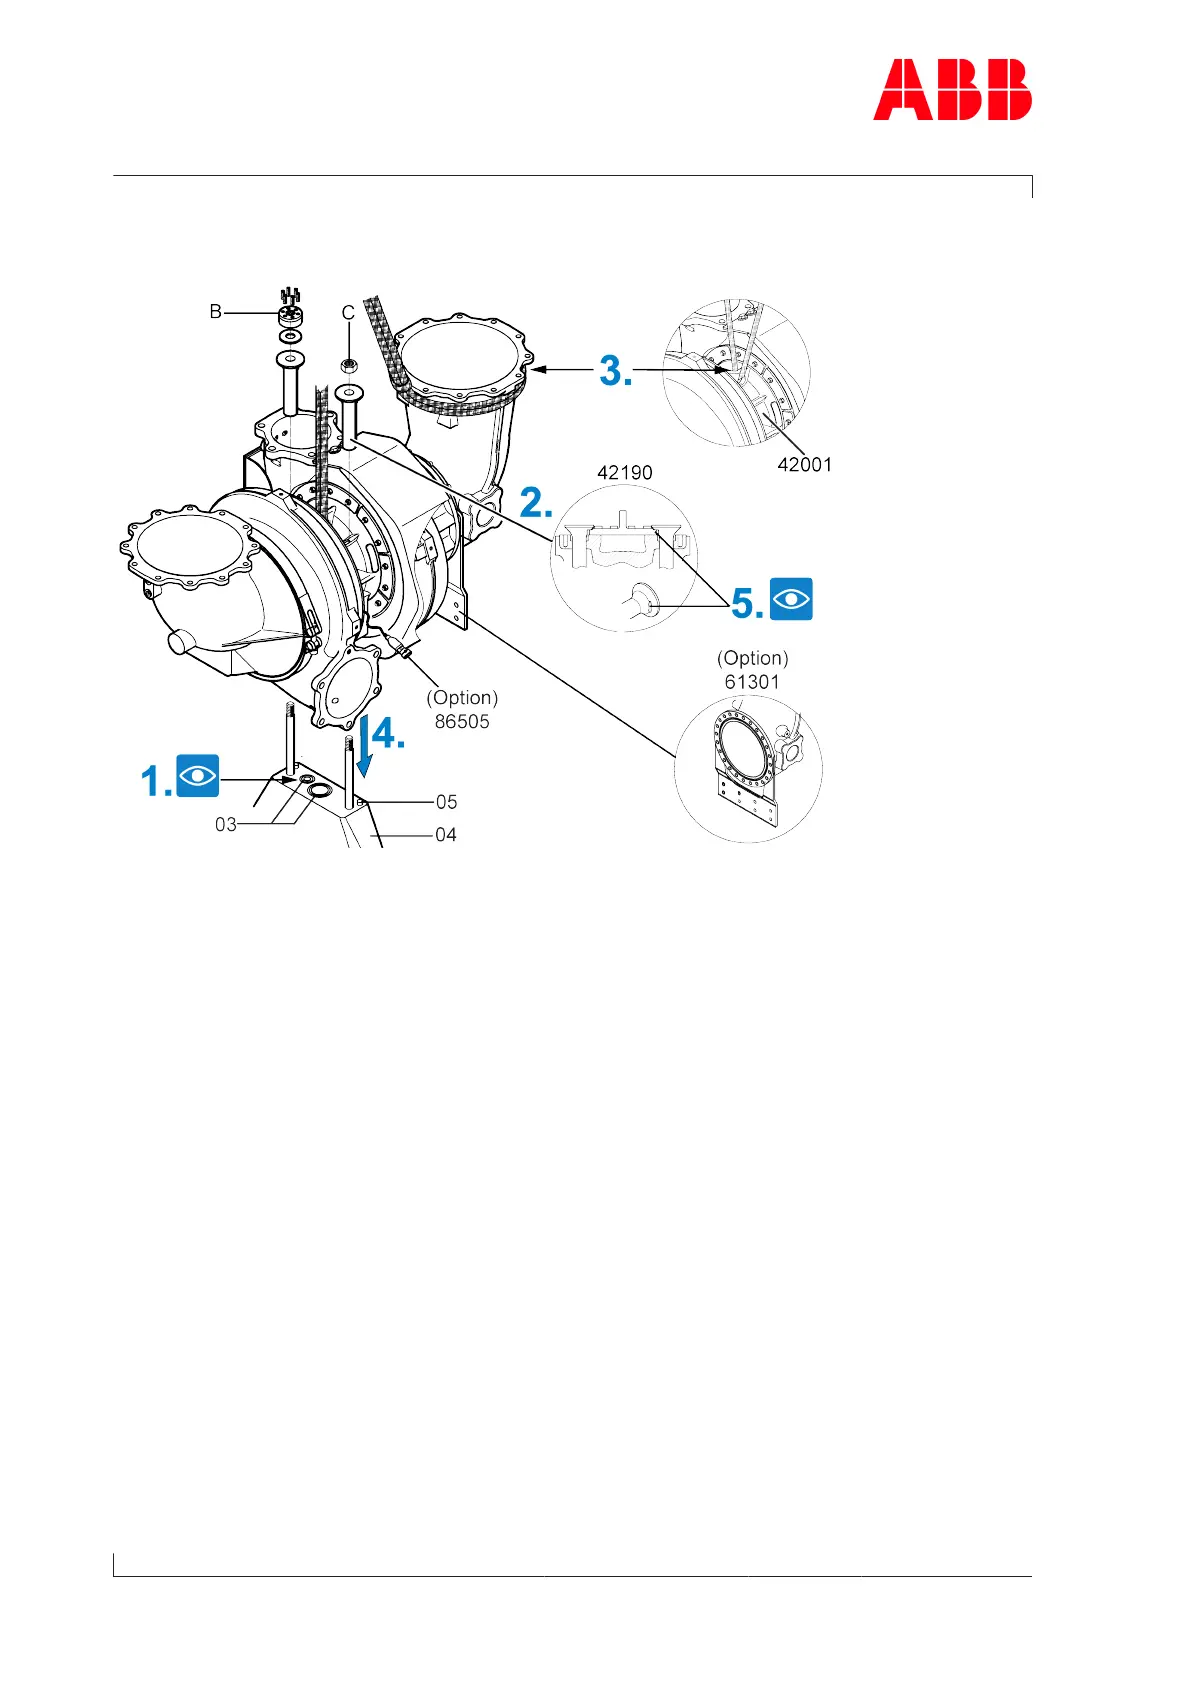
4.3 Placing the turbocharger on the bracket
Fig.7: Placing the turbocharger on the bracket
B Clamping nut
C Standard nut
u Make sure that covers of the oil and water connections are removed.
1. Make sure that the O-rings(03) are undamaged and positioned correctly in the slots.
2. Clean the expansion bushes(42190) and the contact surfaces of the expansion bushes in
the bearing casing.
3. Attach the lifting gear to the suspension eye of the bearing casing(42001) and loop
around the gas outlet casing.
4. Position the turbocharger on the bracket(04) and align it. If present, pay attention to the
positioning pin(05) in the bracket.
5. When fixing with a standard nut (C), fit the expansion bushes in the correct position in
the slot.
Safeguard against wrong fitting (only for water-cooled bearing casings)
Depending on the bracket version(04), two positioning pins(05) can be used for positioning
and safeguarding against wrong fitting of the turbocharger. Therefore the turbocharger
must always be removed from and installed on the bracket vertically.
u Observe the instructions for the fastening variant at hand.
¡ Fastening the turbocharger with a standard nut →13 (A130-A140)
¡ Fastening the turbocharger with a clamping nut →14 (only A140)
Page 12 / 21

 Loading...