Assembly Instructions / A100-H
4 Installing the turbocharger / 4.5 Fastening the turbocharger with a
clamping nut
© Copyright 2020 ABB. All rights reserved. HZTL455311P0004_EN Rev.B July 2020
4.5 Fastening the turbocharger with a clamping nut
Preparation for tightening
CAUTION
Do not clean pressure screws (04)
The pressure screws are equipped with a permanent sliding layer that must
not be removed.
Do neither clean nor lubricate the pressure screws. In case of non-compli-
ance, it cannot be ensured that the necessary tension force is reached.
u Do not clean pressure screws.
u Do not lubricate pressure screws.
In order to correctly fit the clamping nuts, the pressure screws (04) must not protrude from
the clamping nuts (03) in the direction of the thrust washer (02).
u Make sure the pressure screws do not protrude in the direction of the thrust washer.
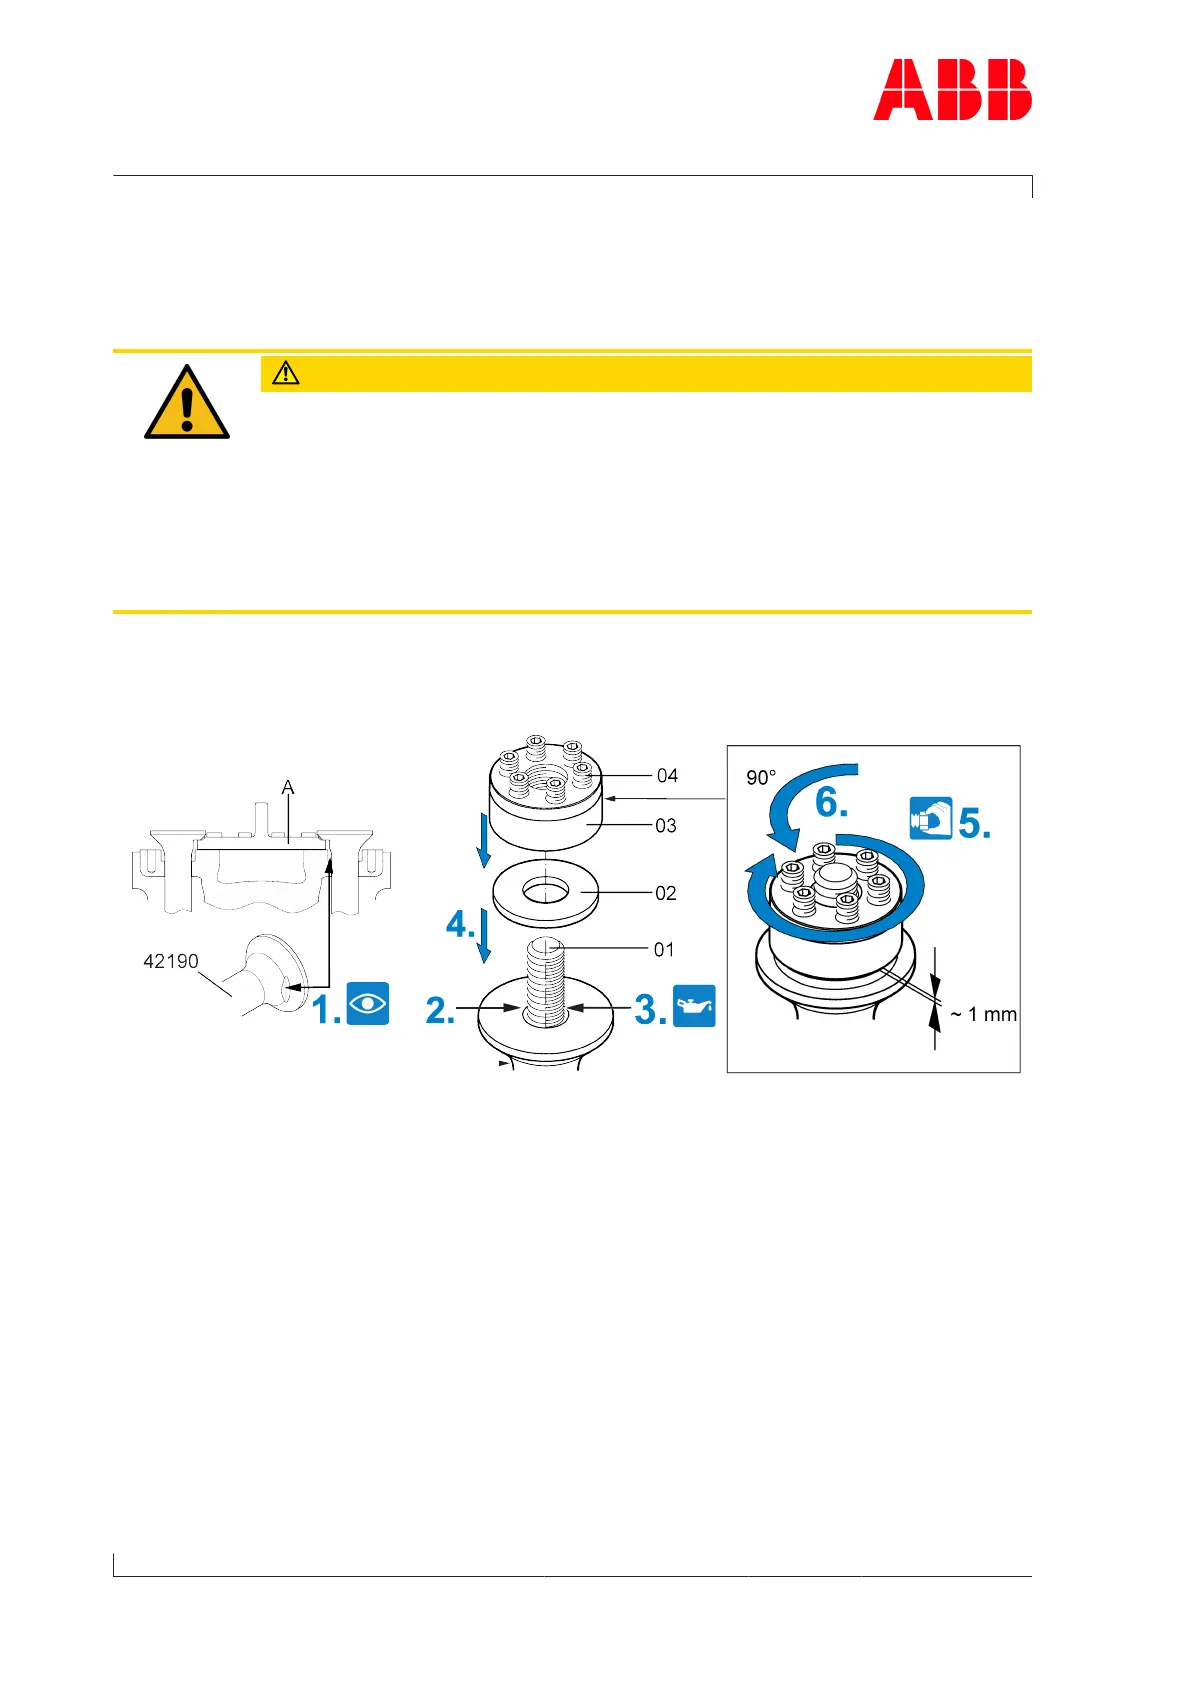
Fig.8: Preparing the clamping nut for the tightening procedure
1. Check whether the expansion bushes (42190) with recess are correctly positioned and do
not touch the flange of the core hole cover (A).
2. Clean the thread of the bolt (01) and the contact surface.
3. Lightly oil the bolt thread.
4. Position the thrust washer (02) in place.
5. Tighten clamping nut (03) by hand.
6. Unscrew clamping nut (03) by ¼ of a turn (90°).
The distance between the thrust washer and the clamping nut is now about 1 mm.
Page 14 / 21

 Loading...