GILLETTE ŁÓDŹ
Robotic station for packing FFS1 dispensers
Step 1: Press the STOP button on the HMI panel screen, on the HMI
+P0 panel or on the +P4 operator panel. Make sure the device has completed
its operating cycle.
Step 2: Turn the INPUT REQUEST switch on the HMI panel +P0 or on
the operator panel +P4, the service door will be unlocked and the air will be
released from the gripper's pneumatic system.
Step 3: Enter through the service door from the HMI +P0 panel and
start rearming the device.
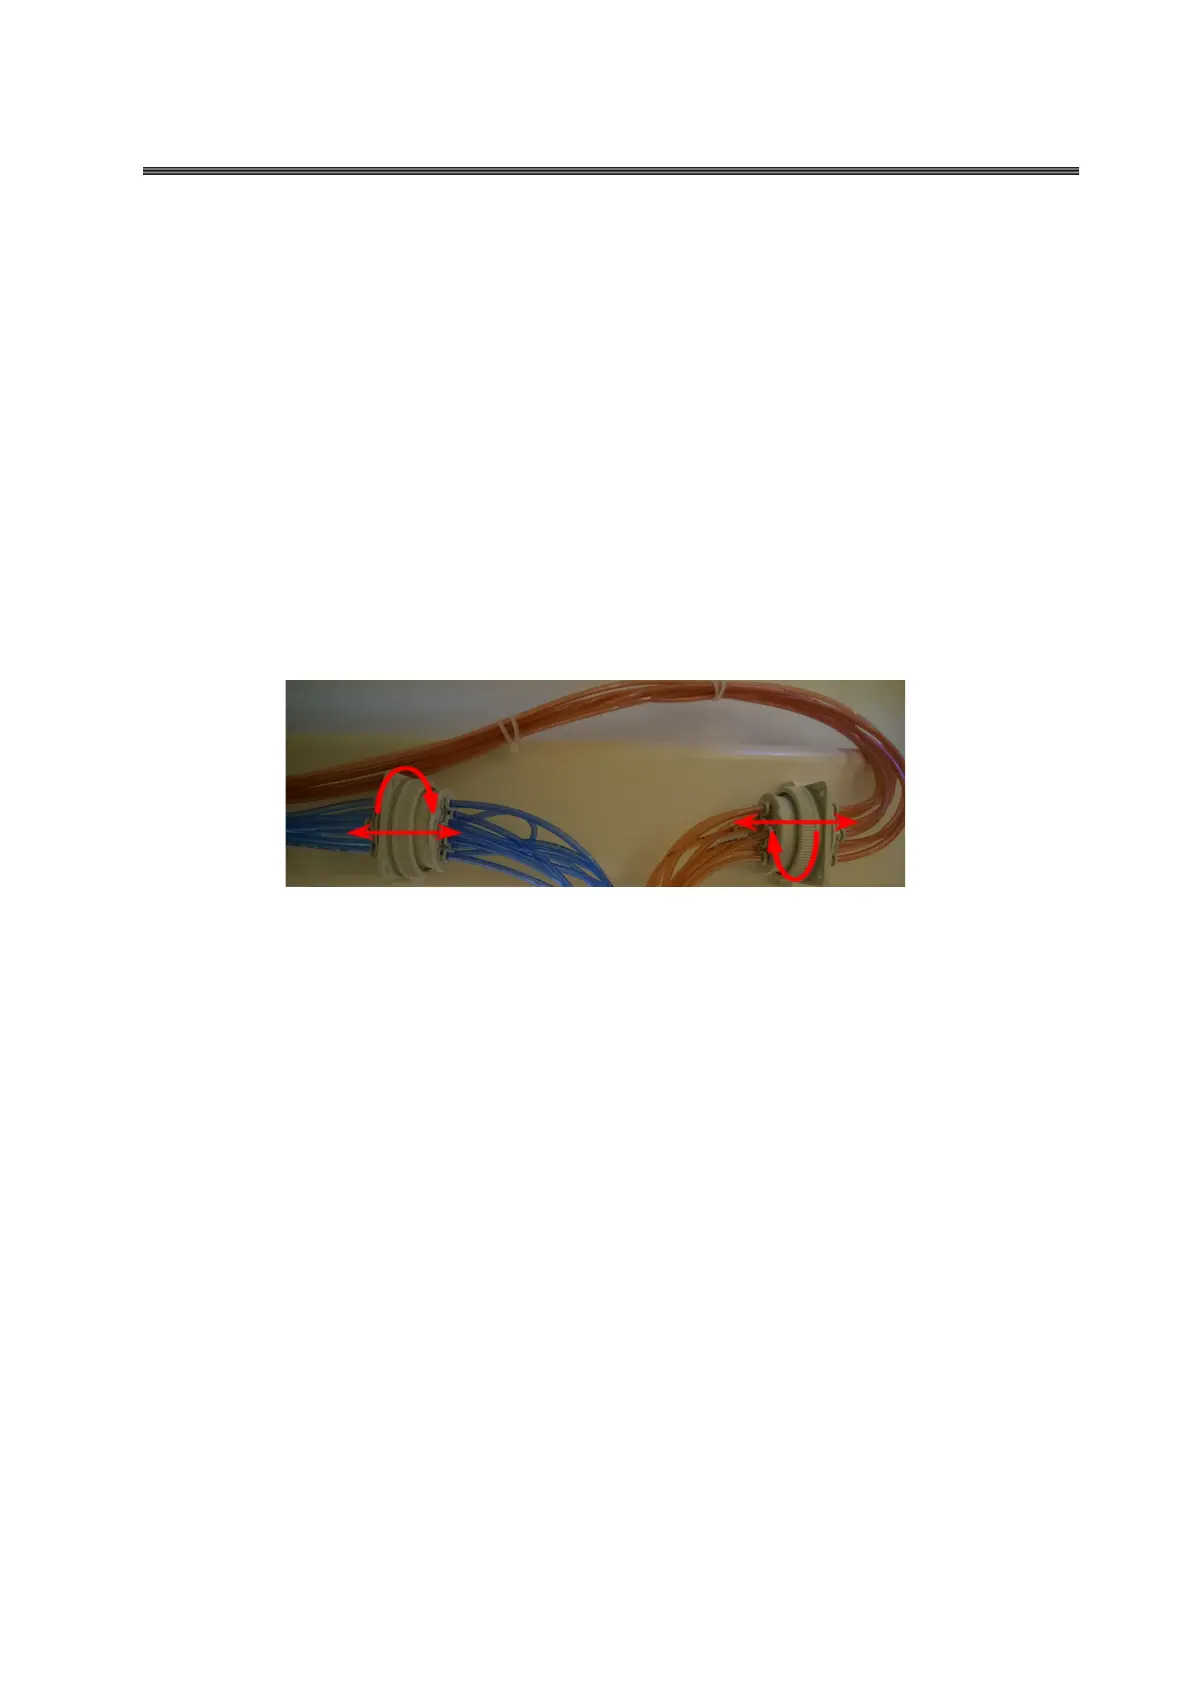
Step 4: Disconnect the gripper's pneumatic connections located inside
the cell. The 12-wire connection sockets are permanently mounted inside the
frame. The gripper cables are terminated with plugs. Disconnecting the
connections requires unscrewing the plug from the socket.
Figure 47 Pneumatic connections
Step 5: Unclip the pneumatic tubing attached to the robot arm. The
pneumatic cable bundle is attached to a marked location on the robot arm
using a clamping strap. The pneumatic lines of both grippers are also marked
to simplify and improve machine setup. The cables should be attached
carefully, but remember not to obstruct the air flow when clamping them to the
robot arm.
ABB Sp. z o.o.
Side 91/135
DTR_GILLETTE_ZSDPD_Farmores1_IRB360_2015_v03