CI/SM500F–EN Rev. A 15
6 Basic setup
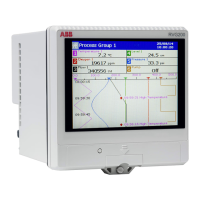
Perform the following steps in sequence to set up the recorder
for the first time. For detailed configuration instructions refer to
the User guide – IM/SM500F-EN.
Start up
1. Locate and mount the recorder as described in Sections 1
and 2.
2. Make electrical and signal connections as described in
Section 3.
3. Power up the recorder.
4. Proceed to the next step to set the date and time.
Set the date and time
1. Press the key from any operator or log view to display
the operator menu.
2. Use the / keys to select Operator 1 and press the
key.
3. Use the / keys to select the 'OK' button at the
Operator 1 – Password (0…9999) page and press the
key (passwords are not set at first-time use). The Operator
1 Edit / Open / New Configuration dialog is displayed with
the Edit Current Configuration button ( ) highlighted.
4. Press the key to display the system configuration
screen.
5. Press the key to display the configuration menu, use the
/ keys to highlight the Common menu option and
press to display the common configuration page.
6. Use the key to select the Time tab and press the key
to edit the Date and Time field. The following warning is
displayed:
press the key.
7. Use the / and / keys to select the first field to
edit.
8. Enter the required information in each field pressing
before using the / and / keys to move to the
next field.
9. When all fields have been set, use the / and /
keys to highlight and press to return to the Time tab.
10. Proceed to the next step to set the sample rate.
Configure the process group(s)
1. Press the key to display the configuration menu, use the
/ keys to select Group 1 and press the key to
display the group's Recording tab.
2. Use the / keys to highlight the edit button ( ) next
to each field and press the key to configure each
parameter as required.
3. Use the key to select the Chart tab.
4. Use the / keys to highlight the edit button ( ) next
to each field and press the key to configure each
parameter as required.
5. If Indicator View is required, use the key to select the
Indicator tab.
6. Use the / keys to highlight the edit button ( ) next
to each field and press the key to configure each
parameter as required.
7. Use the key to select the Archive tab.
8. Use the / keys to highlight the edit button ( ) next
to each field and press the key to configure each
parameter as required.
9. Repeat steps 1 to 8 for Group 2 recording parameters (if
required).
Configure the recording channels
1. Press the key to display the configuration menu, use the
/ keys to select Channels 1.1 - 1.6, press the key
and use the / keys to highlight the first channel to
configure and press the key to display the channel's
Setup tab.
2. Use the / keys to highlight the edit button ( ) next
to each field and press the key to configure each
parameter as required.
3. Use the key to select the Analog I/P XX tab.
4. Use the / keys to highlight the edit button ( ) next
to each field and press the key to configure each
parameter as required.
5. Repeat steps 3 and 4 for each of the Alarm and Totalizer (if
enabled) tabs as required.
6. Press the key to display the configuration menu, use the
/ keys to select Channels 1.1 - 1.6, press the key
and use the / keys to highlight the next channel to
configure and press the key to display the channel's
Setup tab.
7. Repeat steps 2 to 5 to configure the channel as required.
8. Repeat steps 6 and 7 for each of the remaining channels as
required.
9. Repeat steps 1 to 8 for Channels 2.1 - 2.6 (if required).
 Loading...


