EN - 22 BAL.0030.0 • 2021-01-19
6 Commissioning BRS-LC
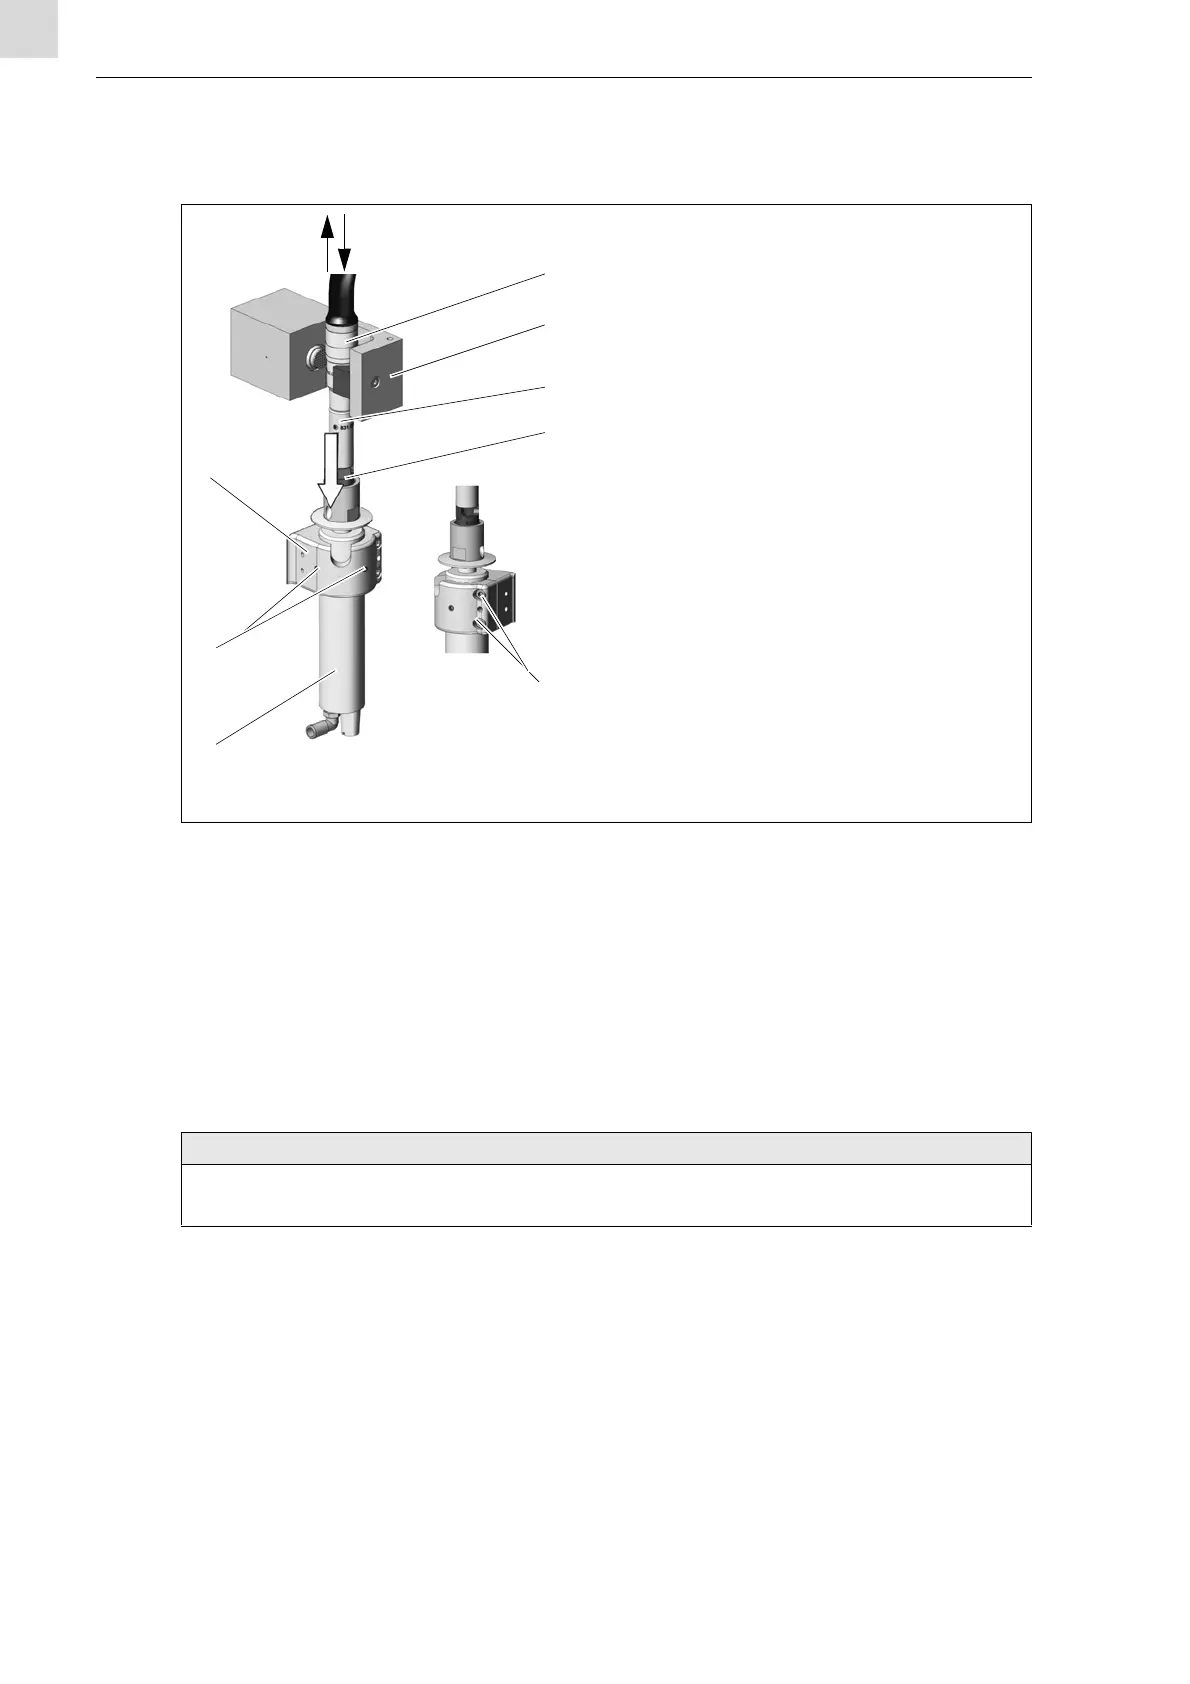
6.10 Setting up the pneumatic motor
1 Loosen the motor clamp via the set screws (7) and the cylinder head screws (5) on the guide block (8).
2 Pull back the pneumatic motor (6) in its mount.
3 Place the required distance sleeve (3) on the reamer (4).
4 Move the torch with the gas nozzle (1) to the clamping position (C).
5 Keep the guide block (8) in the lower position (stroke down).
6 Place the pneumatic motor (6) against the gas nozzle (1) with the distance sleeve (3) placed on top.
7 Secure the adjusted motor position with the cylinder head screws (5) and set screws (7) (tightening torque 3.4 Nm).
8 Move the torch out of the clamping device (2) and remove the distance sleeve (3) from the reamer (4).
1 Gas nozzle
2 Clamping device
3 Distance sleeve
4 Reamer
5 Cylinder head screws
6 Pneumatic motor
7 Set screws
8 Guide block
Fig. 14 Setting up the pneumatic motor
• Make sure that only clean and dry compressed air is used.
The compressed air must correspond at least to the quality class 4 according to ISO 8573-1.