Installation and Operation Manual
Page 5
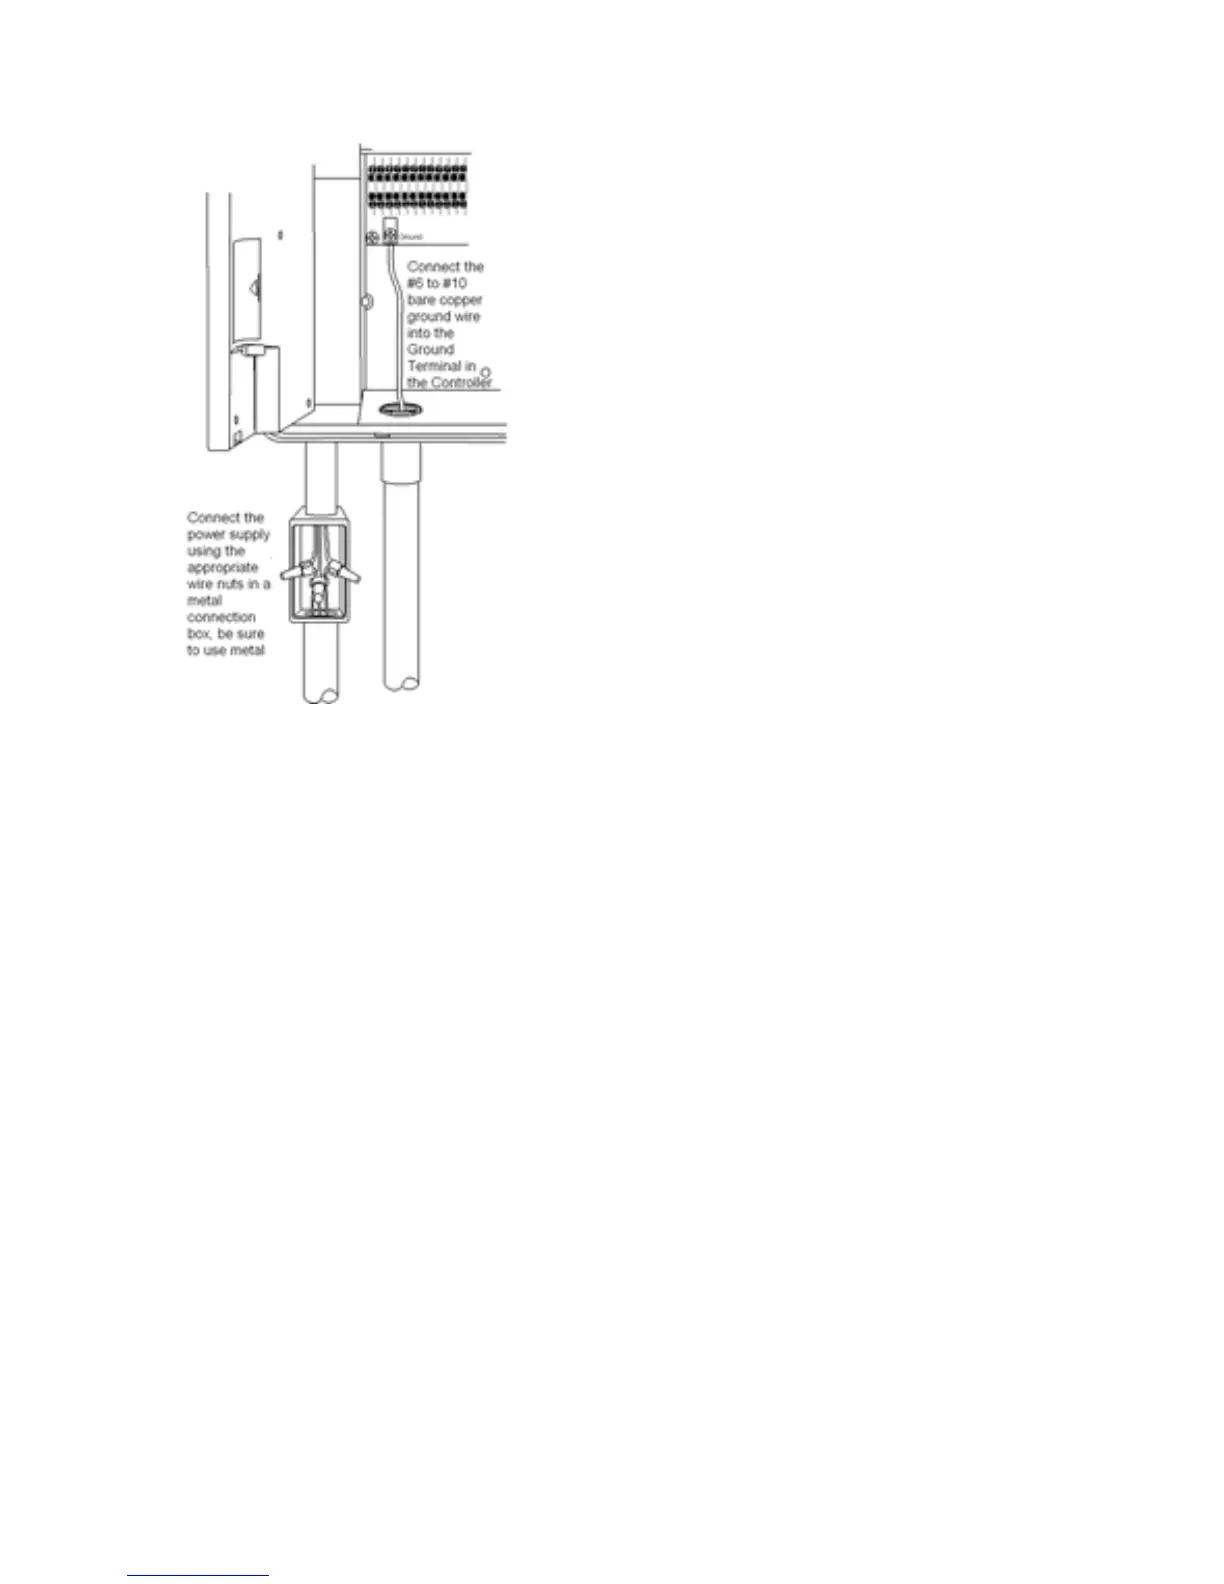
Connecting the power source, and ground
WARNING: AC power wiring must be installed by
qualified personnel only. All electrical components
and procedures must comply with all applicable local
and national electrical codes. Make sure the power is
OFF before connecting to the controller.
1. Route the power wires through a ½" conduit
coupling and into the connection box. Make the
connection in the connection box with wire nuts and
close the box cover.
2. Route a #6 to #10 grounding wire through a ½"
conduit between the 'Ground' terminal and an
outside copper-clad grounding rod.
3. Apply power to the controller.
Connect a Rain Sensor
Often a rain storm will not provide enough water to bring soil moisture levels up to the
needs of the grass. If a program starts during a rainstorm and the soil is dry at the root
zone, the controller will irrigate for the full duration of the watering time. If the rainfall is
heavy and has soaked to the root zone by the time of the program start, the controller will
not allow watering. Hence, a rain sensor is not needed and is not desirable for the
system. However, some municipalities insist that rain sensors be installed on automatic
irrigation equipment. If you live in such an area connect the rain sensor to the two 'rain
switch' terminals on the controller. You will need to remove the jumper wire first.
After installing the rain sensor press the button beneath the LCD Labeled "Rain Sensor"
to activate it.