EasyManuals Logo

Acer X1161P Series User Manual

Acer X1161P Series
54 pages
To Next Page IconTo Next Page
To Previous Page IconTo Previous Page
Page #44 background imageLoading...
Page #44 background image
34
English
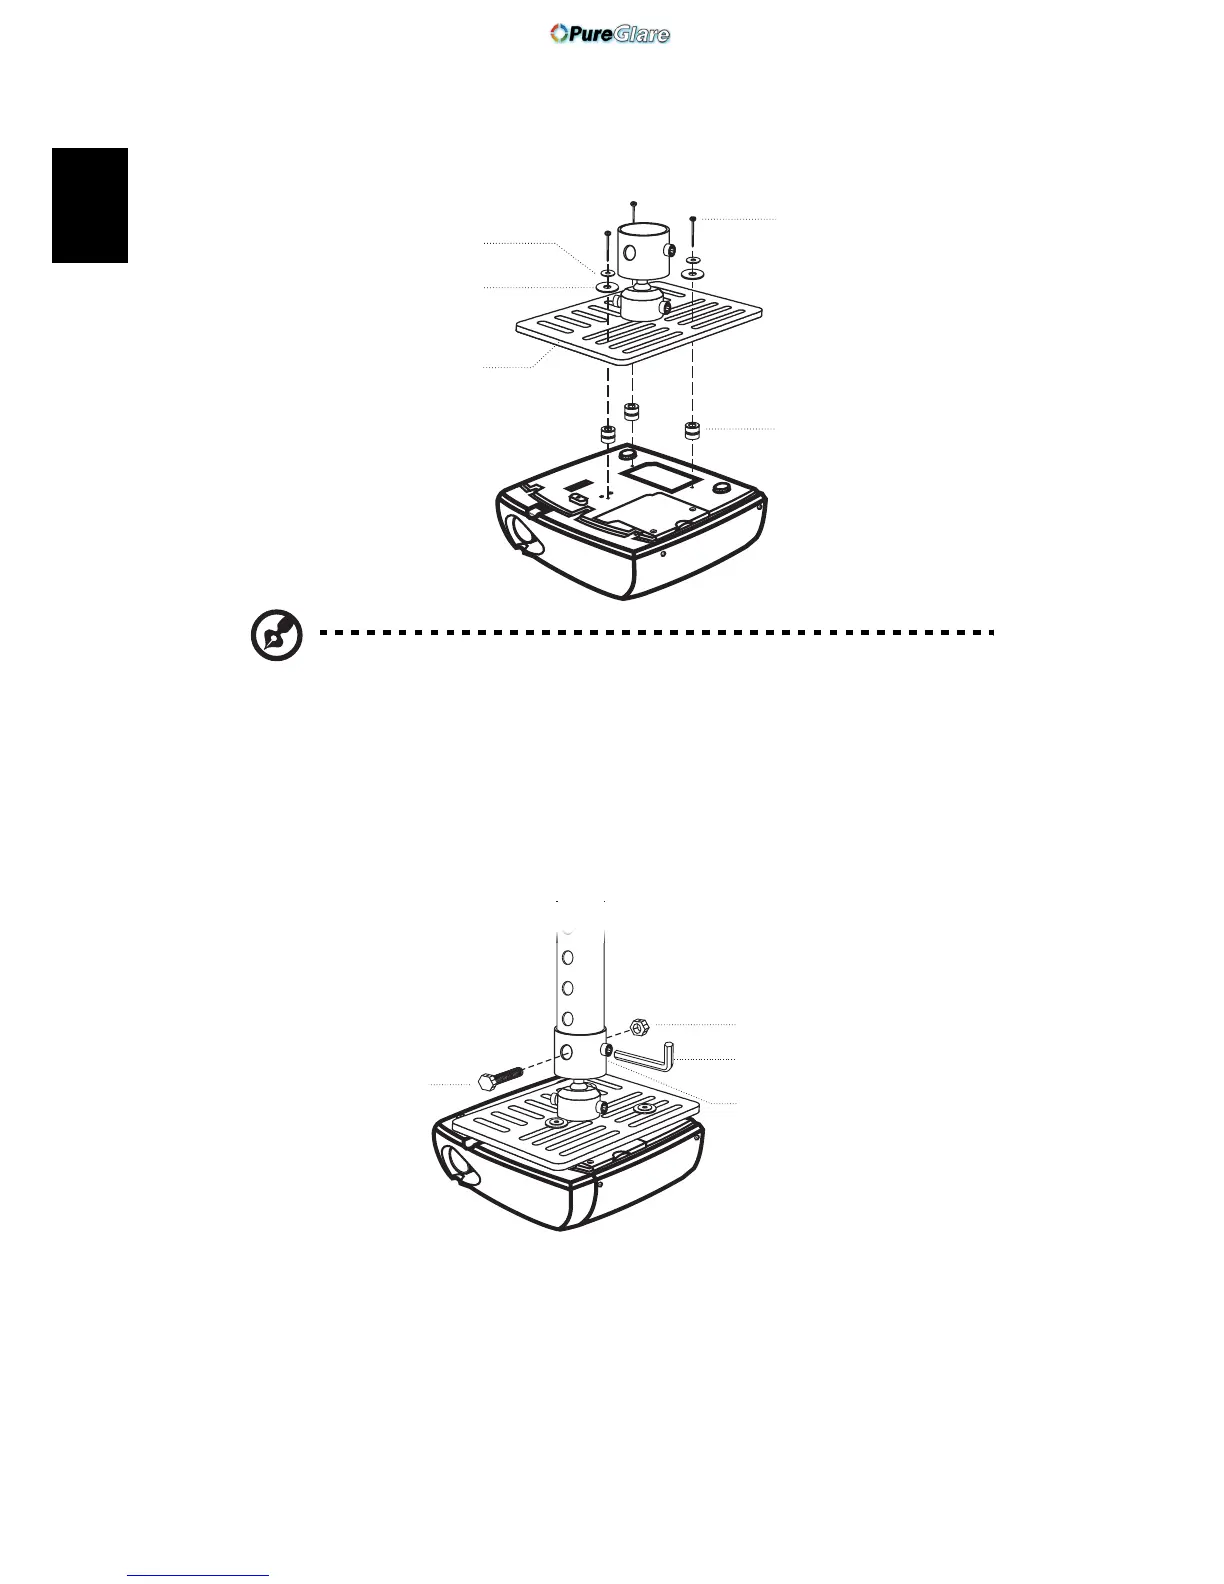
3 Use the appropriate number of screws for the projector size to attach the
projector to the ceiling mount bracket.
Note: It is recommended that you keep a reasonable space
between the bracket and the projector to allow for proper heat
distribution. Use two washers for extra support, if deemed
necessary.
4 Attach the ceiling bracket to the ceiling rod.
Screw Type B
Smaller Washer
Large Washer
Projector Bracket
Supports projector and allows -
for adjustments
Spacer
- For heat dissipation
Large cylinder cap
Tightening Screw
Allen Key
- For tightening/loosening
Screw Type A
50 mm length -
08 mm diameter
http://www.pureglare.com.au

Questions and Answers:

Question and Answer IconNeed help?

Do you have a question about the Acer X1161P Series and is the answer not in the manual?

Acer X1161P Series Specifications

General IconGeneral
Resolution800 x 600 (SVGA)
Weight2.2 kg
Display TechnologyDLP
Brightness2700 ANSI lumens
Lamp Life5000 hours (Normal mode), 6000 hours (Eco mode)
Projection Size30" - 300"
Input ConnectorsVGA, Composite Video, S-Video
Dimensions268 mm x 80 mm x 192 mm
Throw Ratio1.96 - 2.15:1

Related product manuals