EasyManua.ls Logo

Acer X1161P Series - User Manual

Acer X1161P Series
54 pages
Print Icon
To Next Page IconTo Next Page
Loading...
Acer Projector
X1161P/X1161PA/X110P/H110P/
X1161N/X1261P Series
User's Guide
http://www.pureglare.com.au

Questions and Answers

  • C
    courtneyhayesAug 19, 2025
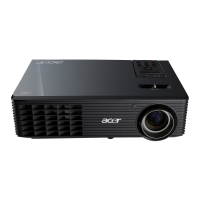
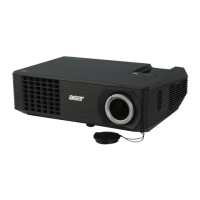
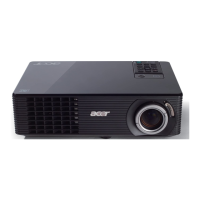
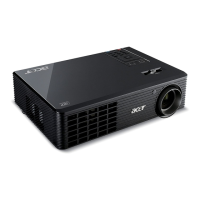
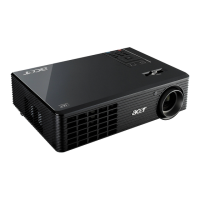
    How to fix no image on Acer Projector?
    • P
      palvaradoAug 19, 2025
      First, ensure all connections are made as described in the "Getting Started" section and that connector pins are not bent or broken. Check that the projector lamp is securely installed, referring to the "Replacing the Lamp" section. Finally, remove the lens cap and ensure the Acer Projector is switched on.
  • Q
    qburchAug 21, 2025
    How to change the size of image on Acer X1161P Projector?
    • T
      Thomas HamiltonAug 21, 2025
      To adjust the image size on your Acer Projector, try the following: Adjust the zoom lever on the front of the projector; move the projector closer to or further from the screen; or press "MENU" on the remote, navigate to "Image --> Aspect Ratio", and experiment with different settings. You can also press "Aspect Ratio" directly on the remote.
  • B
    bryanshawnAug 23, 2025
    Why is Acer X1161P Projector not displaying on my laptop?
    • T
      Tammie WaltersAug 23, 2025
      If your notebook screen isn't displaying your presentation when using an Acer Projector: If using a Microsoft® Windows® based notebook, the screen may be deactivated when a second display device is in use. Refer to your computer's manual for reactivation instructions. If using an Apple® Mac® OS based notebook, go to System Preferences, open Display, and select Video Mirroring "On".
  • M
    Mr. Juan GreenAug 26, 2025
    How to adjust focus on Acer X1161P Projector?
    • A
      Anthony McclainAug 27, 2025
      First, make sure the lens cap is removed. Then, adjust the focus ring on the projector lens. Ensure the projection screen is within the required distance of 3.3 to 39.4 feet (1.0 to 12.0 meters) from the projector. More information can be found in the "How to Get a Preferred Image Size by Adjusting Distance and Zoom" section.
  • J
    Jamie SmithAug 28, 2025
    What to do if Acer X1161P image is distorted on notebook?
    • K
      Kenneth ObrienAug 28, 2025
      If you're experiencing a partial, scrolling, or incorrectly displayed image on your Acer Projector with a notebook, first, press "RESYNC" on the remote control. For an incorrectly displayed image, adjust your computer's resolution, referring to the steps for PC (Windows 95/98/ 2000/XP). Then, press the toggle output settings (e.g., [Fn]+[F4], Compaq [Fn]+[F4], Dell [Fn]+[F8], Gateway [Fn]+[F4], IBM [Fn]+[F7], HP [Fn]+[F4], NEC [Fn]+[F3], Toshiba [Fn]+[F5]). If issues persist, restart all equipment, including the projector.
  • K
    Katherine PhelpsAug 30, 2025
    How to fix slanted image on Acer Projector?
    • M
      medinamarcAug 30, 2025
      To correct slanted sides on your Acer Projector's image: Reposition the projector so it's centered on the screen, if possible. Alternatively, press the "Keystone / " button on the remote until the sides are vertical. If the "Keystone" button isn't available, press "MENU", go to "Image - -> Auto Keystone", and choose "Off" on the OSD.
  • M
    Martha LeeSep 2, 2025
    What to do if Acer Projector image is distorted on PC?
    • J
      Joseph HuntSep 2, 2025
      If your Acer Projector displays a partial, scrolling, or incorrectly displayed image on a PC (Windows 95/98/2000/XP), first press "RESYNC" on the remote control. For an incorrectly displayed image, open "My Computer," then the "Control Panel," and double-click the "Display" icon. Select the "Settings" tab and ensure your display resolution is lower than or equal to UXGA (1600 x 1200). Click the "Advanced Properties" button. If the problem persists, change the monitor display you are using, verify the resolution is lower than or equal to UXGA (1600 x 1200), click "Change" under the "Monitor" tab, click "Show all devices", select "Standard monitor types" under the SP box, and choose the resolution mode you need under the "Models" box.
  • J
    Julia BarrettSep 4, 2025
    How to stabilize flickering image on Acer X1161P Projector?
    • C
      Christopher TranSep 4, 2025
      To resolve an unstable or flickering image on your Acer Projector, adjust the "Tracking". Also, try changing the display color depth settings on your computer.
  • A
    Amber WarnerSep 6, 2025
    How to remove vertical bar on Acer Projector?
    • A
      Angela SchwartzSep 6, 2025
      To address a vertical flickering bar on your Acer Projector's image, use "Frequency" to make an adjustment. Also, check and reconfigure the display mode of your graphics card to ensure it's compatible with the projector.
  • A
    Angela MillerSep 9, 2025
    How to flip image on Acer X1161P Projector?
    • M
      mhebertSep 9, 2025
      To correct a reversed image on your Acer Projector, select "Image --> Projection" on the OSD and adjust the projection direction.

Summary

Information for Your Safety and Comfort

Safe Shutdown for Cleaning

Instructions for safely powering down the projector before cleaning.

Power Connection Safety

Guidelines for safe power connection and disconnection procedures.

Power Outlet Accessibility

Advice on power outlet accessibility for safe operation.

General Safety Warnings

General safety warnings about water, stability, ventilation, and electrical hazards.

Electrical Power Usage

Guidelines for Safe Electrical Operation

Guidelines for operating the projector using electrical power safely.

Product Servicing

When Professional Servicing is Required

Conditions and indicators that require servicing by qualified personnel.

Additional Safety Information

Eye Safety and Environmental Placement

Warning about lens exposure and listing unsuitable environments.

General Operational Safety Precautions

Audio and Disposal Precautions

Hearing Protection and Environmental Disposal

Instructions to protect hearing and guidelines for electronic waste recycling.

Mercury Advisory for Lamps

Advisory regarding mercury content in lamps and proper disposal.

First Things First

Usage Dos and Donts

Guidelines for proper usage and things to avoid during operation.

General Precautions for Longevity

General precautions for maximizing unit life and safe operation.

Introduction

Key Product Features

Highlights key technological and functional features of the Acer projector.

Package Overview

Included Accessories and Components

Lists all items included in the projector package.

Projector Overview

Projector Exterior Views and Labels

Identifies components on the front/upper and rear sides of the projector.

Input;Output Connector Identification

Remote Control and Panel Layout

Remote Control Button Functions

Explains the buttons and their functions on the remote control.

Empowering Key and Remote Functionality

Getting Started

Connecting the Projector to Sources

Provides diagrams and instructions for connecting the projector to sources.

Turning the Projector On;Off

Powering On the Projector

Step-by-step guide to powering on the projector and source.

Powering Off the Projector

Adjusting the Projected Image

Adjusting Projector Height and Angle

How to adjust the projector's height using its feet for optimal display.

Optimizing Image Size and Viewing Distance

Image Size and Distance Data Table

Adjusting Distance and Zoom for Preferred Image Size

Image Size and Zoom Ratio Data

User Controls

Using the Installation Menu

How to use the OSD installation menu for setup and maintenance.

Acer Empowering Technology Functions

Navigating Onscreen Display (OSD) Menus

Color Settings

Display Modes and Wall Color Compensation

Explains display modes and wall color compensation.

Brightness, Contrast, and Color Temperature Adjustments

Adjusting brightness, contrast, and color temperature for optimal visuals.

Gamma, RGB, Saturation, and Tint Adjustments

Adjusting gamma, RGB colors, saturation, and tint.

Image Settings

Projection Mode and Location Settings

Settings for projector orientation (Front/Rear) and placement (Auto/Desktop/Ceiling).

Aspect Ratio and Keystone Correction

Position, Frequency, Tracking, Sharpness Adjustments

3 D Display Modes and Sync Invert

Image Setting Notes and Limitations

Setting Menu

Menu Location and Closed Captioning

Setting menu location and enabling/disabling the closed caption feature.

Security Settings and Timeout Configuration

Configuring projector security features and password timeout intervals.

User and Administrator Password Management

Standby VGA Output and Settings Reset

Management Menu

Power Saving and Auto Shutdown Settings

Managing ECO Mode, High Altitude, and Auto Shutdown features.

Lamp Hour Monitoring and Reset

Managing lamp hour display, reminders, and reset function.

Audio Settings

Volume and Mute Control Options

Adjusting volume level and mute status for the projector's audio output.

Timer Settings

Configuring Timer Display and Operation

Setting timer display location, start/stop, period, and mode.

Language Selection

Choosing the OSD Menu Language

How to select the preferred display language for the Onscreen Display (OSD) menu.

Appendices

Troubleshooting Common Issues

Guide to diagnosing and resolving common projector problems.

Troubleshooting Image Display Problems (1-8)

Troubleshooting Image and Projector Issues (9-11)

OSD Error Messages

Interpreting Fan Fail and Overheated Messages

Explanations for 'Fan Fail' and 'Projector Overheated' OSD messages.

LED and Alarm Definitions

Power LED Status and Error Indicators

Meaning of different Power LED states and error messages.

Dust Filter Maintenance

Replacing and Cleaning Dust Filters

Steps to remove, clean, or replace the projector's dust filters.

Replacing the Lamp

Lamp Replacement Safety and Procedure

Safety warnings and step-by-step procedure for replacing the projector lamp.

Ceiling Mount Installation

Preparing Ceiling Mount Points

Drilling holes and attaching the ceiling rod for projector mounting.

Attaching Bracket and Adjusting Mount Position

Specifications

Projection System, Resolution, and Compatibility

Details on projection system type, resolutions, and input compatibility.

Lens, Distance, and Keystone Specifications

Specifications for projection lens, distance, throw ratio, and keystone.

Audio, Weight, Dimensions, and Power Specs

Specifications for audio, weight, dimensions, and power consumption.

Input;Output Connectors Overview

Standard Package Contents List

Compatibility Modes

VGA Analog PC Signal Compatibility

Table of supported VGA resolutions and frequencies for PC signals.

VGA Analog Extended Wide Timing

VGA Analog Component Signal Compatibility

Regulations and Safety Notices

FCC Compliance and Interference Guidelines

Details FCC compliance, interference, and user corrective measures.

Canadian User Notice and Radio Compliance

EU Declaration of Conformity

Compliance with EC Directives

States compliance with EC directives (EMC, Low Voltage, RoHS, Eco-design).

R&TTE Directive Harmonized Standards

FCC Declaration of Conformity

US Importer Responsibility and Compliance

Identifies the responsible US party for FCC declaration.

Acer X1161P Series Specifications

General IconGeneral
Resolution800 x 600 (SVGA)
Weight2.2 kg
Display TechnologyDLP
Brightness2700 ANSI lumens
Lamp Life5000 hours (Normal mode), 6000 hours (Eco mode)
Projection Size30" - 300"
Input ConnectorsVGA, Composite Video, S-Video
Dimensions268 mm x 80 mm x 192 mm
Throw Ratio1.96 - 2.15:1

Related product manuals