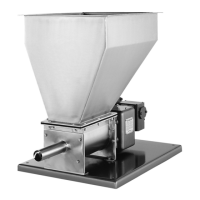
4.7 Universal Gearbox (3)
Please refer to Figure 3.
Later model Gearboxes (3), those which include the numbers 0607 or 0196 embossed in the gearbox
casting, are entirely metric in design, with the exception of the threads on the Metering Auger Drive Shaft
(11) associated with Gearbox (3). These particular Gearboxes (3) have the numbers 0196 (for the Models
105 and 105X) and 0607 (for the Model 105Z) embossed into their castings.
4.7.1 To remove the Metering Auger Drive Shaft (11) and/or Gear (22),
first remove the Motor (1)
and Gear-reducer (2). Remove Snap Rings (40) and Retaining Ring (90) and then, slide the
Metering Auger Drive Shaft Bearing (37) backward and remove from the Gearbox (3). After this
has been done, slide Spacer (S1) and the shaft key from Gear (22) backward and off the
Metering Auger Drive Shaft (11). Then, slide the Metering Auger Drive Shaft (11) forward or
backward to remove, while also removing Gear (22) and Spacer (S1) as the Drive Shaft (11) is
withdrawn.
4.7.2 To remove the Intromitter (or Conditioning Auger) Drive Shaft (9) and/or Gear (25),
first
follow the steps outlined in the preceding paragraph 4.7.1 for removal of the Metering Auger Drive
Shaft (11) and Gear (22). Then, remove Snap Ring(s) (41) and slide Gear (25), along with its
shaft key and Spacer (S5), backward and off the Intromitter (or Conditioning Auger) Drive Shaft
(9). Once this has been completed, slide the Intromitter (or Conditioning Auger) Drive Shaft (9)
forward and remove.
4.7.3 To remove Countershaft (28), Gear (23) and/or Gear (24),
first remove Motor (1). Then, remove
Snap Ring (39) on the front end (feeder side) of Countershaft (28). Once completed, slide the
Countershaft (28) to the rear (motor side) of the Gearbox (3). Spacer (S3), Gears (23 and 24),
along with their respective shaft keys and Spacer (S2), will release from the Countershaft (28) as
the countershaft is withdrawn.
4.7.4 To reassemble, reverse the preceding procedure.
NOTES:
Gears must be replaced in the same orientation in which they were removed.
Spacers are not interchangeable, except Spacers (S1 and S2) which are identical.
Loosening of the Seal Cap (14) for the Metering Auger Drive Shaft (11) and the Seal
Cap Pressure Plate (91) for the Intromitter (or Conditioning Auger) Drive Shaft (9) will
relieve pressure on these shafts (generated by the packing material) facilitating removal
(and replacement).
Replacing Packing (16)
4.7.5 Remove both the Intromitter (or Conditioning Auger) (8) and Metering Auger (10).
Then,
loosen (unthread) the Seal Cap (14) and remove. Remove the Packing (16) with a small
screwdriver or needle-nose pliers and then, remove Spring (18). Once this has been done, clean
the inside of the hollow Intromitter (or Conditioning Auger) Drive Shaft (9) and the outside surface
of the Metering Auger Drive Shaft (11) where the Packing (16) seals against the Metering Auger
Drive Shaft (11). Carefully examine the Metering Auger Drive Shaft (11) for wear and/or scoring;
replace if worn or scored.
NOTE:
In order to best examine the Metering Auger Drive Shaft (11), the shaft may need to be
moved forward. To accomplish this, please follow the procedure outlined in paragraph
4.7.1.
4.7.6 To reassemble, reverse the preceding procedure.
16