8 D3V MANUAL [ENGLISH] 9D3V MANUAL [ENGLISH]
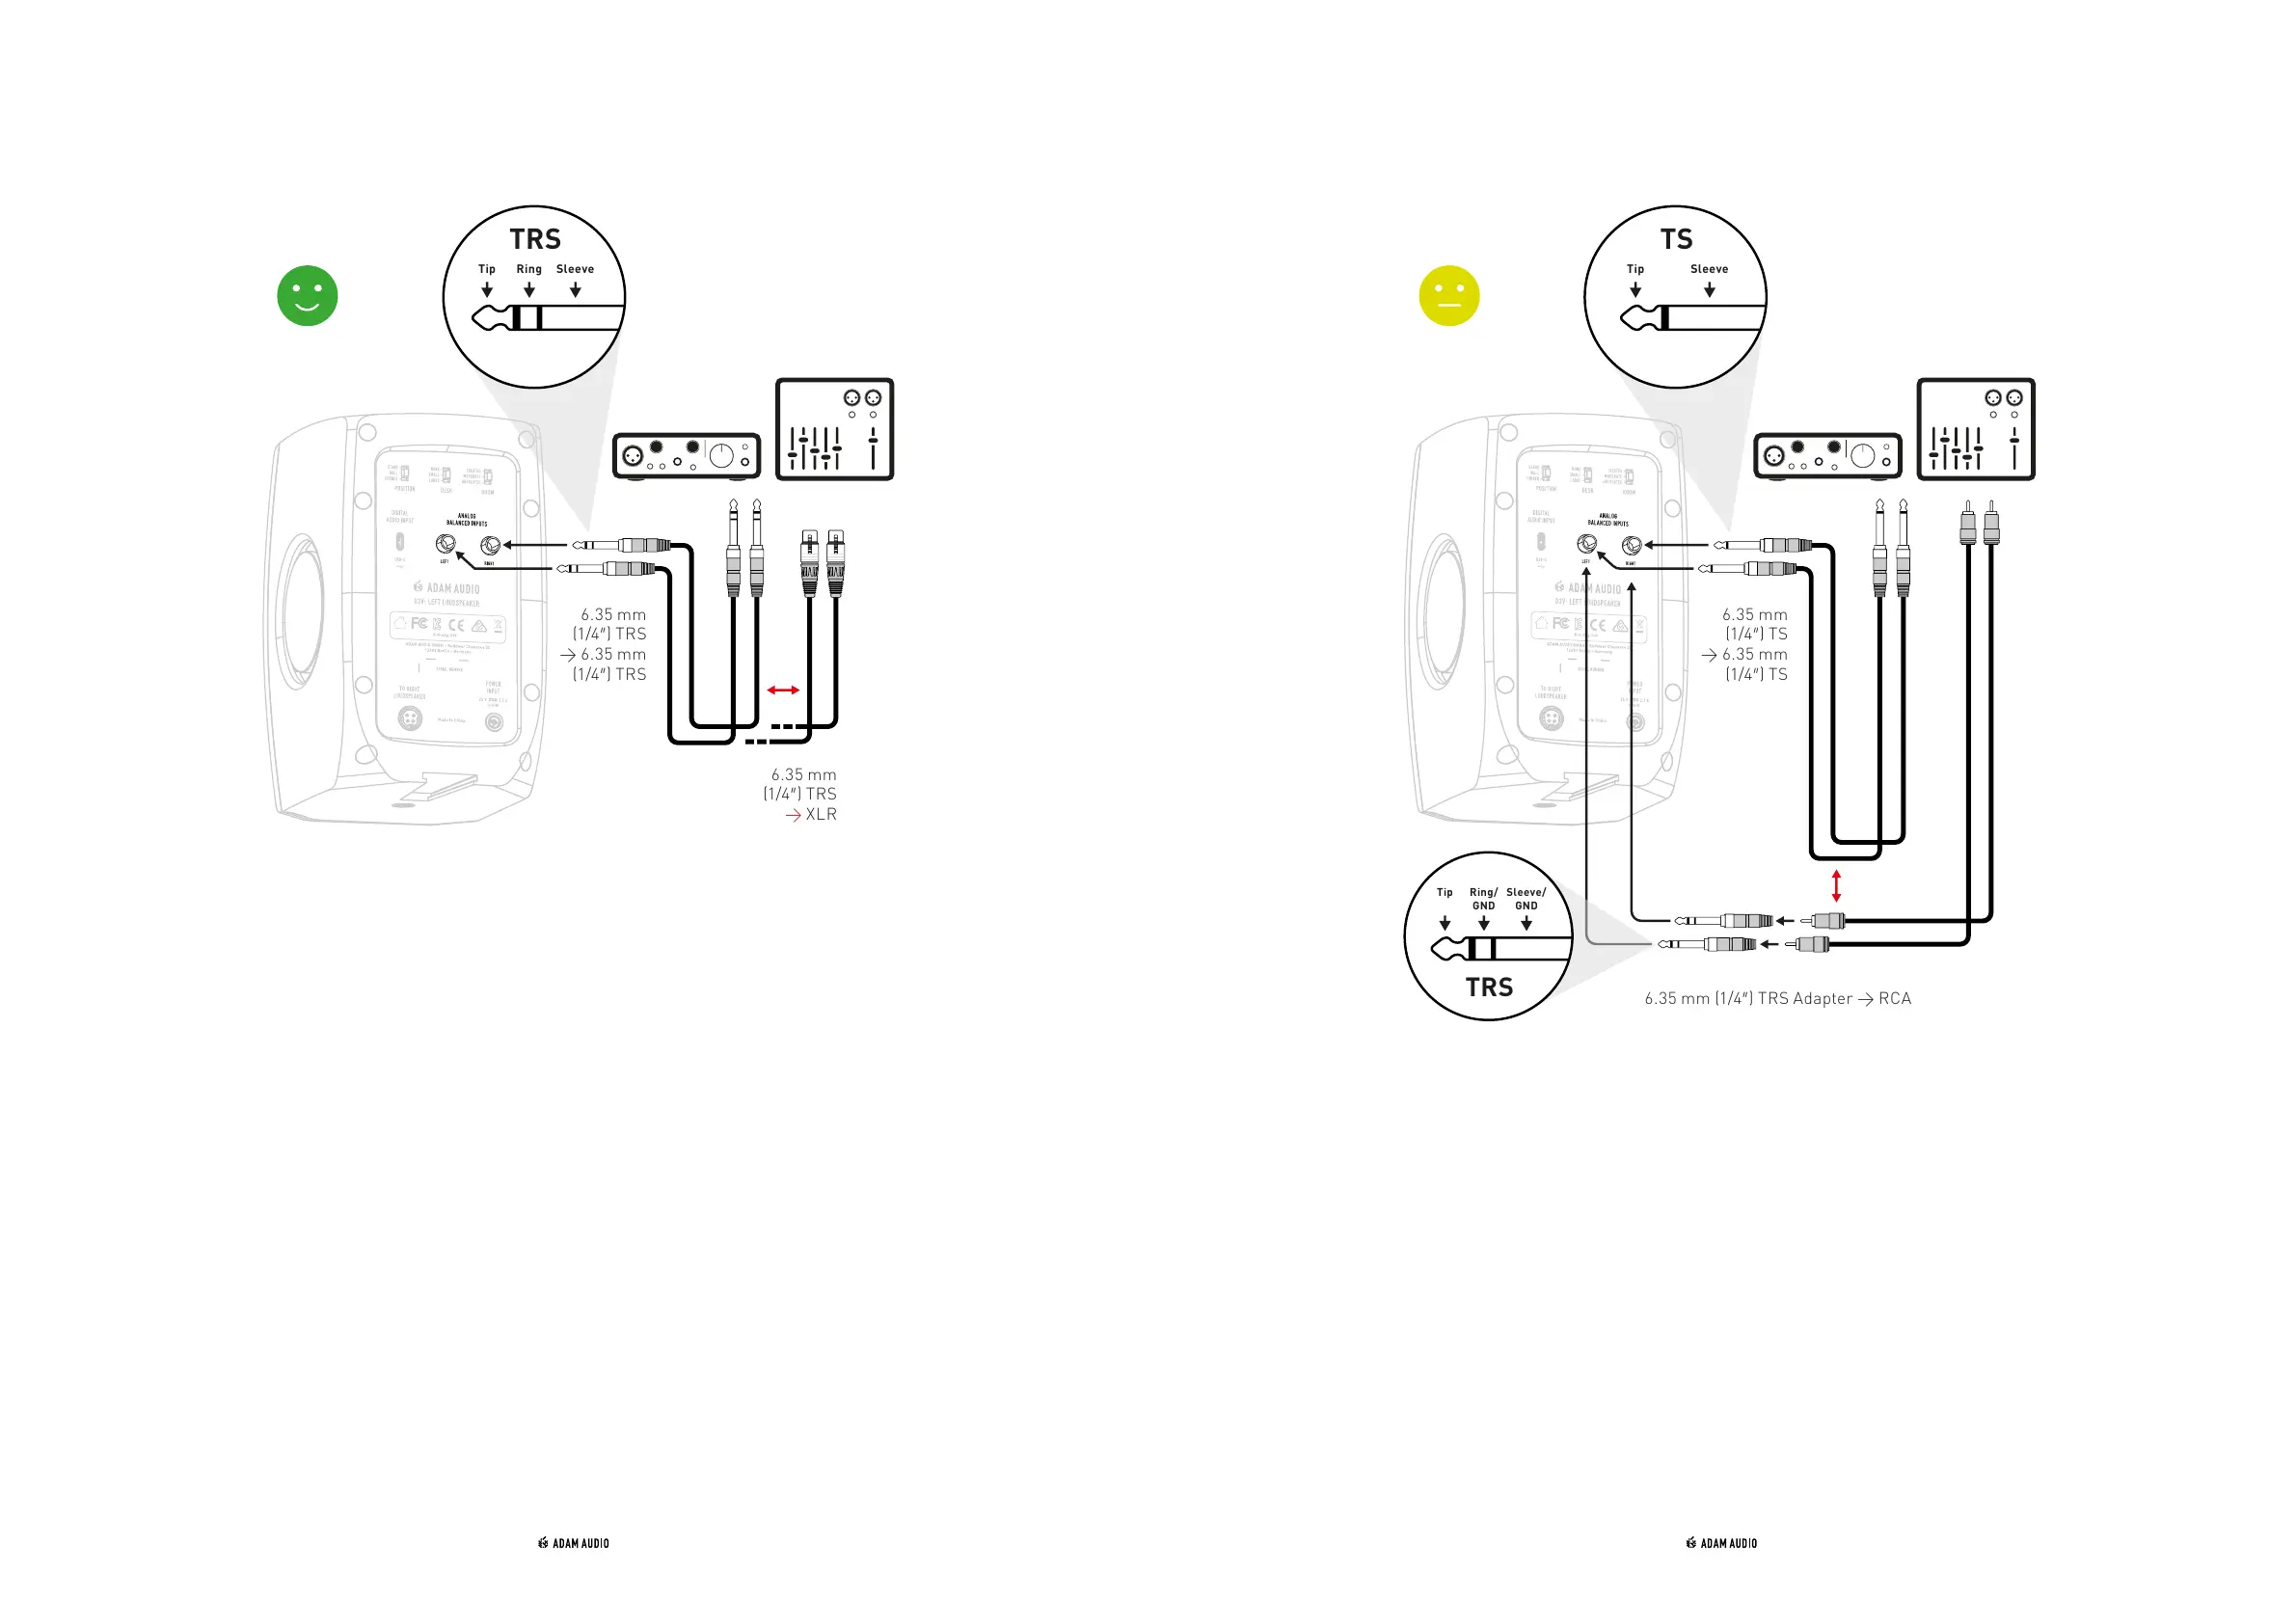
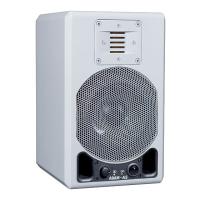
b) Balanced audio connection c) Unbalanced audio connection
6.35 mm
(1/4″) TRS
→ XLR
6.35 mm
(1/4″) TRS
→ 6.35 mm
(1/4″) TRS
6.35 mm
(1/4″) TS
→ 6.35 mm
(1/4″) TS
6.35 mm (1/4″) TRS Adapter → RCA
→ Lower both the output volume of your source and that of the D3V (by turning
the front panel volume knob anticlockwise) completely before connecting or
disconnecting audio cables from the D3V and/or your source equipment.
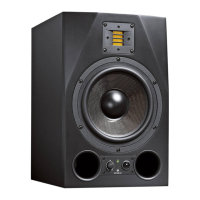
→ Balanced analog audio connections are preferred when connecting the D3V to
equipment with balanced analog outputs, e.g. an audio interface or a mixing
console.
→ Refer to the operating manuals of your source equipment to make sure the analog
outputs are balanced outputs.
→ Balanced audio connections have less risk of picking up unwanted noises like
humming or buzzing, especially if long cable lengths are used.
→ Typical balanced audio cables are “TRS-to-TRS” or “XLR-to-TRS” cables.
→ Please note that all components of the connection need to be wired as balanced,
otherwise the connection becomes unbalanced.
→ To reproduce analog audio from a source, the analog input needs to be selected.
→ see chapter 5 “Use of rotary front knob & LED states”
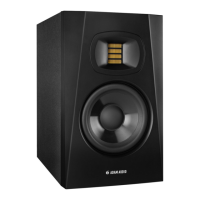
→ Lower both the output volume of your source and that of the D3V (by turning
the front panel volume knob anticlockwise) completely before connecting or
disconnecting audio cables from the D3V and/or your source equipment.
→ Use short cable lengths for unbalanced audio connections to lower the risk of
picking up unwanted noises like humming or buzzing.
→ Typical unbalanced audio cables are “TS-to-TS” and “XLR-to-TS” cables.
→ Use “RCA-to-TRS” adaptors (not included) to connect the D3Vs to a source with
unbalanced RCA outputs.
→ To reproduce analog audio from your source, the analog input needs to be selected
→ see chapter 5 “Use of rotary front knob & LED states”