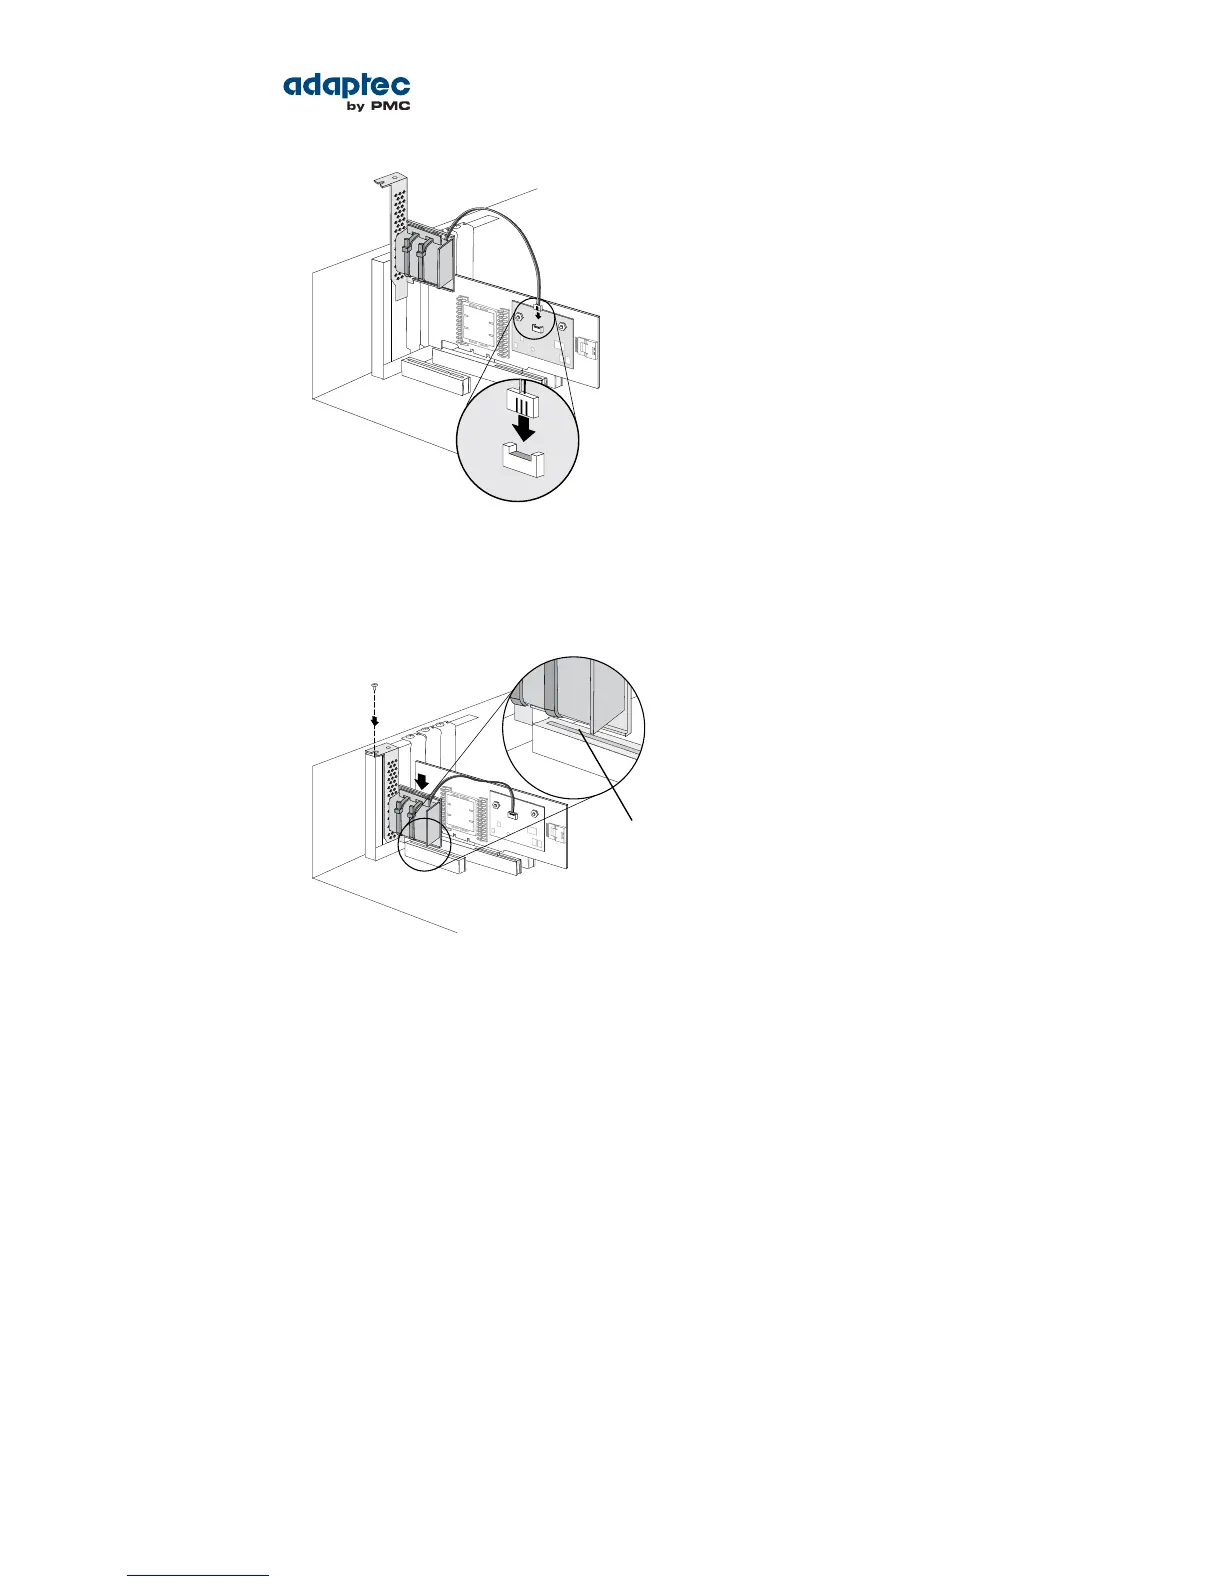
7. Install the mounting plate in the empty slot next to the controller, as shown in the next gure. After
securing the mounting plate to the card cage, verify that the supercapacitor module and mounting
plate sit above (and do not touch) the PCIe slot.
8. Connect your computer's disk activity LED cable to the LED connector on the controller (marked on
the gures in About Your RAID Controller on page 16).
Ensure that the positive lead of the LED cable (usually a red wire or a wire marked with a red stripe)
is attached to pin 1.
9. Prepare and install your internal disk drives, following the instructions in Connecting Disk Drives to
Your Controllers on page 31.
If you are not installing internal disk drives, close your computer cabinet, reattach the power cord,
then continue with Connecting External Devices on page 33.
10. Restart your computer.
The supercapacitor starts charging automatically. It should reach full charge in 3-4 minutes.
Connecting Disk Drives to Your Controllers
You can connect SAS disk drives, SATA disk drives, and SATA and SAS Solid State Drives (SSDs) to your
Adaptec RAID controller. (See www.adaptec.com/compatibility for a list of compatible drives.) There
are no jumpers or switches to set before installation.
If you plan to build a bootable array, ensure that you install at least the minimum number disk drives
required to support the RAID level you want. See Choosing a RAID Level on page 23 for more information.
31Proprietary and Condential to PMC-Sierra, Inc.
Document No.: CDP-00277-01-A Rev. A, Issue:
Serial Attached SCSI RAID Controllers Installation and User's Guide