65
USING ADOBE AUDITION
Applying effects
Last updated 2/16/2012
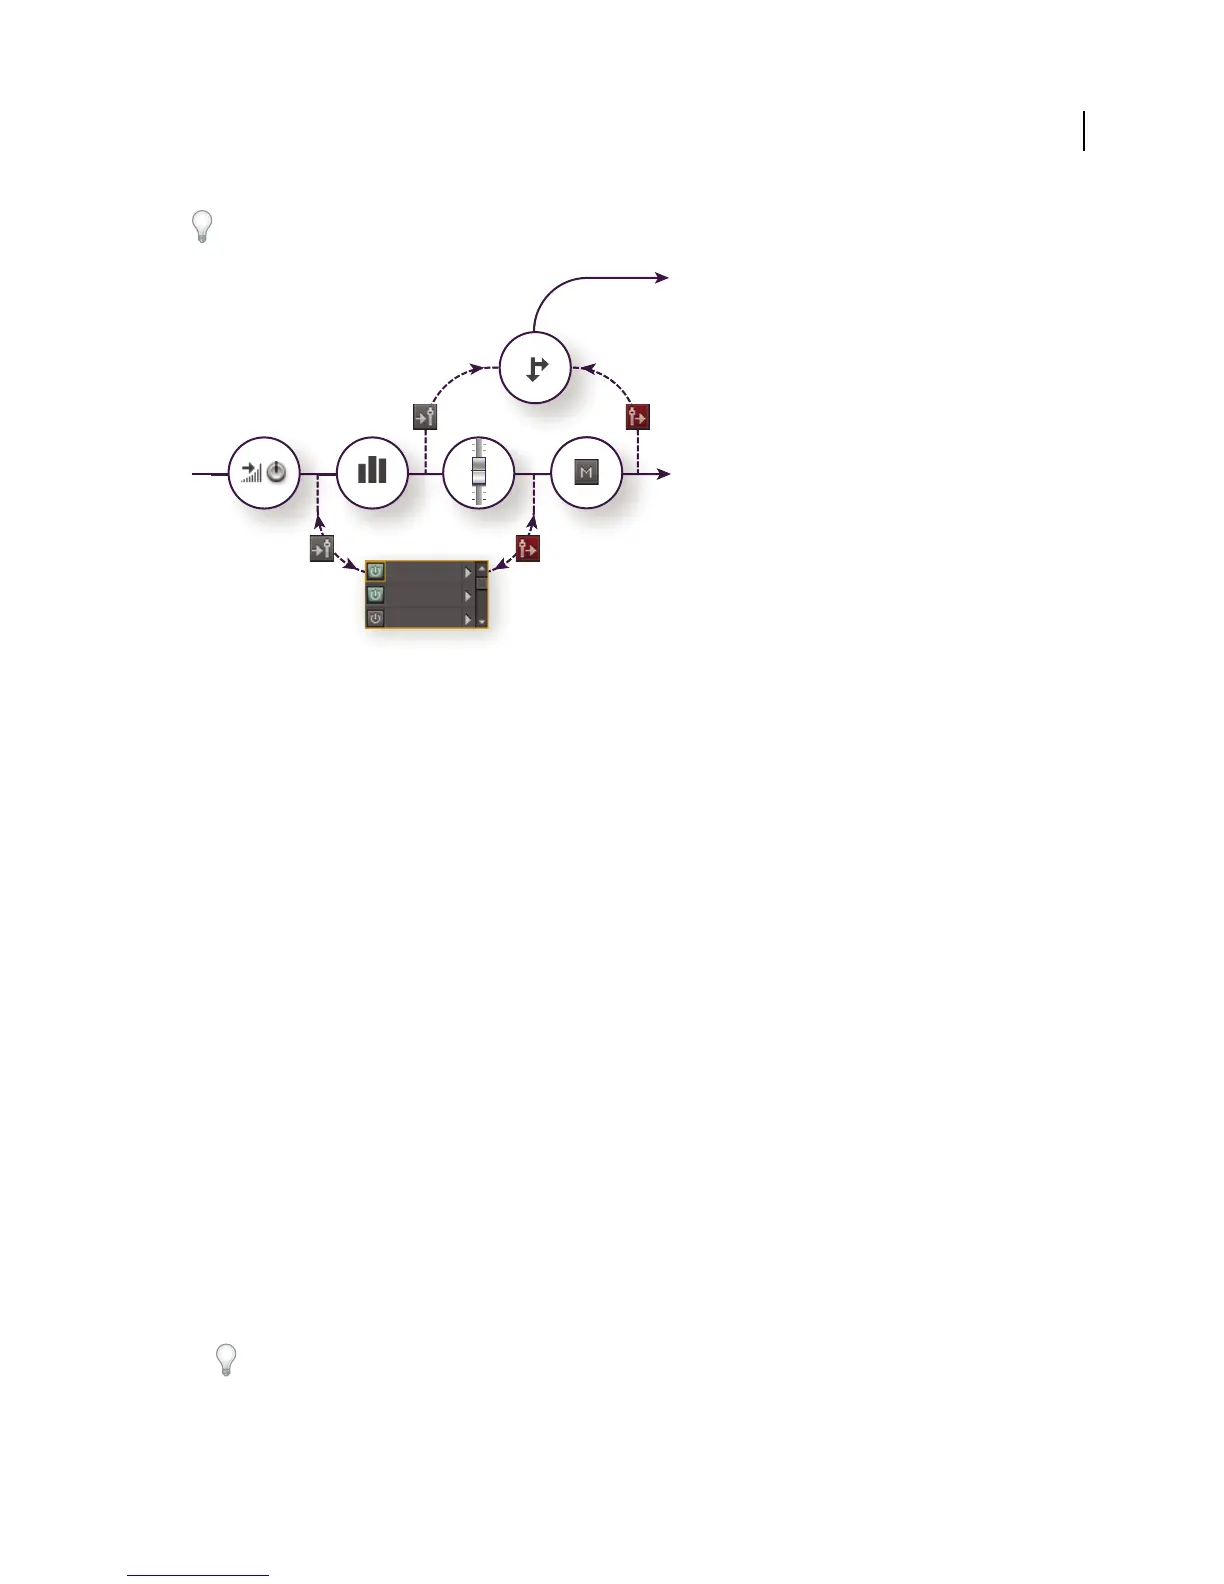
If you’re editing effect settings in the Effects Rack, click the Pre-Fader/Post-Fader button in the lower-left corner.
Pre- and post-fader effect and send routing for each track:
A. Input B. EQ C. Volume D. Mute E. Send F. Effects Rack
More Help topics
“Routing audio to buses, sends, and the Master track” on page 112
“Set up a send” on page 114
Adding third-party plug-ins
Third-party plug-ins let you extend the already powerful effects provided with Adobe Audition. The application
supports VST plug-ins on both platforms and Audio Units plug-ins on Mac OS.
Applying plug-in effects is identical to applying built-in effects. For information about plug-in features, consult the
documentation provided by the plug-in manufacturer.
Enable VST and Audio Units plug-ins
To access third-party plug-ins in Adobe Audition, you must first enable them. By default, all third-party plug-ins are
disabled. To optimize performance, enable only the plug-ins you plan to use in Adobe Audition.
Note: If effects are being used in a multitrack session, close the session.
1 Choose Effects > Audio Plug-in Manager.
2 In the VST Plug-in Folders section, click Add to specify custom folders you want to scan for plug-ins. Click Default
to specify the standard VST folder for your operating system.
3 In the Available Plug-ins section, click Scan For Plug-ins.
If you’ve recently updated a plug-in, select Rescan Existing Plug-ins.
4 Select the plug-ins you want to access in Adobe Audition, and then click OK.
ABCD
F
E



 To Next Page