ADT 7100 User Manual Operating Procedure
15. Place the center of the torque wrench at the end of the spindle and fully engage it with the
holding nut on the Spanner Tool.
16. Screw the holding nut onto the spindle by gently pushing the spanner tool toward the
spindle, then turn the spanner tool clockwise while holding the torque wrench straight out
from the spindle. Tighten until the torque wrench clicks one to two times.
Note: If the holding nut binds or does not turn easily, it may be cross-threaded. Remove
the holding nut and start again while holding the torque wrench straight.
17. Close the blade cover.
18. Move the locking lever to the right to lock the blade cover in place.
19. Close the cutting chamber cover.
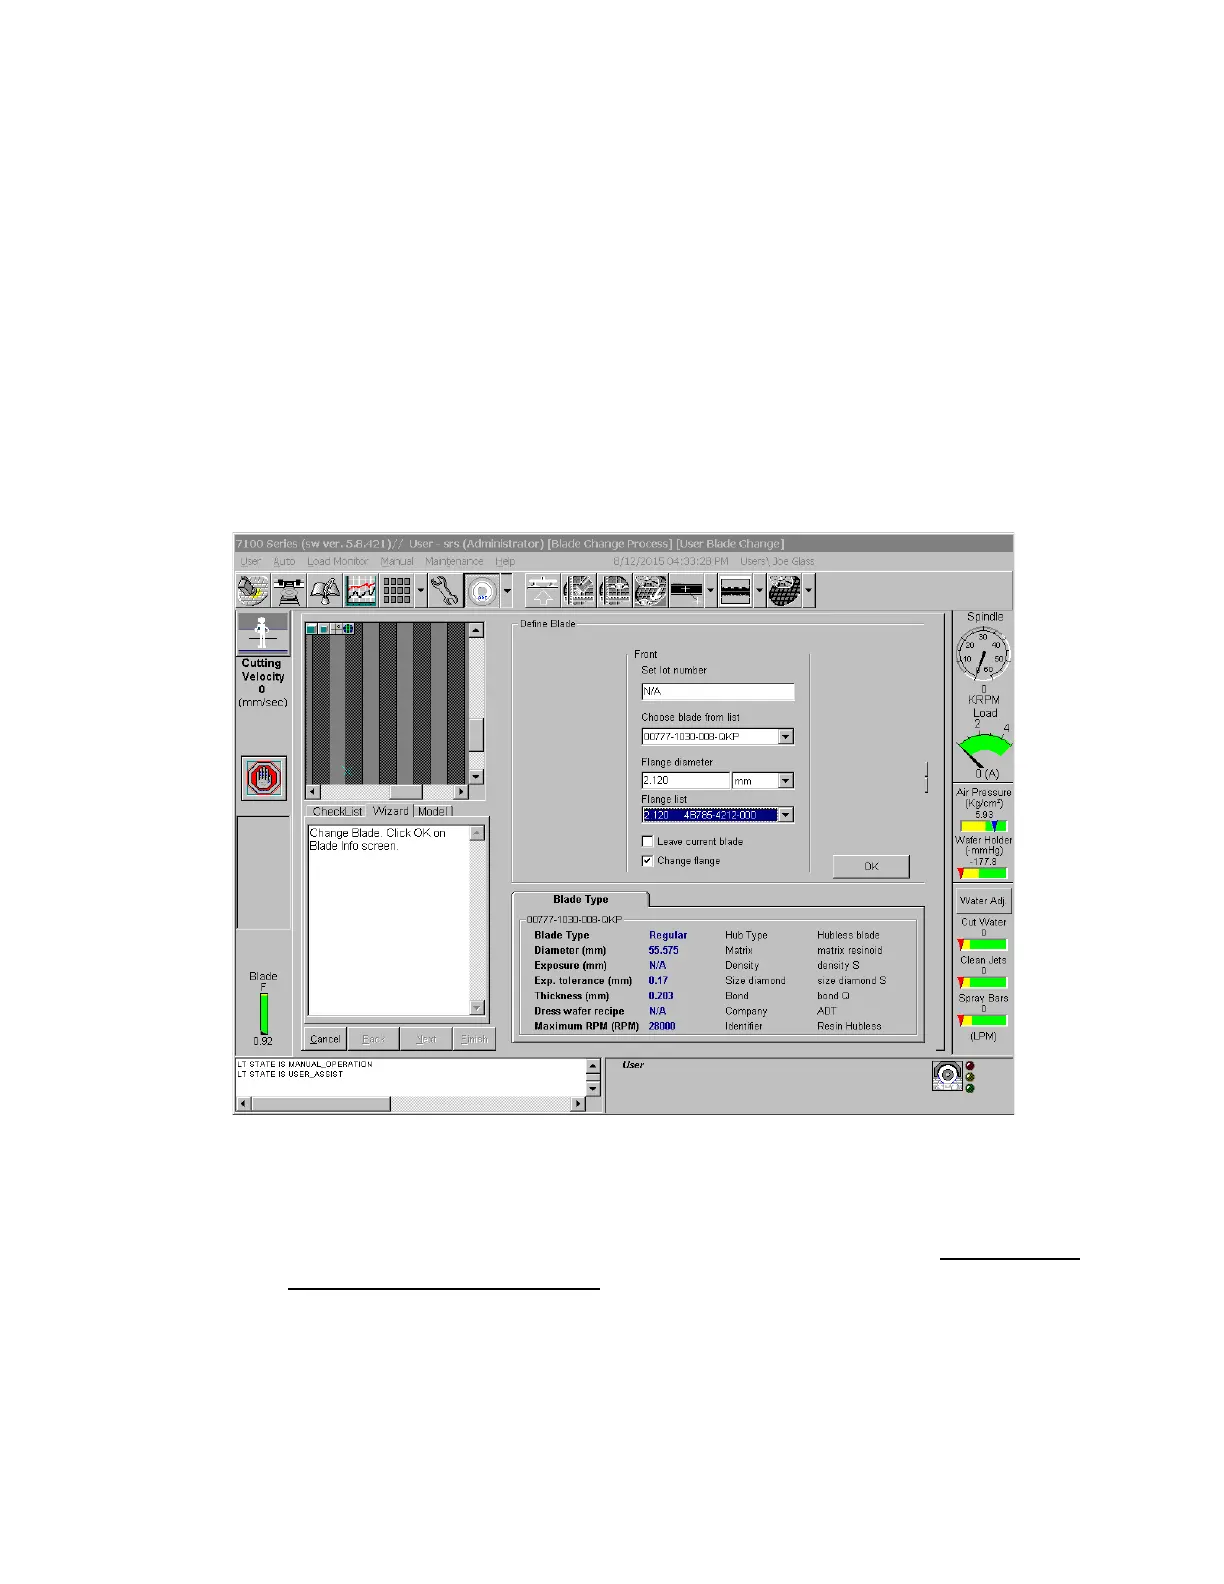
20. On the Define Blade screen, enter N/A in the Set Lot Number field.
21. Select your blade from the pull-down list. Failure to select the correct blade and flange could
damage the machine and your wafer.
22. If you are using a blade mounted on a flange, check the Change Flange option.
a. Select the flange that you put on the spindle from the pull-down menu. Do NOT enter a
value in the Flange Diameter field, as this will likely cause damage to the tool.
b. Do not change the Flange Diameter Units after selecting the flange, or the diameter
will be incorrect.
23. In the Define Blade screen, click OK. Next, check the blade exposure displayed in the blade
indicator. It should be the same as indicated in the section titled “Preparing hubless blades.”
Lurie Nanofabrication Facility 2-12