Replacement Procedure
OsmoTECH® PRO Block Probe
Page 3 222123PM Rev 0
Removing the sample cooling assembly
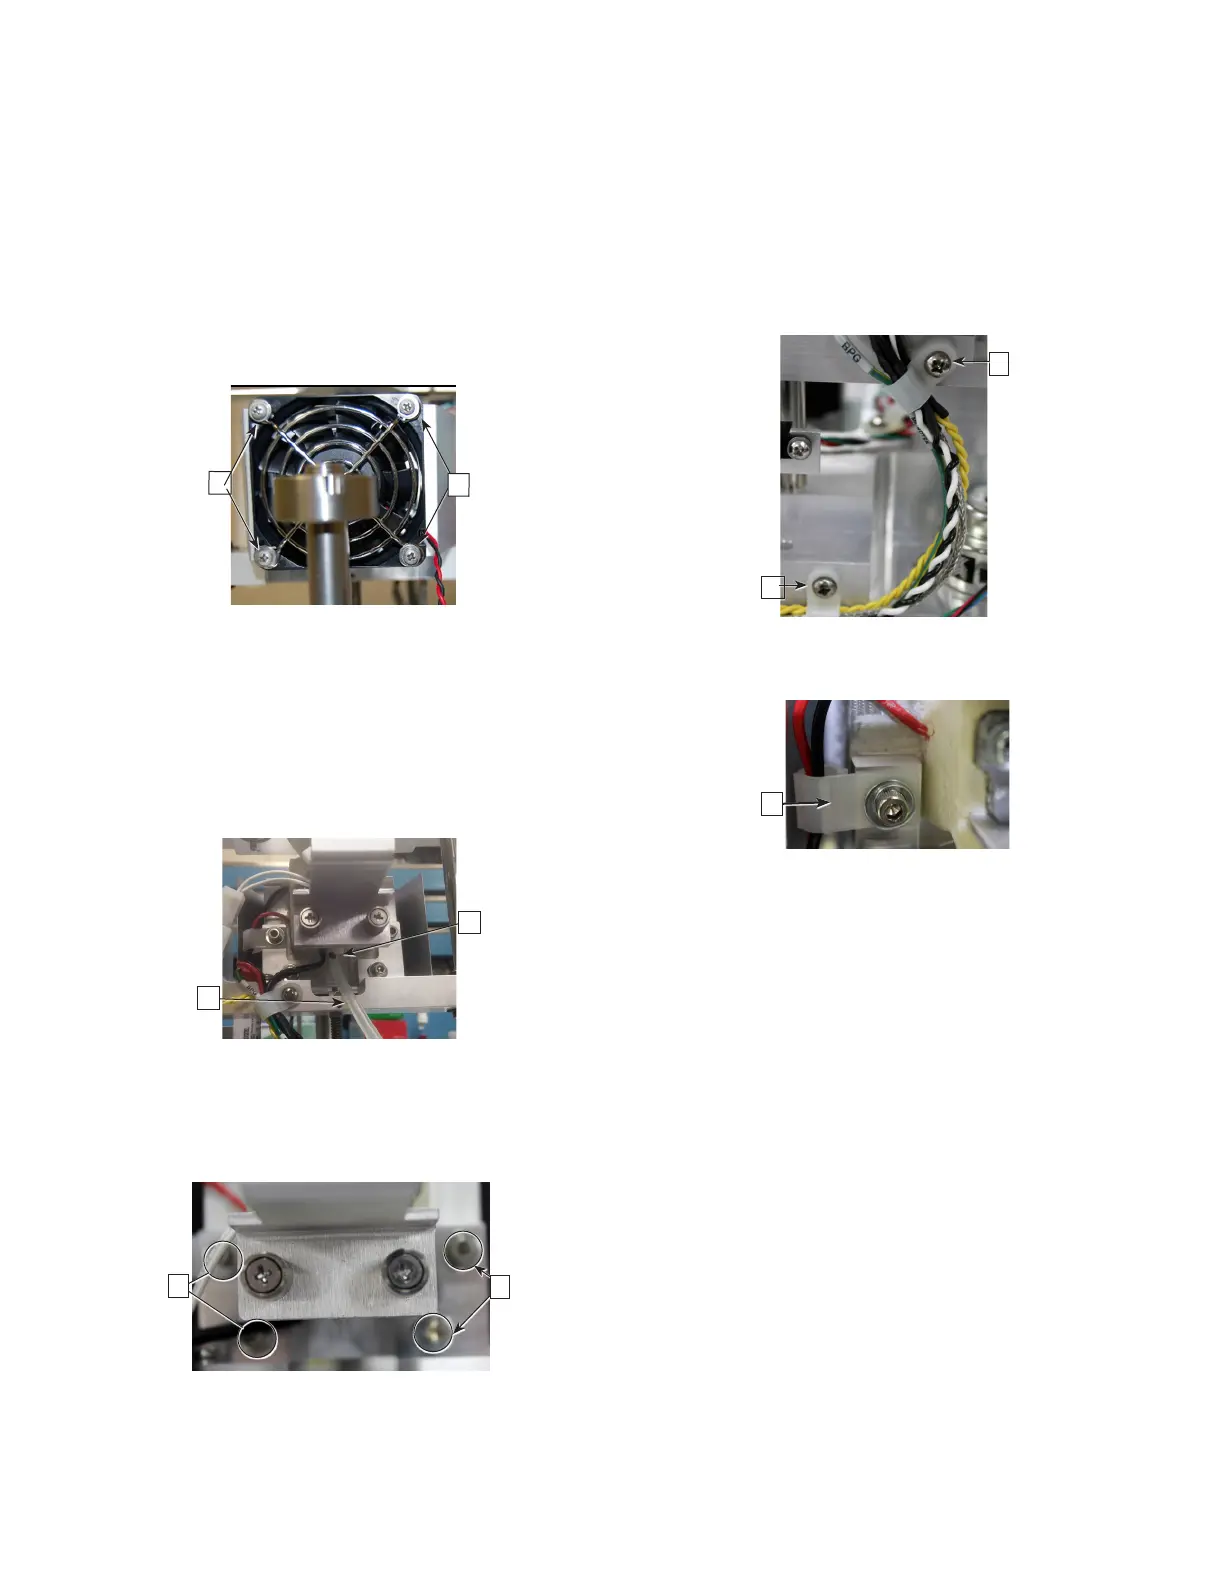
1. Remove the four screws and washers [F] that
secure the cooling fan, the finger guard, and the
air‑flow diverter to the cooling assembly’s heatsink.
F
F
Do not remove the cooling fan wire leads from the
cable clamps.
NOTE: Remember/record the position and
orientation of the cooling fan before
removing it from the chassis.
2. Disconnect the sample well drain tubing [G] from
the drain tube [H].
H
G
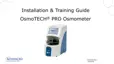
3. Remove the four socket head cap screws and
washers [I] that are used to secure the sample
cooling assembly to the sample well mounting
block.
I
I
One of the socket head cap screws also secures a
cable clip.
4. Remove the block probe cable, the thermo‑electric
cable, and the solenoid cable from the two cable
clamps [J].
J
J
5. Detach the cable clip [K] from the thermo‑electric
wire leads.
K
6. Carefully lift the sample cooling assembly out of the
osmometer module assembly.