- 8 -
www.advateklights.com PixLite 16 Mk2 User Manual V210222
supply in accordance with specifications listed in Section 8.1 to the power bank 1
screw terminal, as shown in Figure 1 above.
4.4 - Control Data
Ethernet data is connected via a standard network cable into the RJ45 Ethernet jack
located on the right-hand side of the unit. The controller supports Streaming ACN
(sACN / E1.31) or Art-Net data.
4.5 - Connecting Pixel LEDs
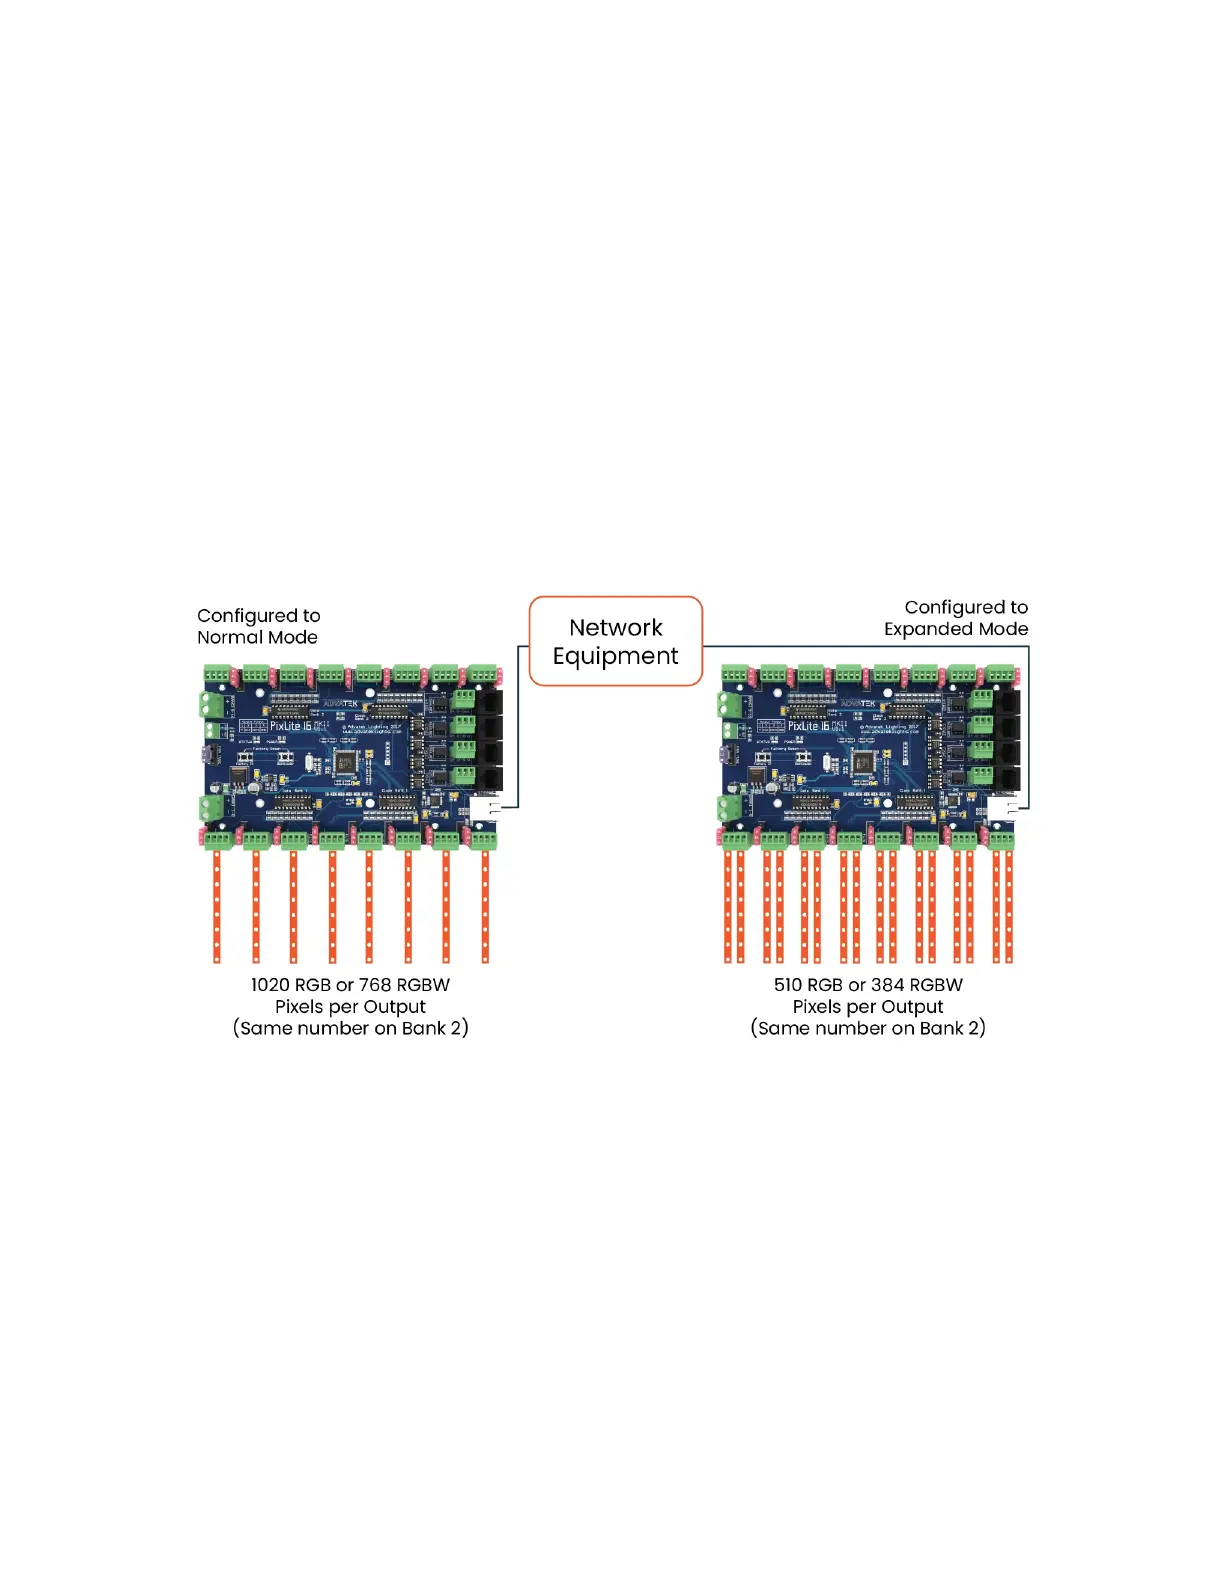
The number of pixels a PixLite 16 Mk2 can drive is shown in Figure 2 below.
Figure 2: Pixel Set up
The pixel lights are connected directly via the 16 pluggable screw terminal connectors
on the board. Each connector is labelled with its output channel number (1-16) and
pin 1 is also clearly marked (There is also a pin-out for the connectors clearly marked
on the PCB silk-screen for quick reference). Simply wire your lights into each screw
terminal and then plug them into the mating sockets.
Warning: It is very important not to short +ve onto the clock or data lines when using
pixels greater than 5V. Given this mistake can happen, additional protection circuitry
has been added to prevent any damage to the main CPU. However, if the output
buffer part is damaged due to shorting, it has been designed for easy replacement
 Loading...