provides the same or a higher level of security. Otherwise it will automatically turn into a lower level of security to
maintain backward compatibility.
For more information about Z-Wave technology, devices, white papers etc. please refer to www.z-wave.info.
Product Description
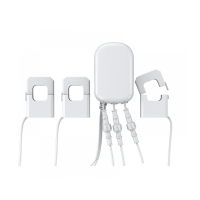
Installed in an electricity box, the energy meter will monitor the total consumption of electricity used by an entire
building. And its intelligent clamps will report that energy use back to your Z-Wave gateway or controller, in watts or
kilowatt-hours, and in real time. So you can see how much electricity you really use and when you use it.
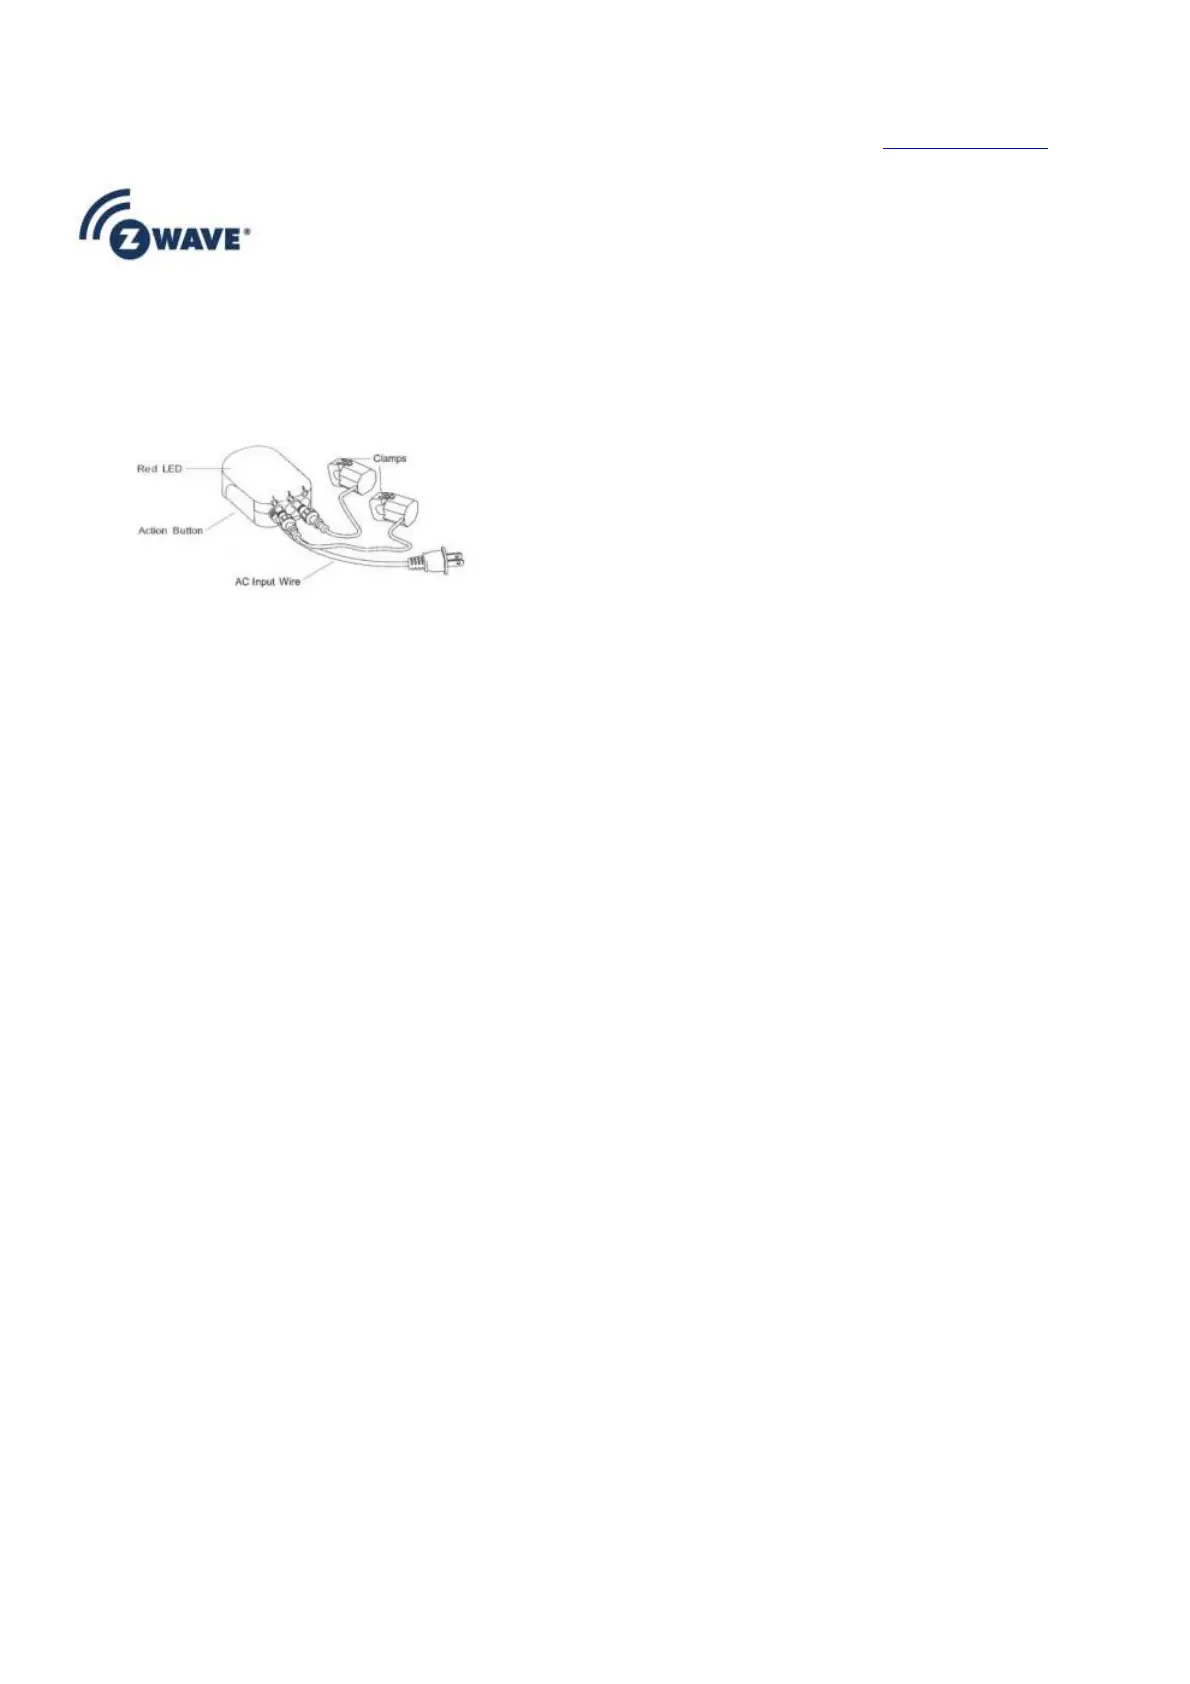
Red LED, Action Button, AC Input Wire,
Clamps
Prepare for Installation / Reset
Please read the user manual before installing the product.
In order to include (add) a Z-Wave device to a network it must be in factory default state . Please make sure to
reset the device into factory default. You can do this by performing an Exclusion operation as described below in the
manual. Every Z-Wave controller is able to perform this operation however it is recommended to use the primary
controller of the previous network to make sure the very device is excluded properly from this network.
Reset to factory default
This device also allows to be reset without any involvement of a Z-Wave controller. This procedure should only be
used when the primary controller is inoperable.
– Press and hold the button on the backside for 10 seconds
Safety Warning for Mains Powered Devices
ATTENTION: only authorized technicians under consideration of the country-specific installation guidelines/norms
may do works with mains power. Prior to the assembly of the product, the voltage network has to be switched off and
ensured against re-switching.
Installation
Unless otherwise stated, the circuit box’s main breaker should be turned off to perform these installation steps.
1. Turn the main breaker off.
2. Open the main circuit box panel.
3. Clip one clamp of the meter around the incoming electricity cable that connects to the main circuit breaker.
4. Connect the clamp to the meter using a Clamp Connector.
5. Connect the AC Wire to the meter using the AC Wire Connector.
6. Wire the AC Wire into one breaker. The brown wire is Live, the blue wire is neutral.
7. Replace the main circuit box panel.
8. Turn the main breaker back on.
It is now time to place the main body of the Home Energy Meter. Inside the meter is a radio antenna used for
communications, and this must be taken into consideration when selecting a location for the meter.
If the circuit boxes is made of metal the radio signal strength may be reduced. In this situation it is recommended that
the main body of the meter be affixed outside the circuit box. This will improve the radio signal strength. The Home
Energy Meter has been weatherized to the international IP43 standard so that it is resistant to rain and snow when