The remote control is pre-programmed
No pairing with the receiver required
STEP 6
!
Pairing the Remote Control
NOTE: Blades must be aached prior to tesng the fan
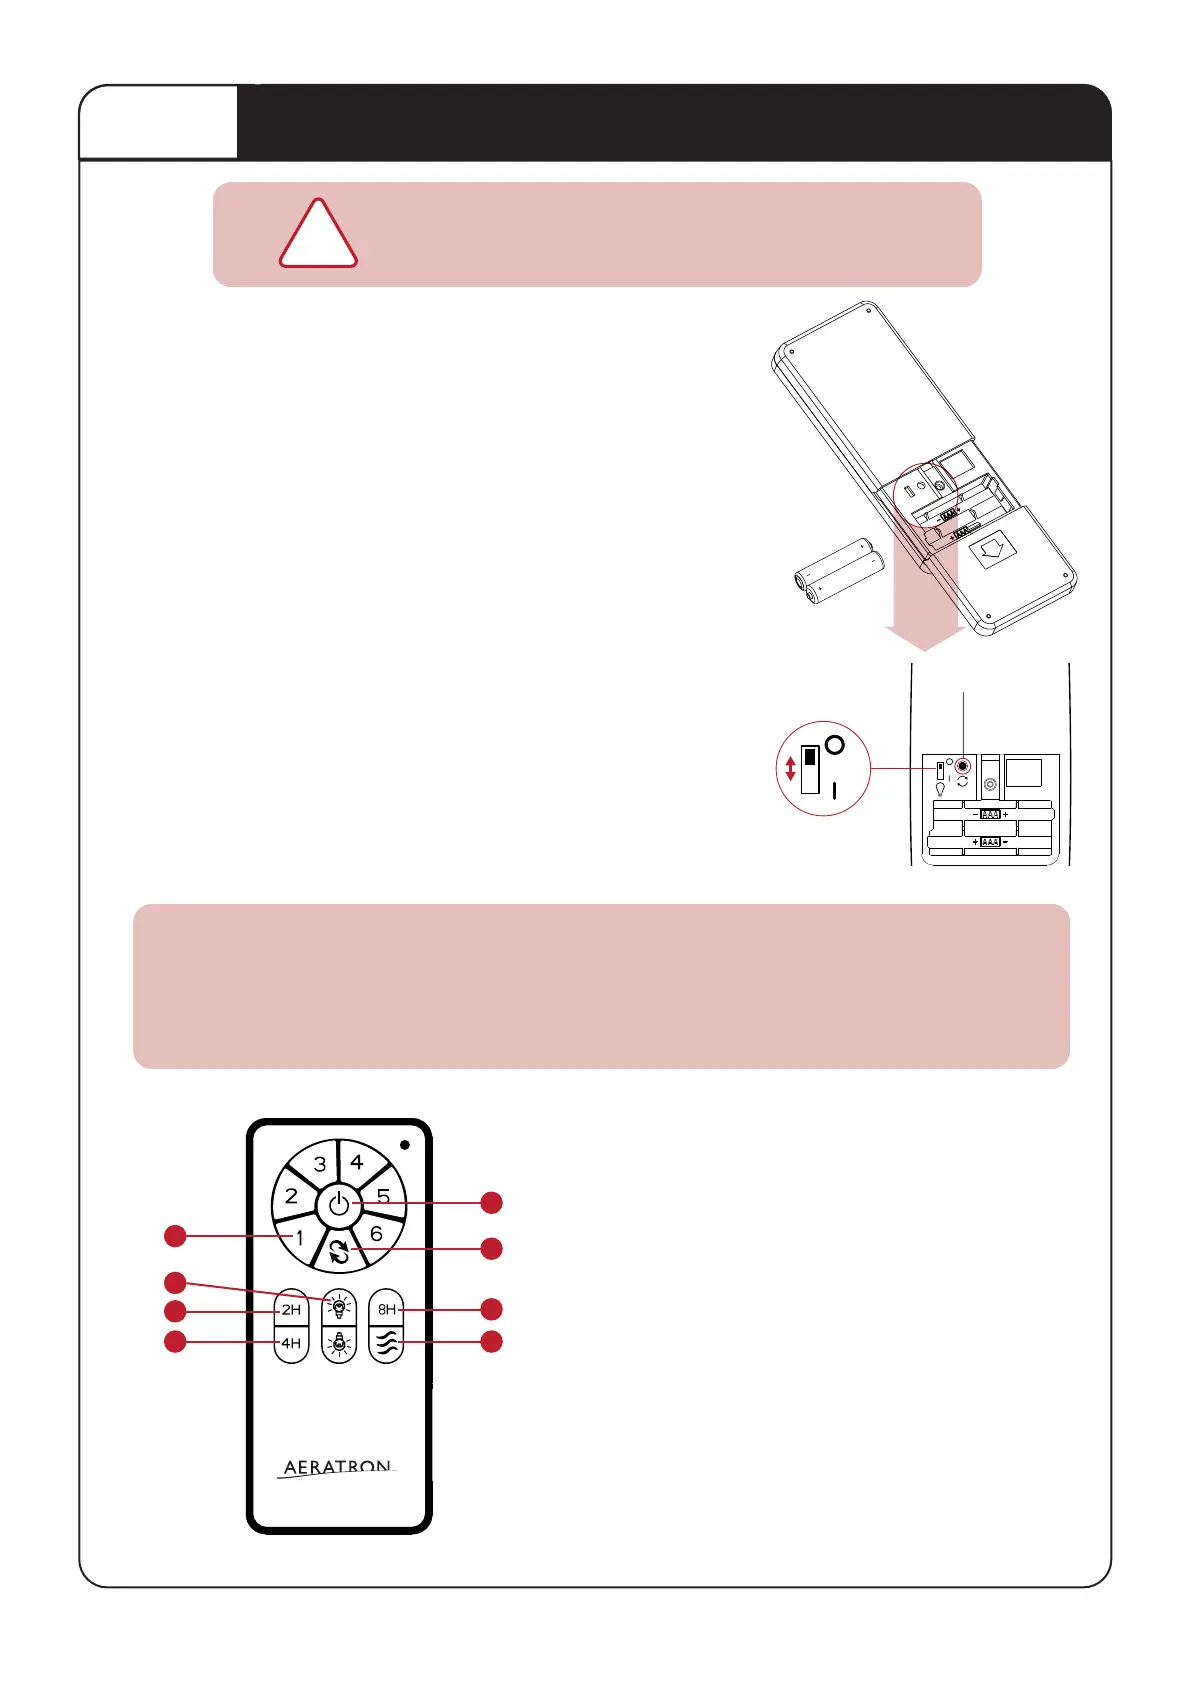
1. On Receiver: Verify that the “Learn” switch is in the “O” posion
2. Slide baery cover to unlock - Locate the LEARN BUTTON &
insert baeries.
3. Switch on the main power to acvate the receiver, indicated
by one beep. (Energise one fan reciever at a ame).
4. Within 60 seconds aer the power is turned on (one beep),
press and hold the LEARN buon on the Remote Control
(min. 3 secs.) unl Fan Receiver issues three ‘beeps’ which
indicates successful pairing.
5. On Receiver: switch the “Learn” switch to “X” (this will
lock the pairing code with the remote)
6. Finish STEP 7, 8 & 9 and press ON/SPEED buon to test
fan funcons.
7. To re-pair, repeat steps 3 to 5
NOTE: Power must be off for 10 seconds min. before repairing.
Pairing a Single Fan per remote control: LEARN MODE
The Remote Control and Fan Receiver will memorise the pairing
code for future use even if mains power is switched off.
LIGHT SWITCH: Select ON/OFF or DIMMING for the light funcon.
(Light will maintain last seng if turned off)
Controlling the Fan
1. Fan OFF
2. Fan ON & Speed 1-6
3. Forward / Reverse
Use Forward mode (counterclockwise) for cooling
Use Reverse mode (clockwise) to circulate warm air
4. Timer 2, 4 & 8hrs
5. Light ON/OFF
To DIM, press and HOLD light buon
to cycle from bright to dark.
(LIGHT SWITCH at DIMMING posion)
6. Breeze/Cycle through speeds randomly
One remote control can control up to 8 fans (within a 7m (23”) radius).On ALL receivers verify
that the “Learn” switch is in the “O” posion. Switch on the mains power to acvate ALL
receivers at the same me, indicated by one ‘beep’. Within 60 seconds, press and hold the
LEARN buon on the remote control (min. 3 seconds) unl fan receiver issues three ‘beeps’.
Pairing mulple fans per remote control.
2
4
5
4 6
4
3
1
O LIGHT DIMMING
‘LEARN’ BUTTONLIGHT SWITCH
| LIGHT ON/OFF
7