10
4.1.4 Installation
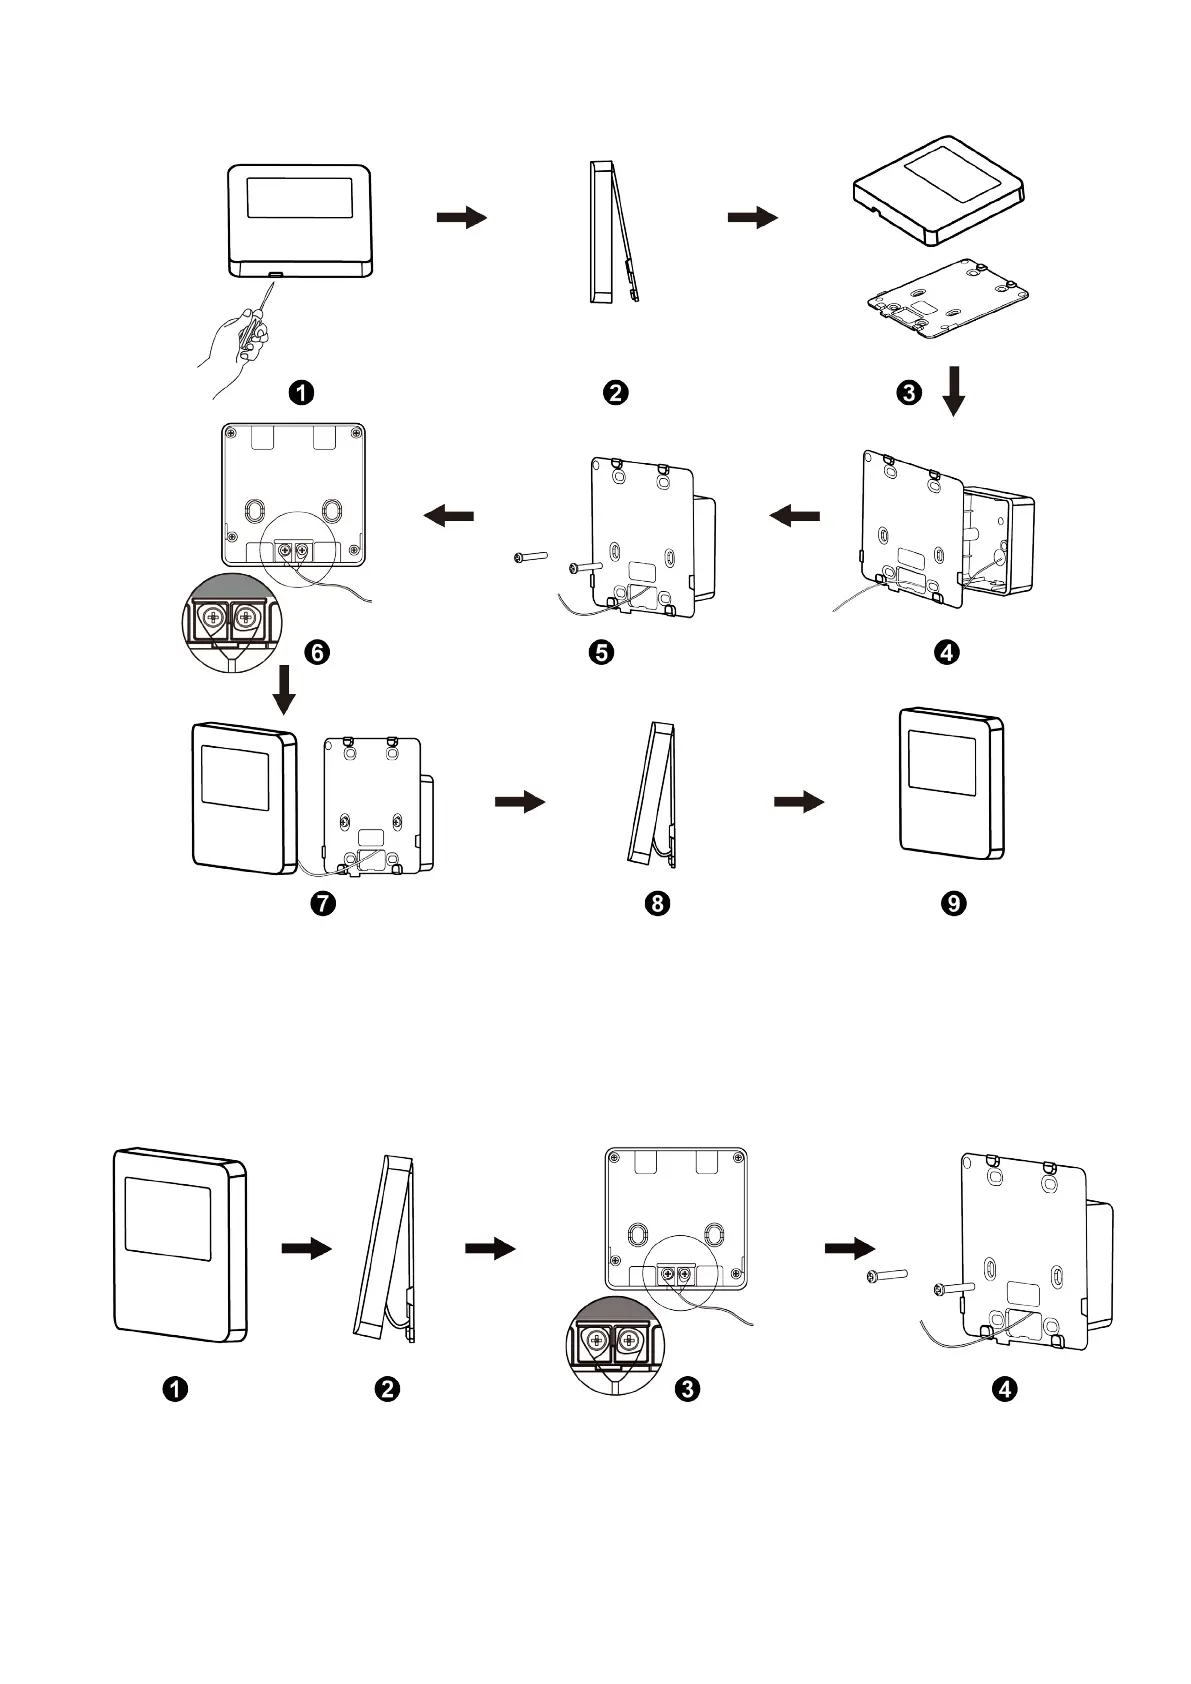
Fig. 4.8: Installation of Wired Controller
Fig. 4.8 shows a simple installation course of wired controller, and the following points should be noted:
1. Before installation, please cut o the power supply of indoor unit, it is not allowed to operate with power supply;
2. Pull out the 2-core twisted pair inside the installation hole in the wall, and thread the wire through the hole in the back of soleplate of wired controller;
3. Stick the soleplate of wired controller on the wall, and use Self-tapping Screw ST3.9×25 MA or screw M4×25 to x the soleplate with the installation hole of wall;
4. Connect the 2-core twisted pair to wiring terminal H1 and H2, and then tighten the screw;
5. Arrange the wires in the back of panel, and then buckle the panel of wired controller with the soleplate of wired controller.
4.1.5 Disassembly
Fig. 4.9: Disassembly of wired controller